Airbnb Photo Editing: Before and After Transformations That Boost Bookings
See how AI photo editing transforms ordinary Airbnb photos into booking magnets. Real before-and-after examples for every room type.
There is a moment every Airbnb host knows well: you finish cleaning and staging your property, pull out your phone, take what seems like a perfectly decent photo, and then look at it on your listing next to a competitor's images. The gap between your photo and theirs is obvious, but you cannot quite pinpoint why.
The answer, more often than not, is editing. The vast majority of high-performing Airbnb listings use professionally edited photos. Not filters slapped on in Instagram, but thoughtful adjustments to brightness, color, contrast, and tone that make spaces look the way they actually feel in person --- or even a bit better.
In this post, we walk through real before-and-after editing examples for every major room type in a vacation rental. Each example demonstrates a common problem and shows how AI-powered editing solves it quickly and convincingly.
Why Editing Matters More for Airbnb Than Traditional Real Estate
Traditional real estate listings are designed to get someone to visit a property in person. Airbnb listings are designed to get someone to commit money and trust sight unseen. The bar for visual persuasion is higher.
When a homebuyer sees listing photos, they plan to tour the property before making an offer. When a vacation rental guest sees listing photos, those photos are often the only visual information they will have before booking. The photos do not just attract interest --- they close the deal.
This is why investing in photo editing delivers an outsized return for short-term rental hosts. Every improvement to your images directly impacts your conversion rate from viewer to booker.
For a comprehensive guide to taking better photos in the first place, see our vacation rental photography tips.
Living Room Transformations
The living room is typically the first interior photo guests see after your hero shot. It sets the expectation for the rest of the property.
Problem: Dark and Flat
The most common living room photo problem is underexposure. Modern smartphone cameras often underexpose interiors because they are trying to properly expose the bright light coming through windows. The result is a room that looks darker, smaller, and less inviting than it actually is.
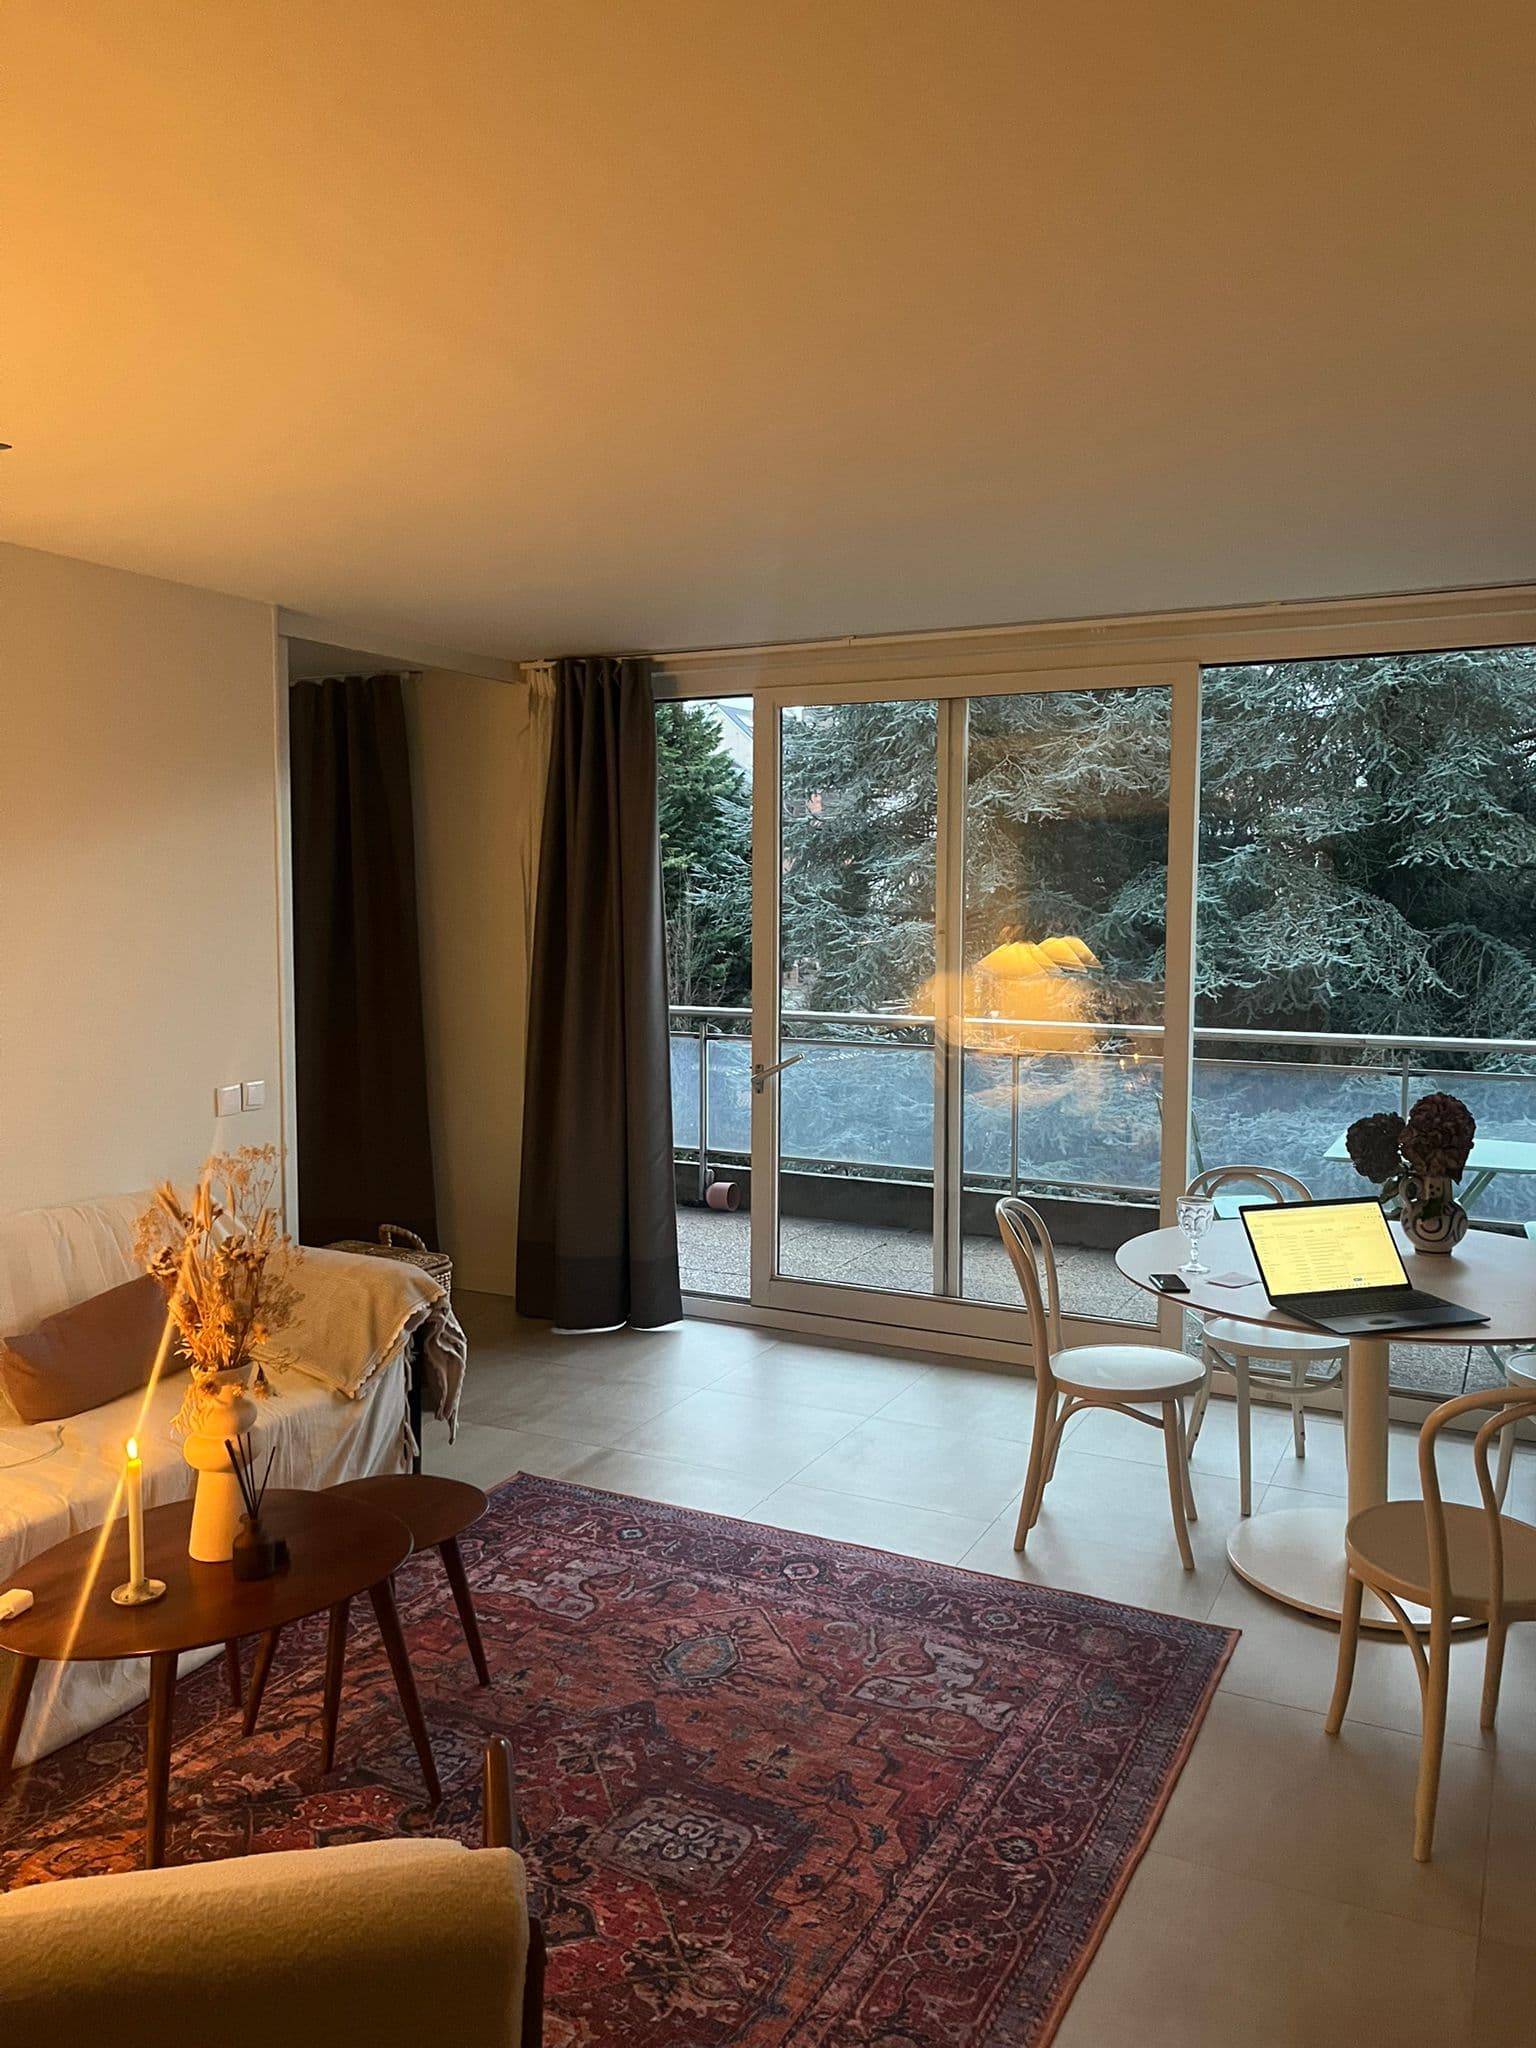
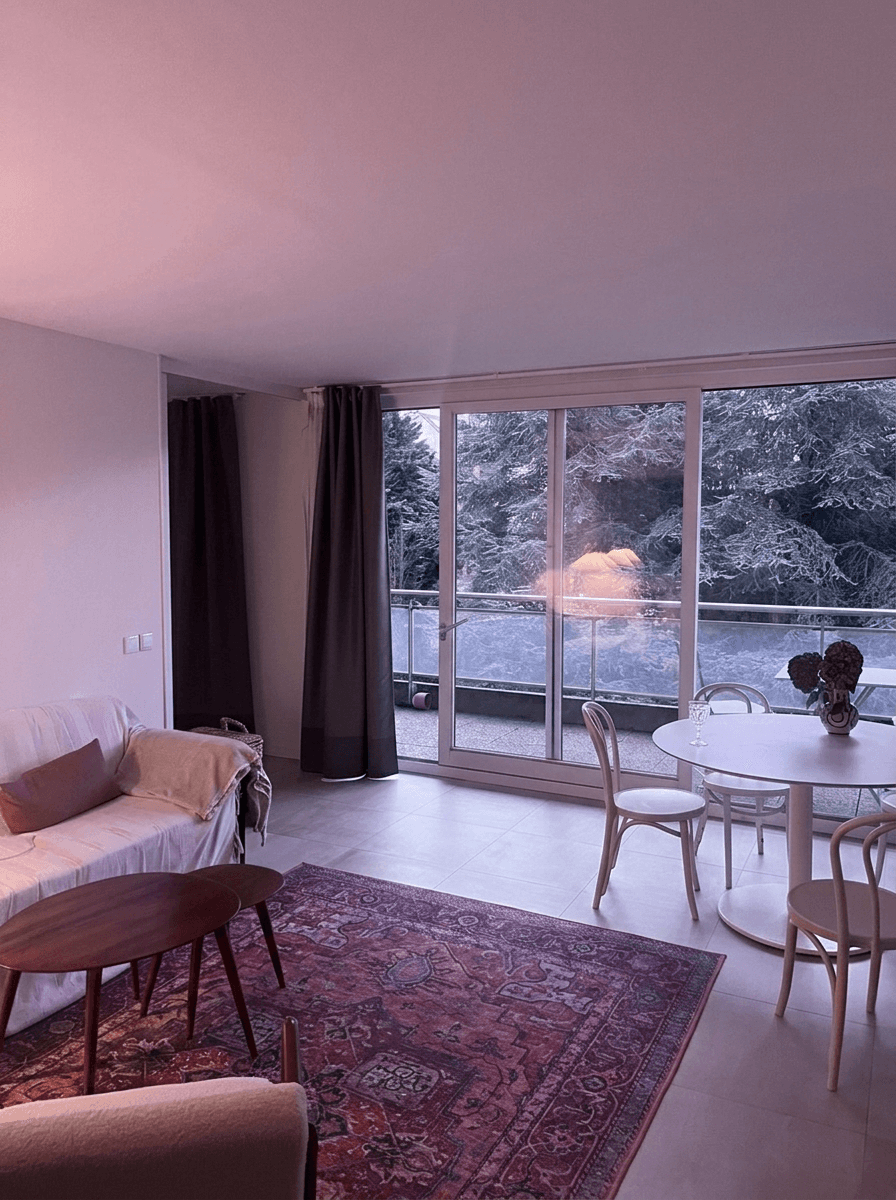
What Changed
- Shadows lifted across the entire room, revealing detail in darker corners and under furniture
- Window exposure balanced so you can see both the interior and the view outside
- Color temperature warmed slightly to create an inviting atmosphere
- Clarity enhanced to bring out texture in fabrics, wood, and decorative elements
- Overall brightness increased while maintaining natural-looking contrast
This type of edit takes a photo that makes a living room look like a cave and transforms it into one that makes guests think, "I want to sit on that couch." The key is that nothing about the room changed --- the edit simply presents it the way your eyes experienced it in person.
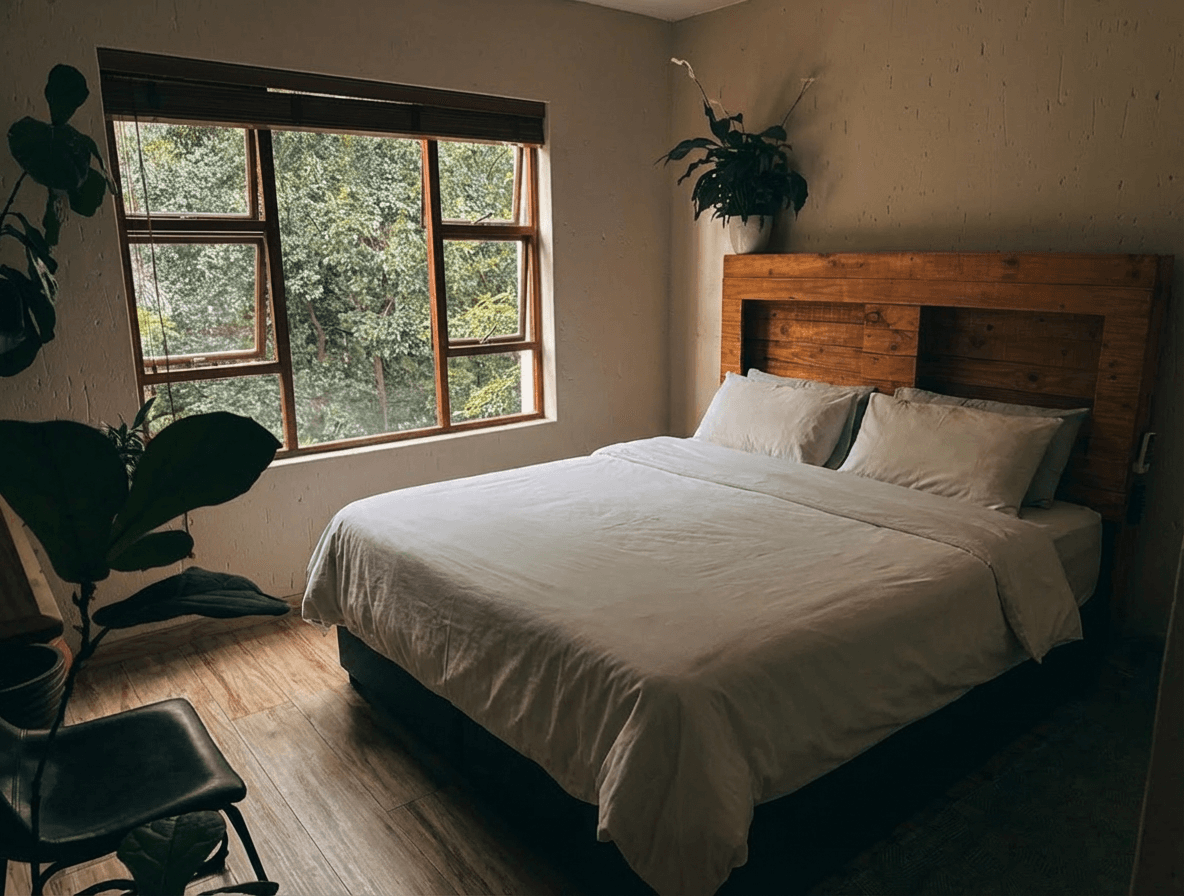
Bedroom Transformations
Bedrooms are where guests will spend the most time, and the bedroom photo is often the decision-making image. A bedroom that looks plush, clean, and restful converts. One that looks dim and lifeless does not.
Problem: Yellow Cast and Unflattering Tone
Indoor lighting --- especially warm-toned bulbs common in bedrooms --- creates a yellow or orange color cast that the human eye corrects for but cameras do not. The result is a bedroom photo that looks dingy and dated even when the actual space is fresh and modern.
What Changed
- White balance corrected to neutralize the yellow cast, making white linens actually look white
- Shadows gently lifted to show detail in the corners without losing the cozy mood
- Subtle sharpening applied to bedding texture, making linens look crisp and inviting
- A slight brightness boost to the overall exposure while keeping the room feeling warm
- Skin-friendly tones preserved so the room still feels cozy rather than clinical
White balance correction alone can transform a bedroom photo from "that looks old" to "that looks like a boutique hotel." It is one of the highest-impact single edits you can make.
Kitchen Transformations
Kitchen photos need to communicate cleanliness and functionality. Guests want to see a bright, organized space where they can imagine cooking a meal.
Problem: Harsh Shadows and Uneven Lighting
Kitchens often have a mix of overhead lighting, under-cabinet lighting, and window light that creates uneven illumination. Some areas are well-lit while others fall into shadow, making the space feel disjointed and smaller than it is.
The AI editing approach for kitchens focuses on balancing the light across the entire space. Under-cabinet areas are brightened, countertop shadows are lifted, and the overall tone is made consistent so the eye moves smoothly through the image rather than fixating on bright spots.
Key Kitchen Edits
- Shadow recovery under cabinets and in corners
- Highlight control on reflective surfaces like stainless steel and granite
- Color accuracy to make countertops, backsplash, and cabinetry look true to life
- Perspective correction to ensure vertical lines (cabinet edges, door frames) are straight
- Clarity boost to make textures pop without looking over-processed
A well-edited kitchen photo communicates quality. Guests see clean lines, bright surfaces, and professional presentation --- and they associate those qualities with the hosting experience as a whole.
Bathroom Transformations
Bathrooms are the room hosts most frequently under-photograph and under-edit. A poorly photographed bathroom creates doubt about the property's cleanliness, even if the rest of the listing looks great.
Problem: Harsh Vanity Lighting and Tight Space
Bathroom vanity lighting is designed for applying makeup, not for photography. It creates harsh shadows under eyes, on walls, and in corners. Combined with the typically small dimensions of a bathroom, unedited photos often make this space look cramped and institutional.
Key Bathroom Edits
- Light balancing to soften harsh vanity shadows and create even illumination
- Color correction to counteract the greenish or bluish cast of certain bathroom lighting
- Brightness boost to make tile and porcelain surfaces look clean and bright
- Gentle softening of harsh reflections on mirrors, chrome fixtures, and glass
- Perspective correction to keep walls and tile lines perfectly straight
The edited result is a bathroom that looks spa-like rather than utilitarian --- a space guests will look forward to using rather than merely tolerating.
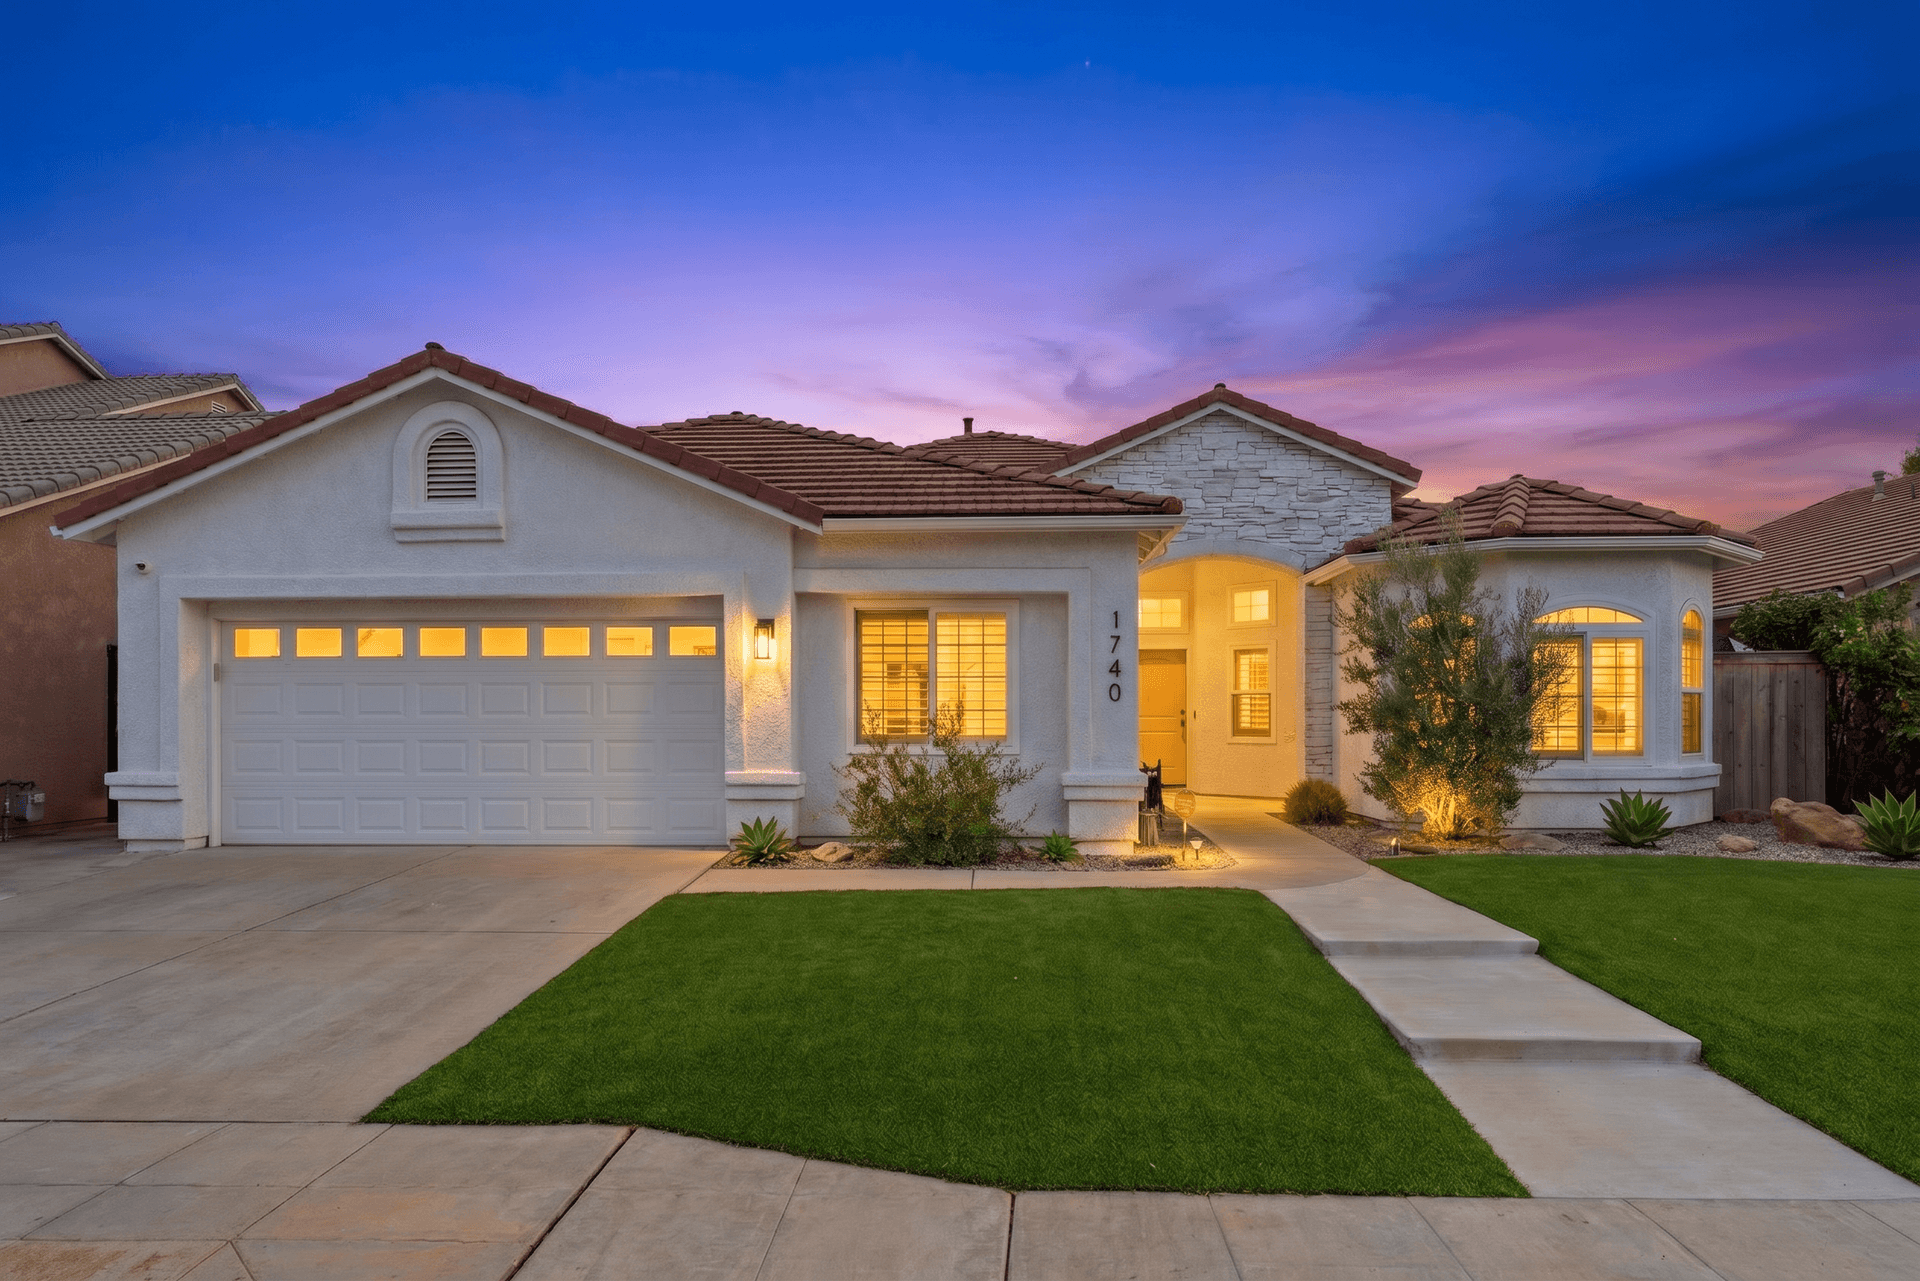
Exterior and Outdoor Space Transformations
Your exterior photo is often your hero image, and outdoor spaces like patios, pools, and gardens are major booking drivers for vacation rentals.
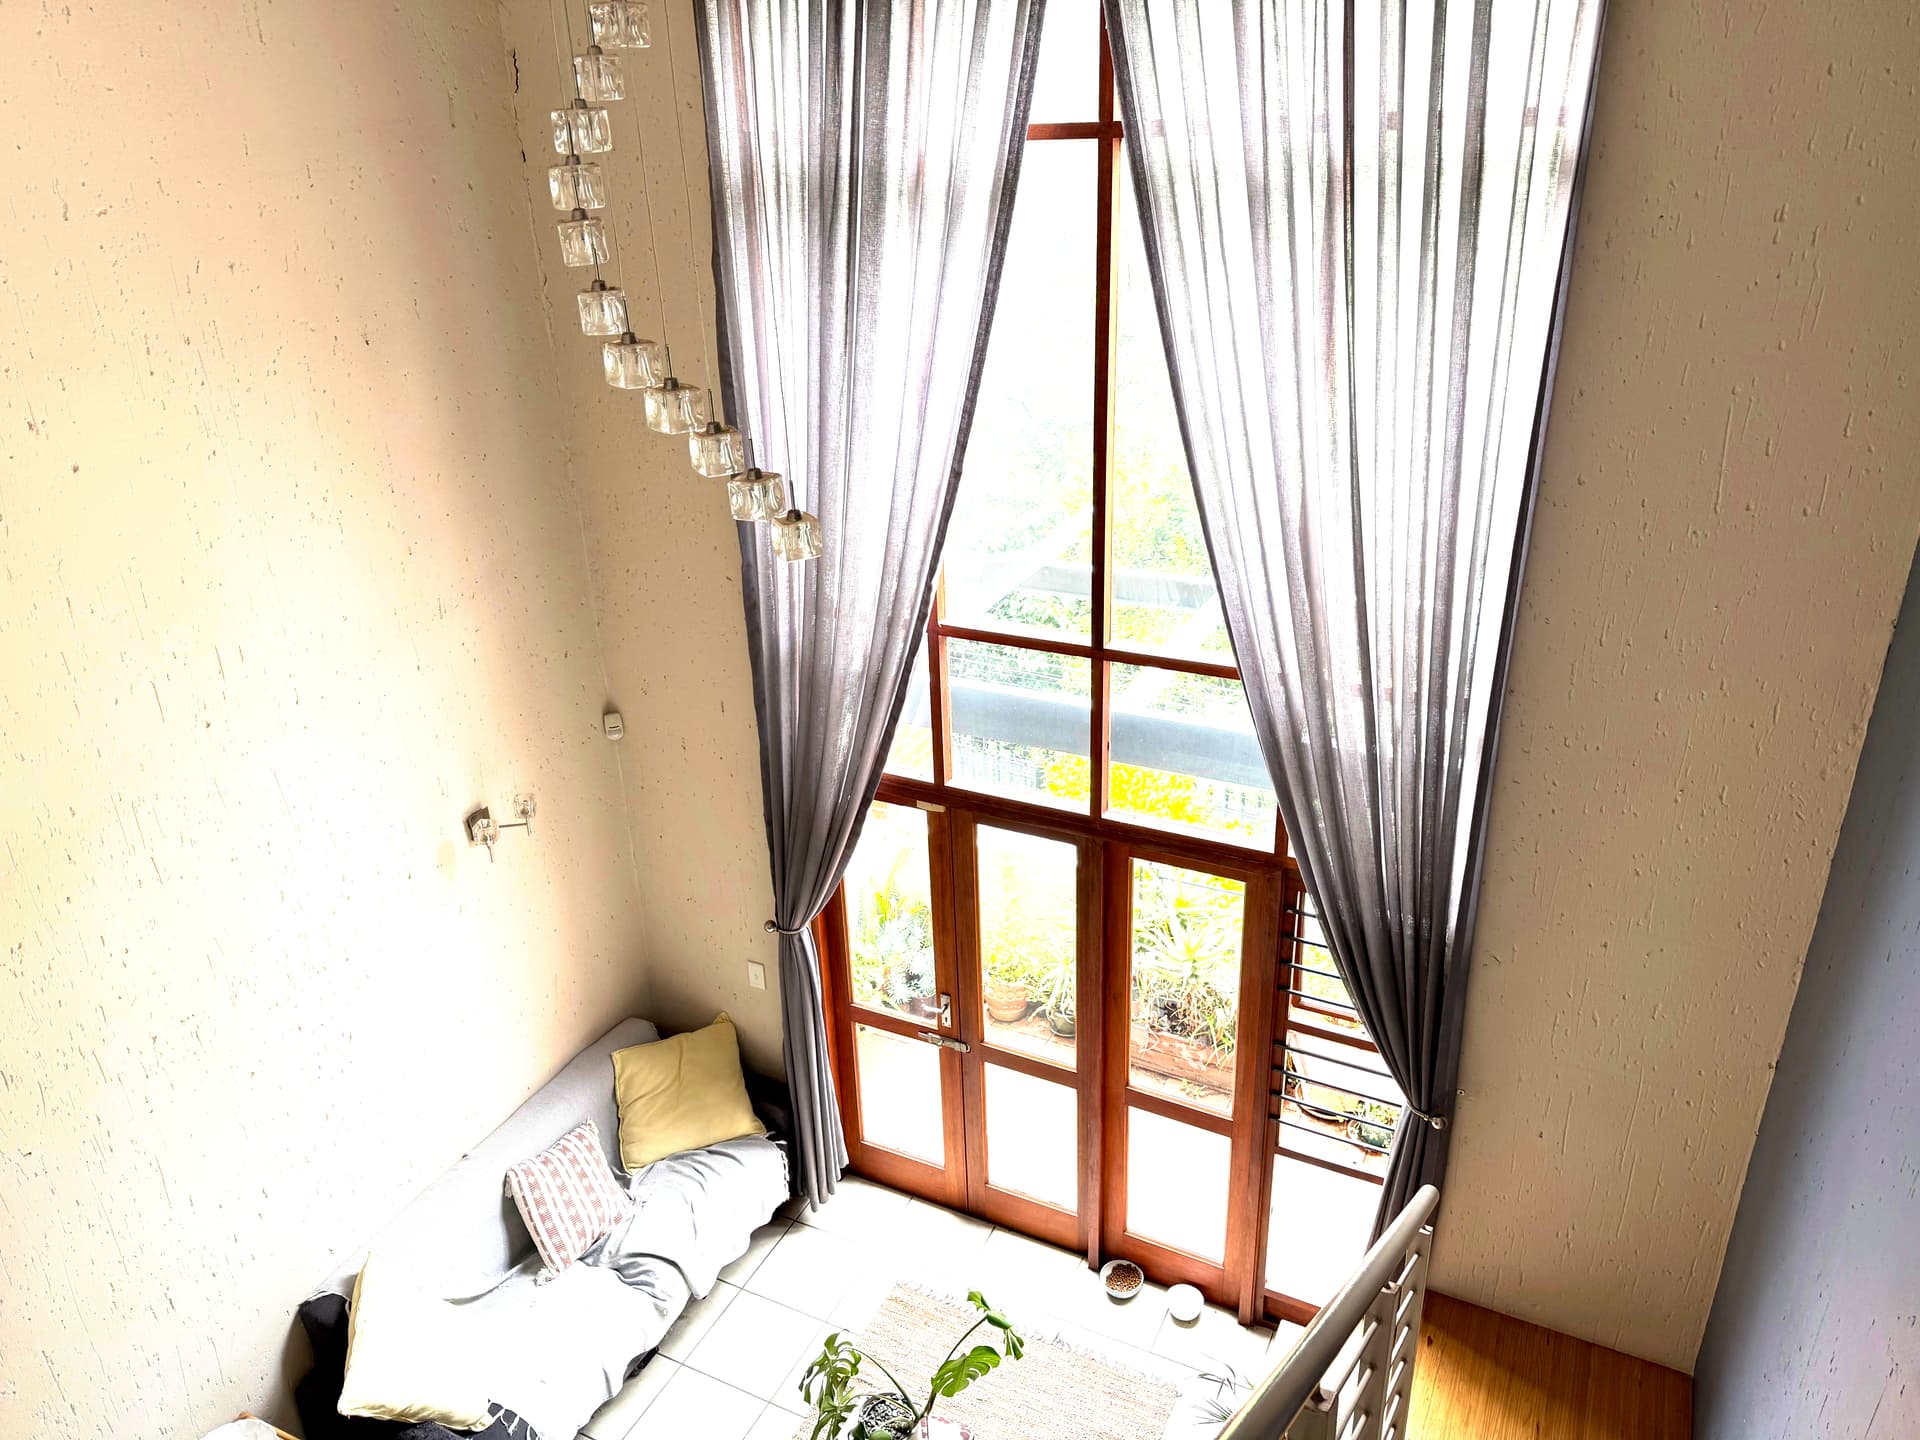
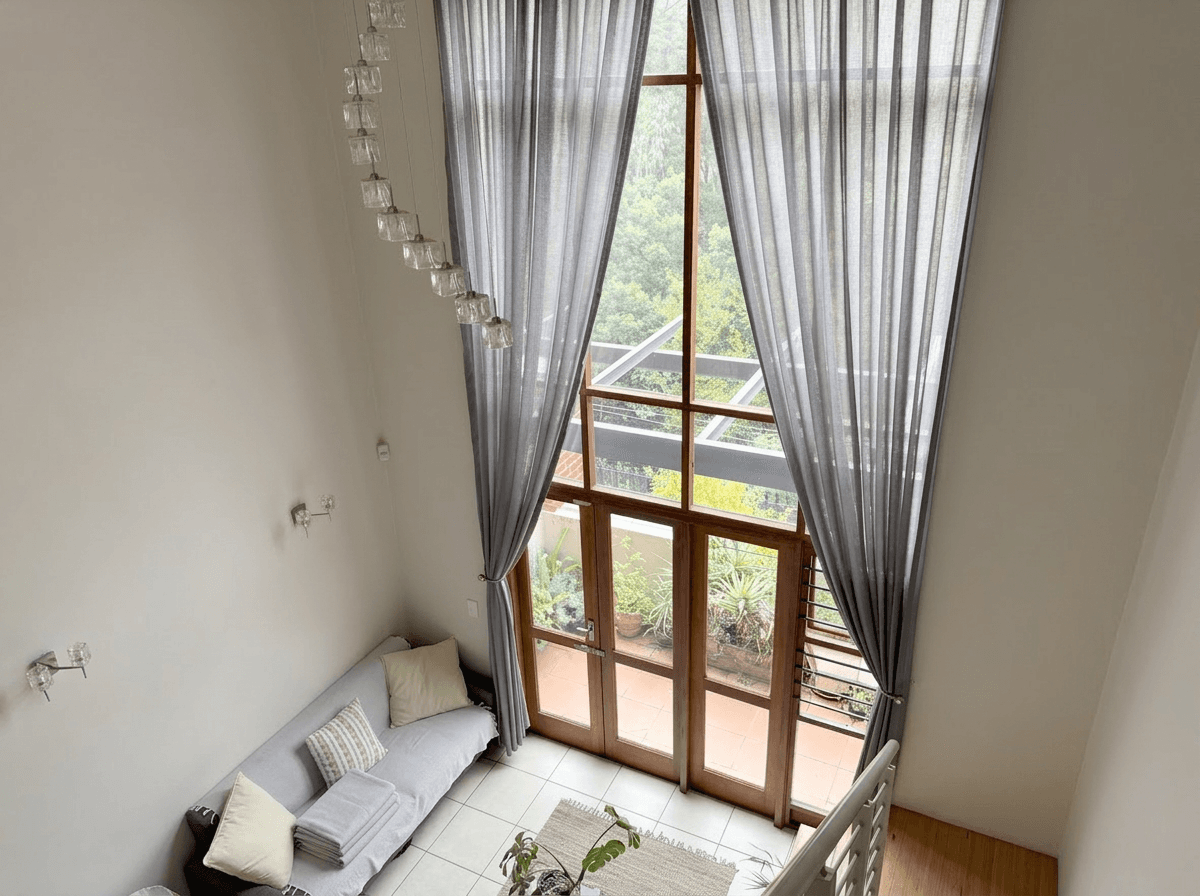
Problem: Overcast Sky and Dull Colors
Not every shoot day gives you blue skies and golden light. Overcast conditions flatten colors, eliminate shadows that create depth, and produce a gloomy sky that dominates the top half of your photo. For vacation rental exteriors, where you want guests to imagine sunny days by the pool, this is a significant problem.
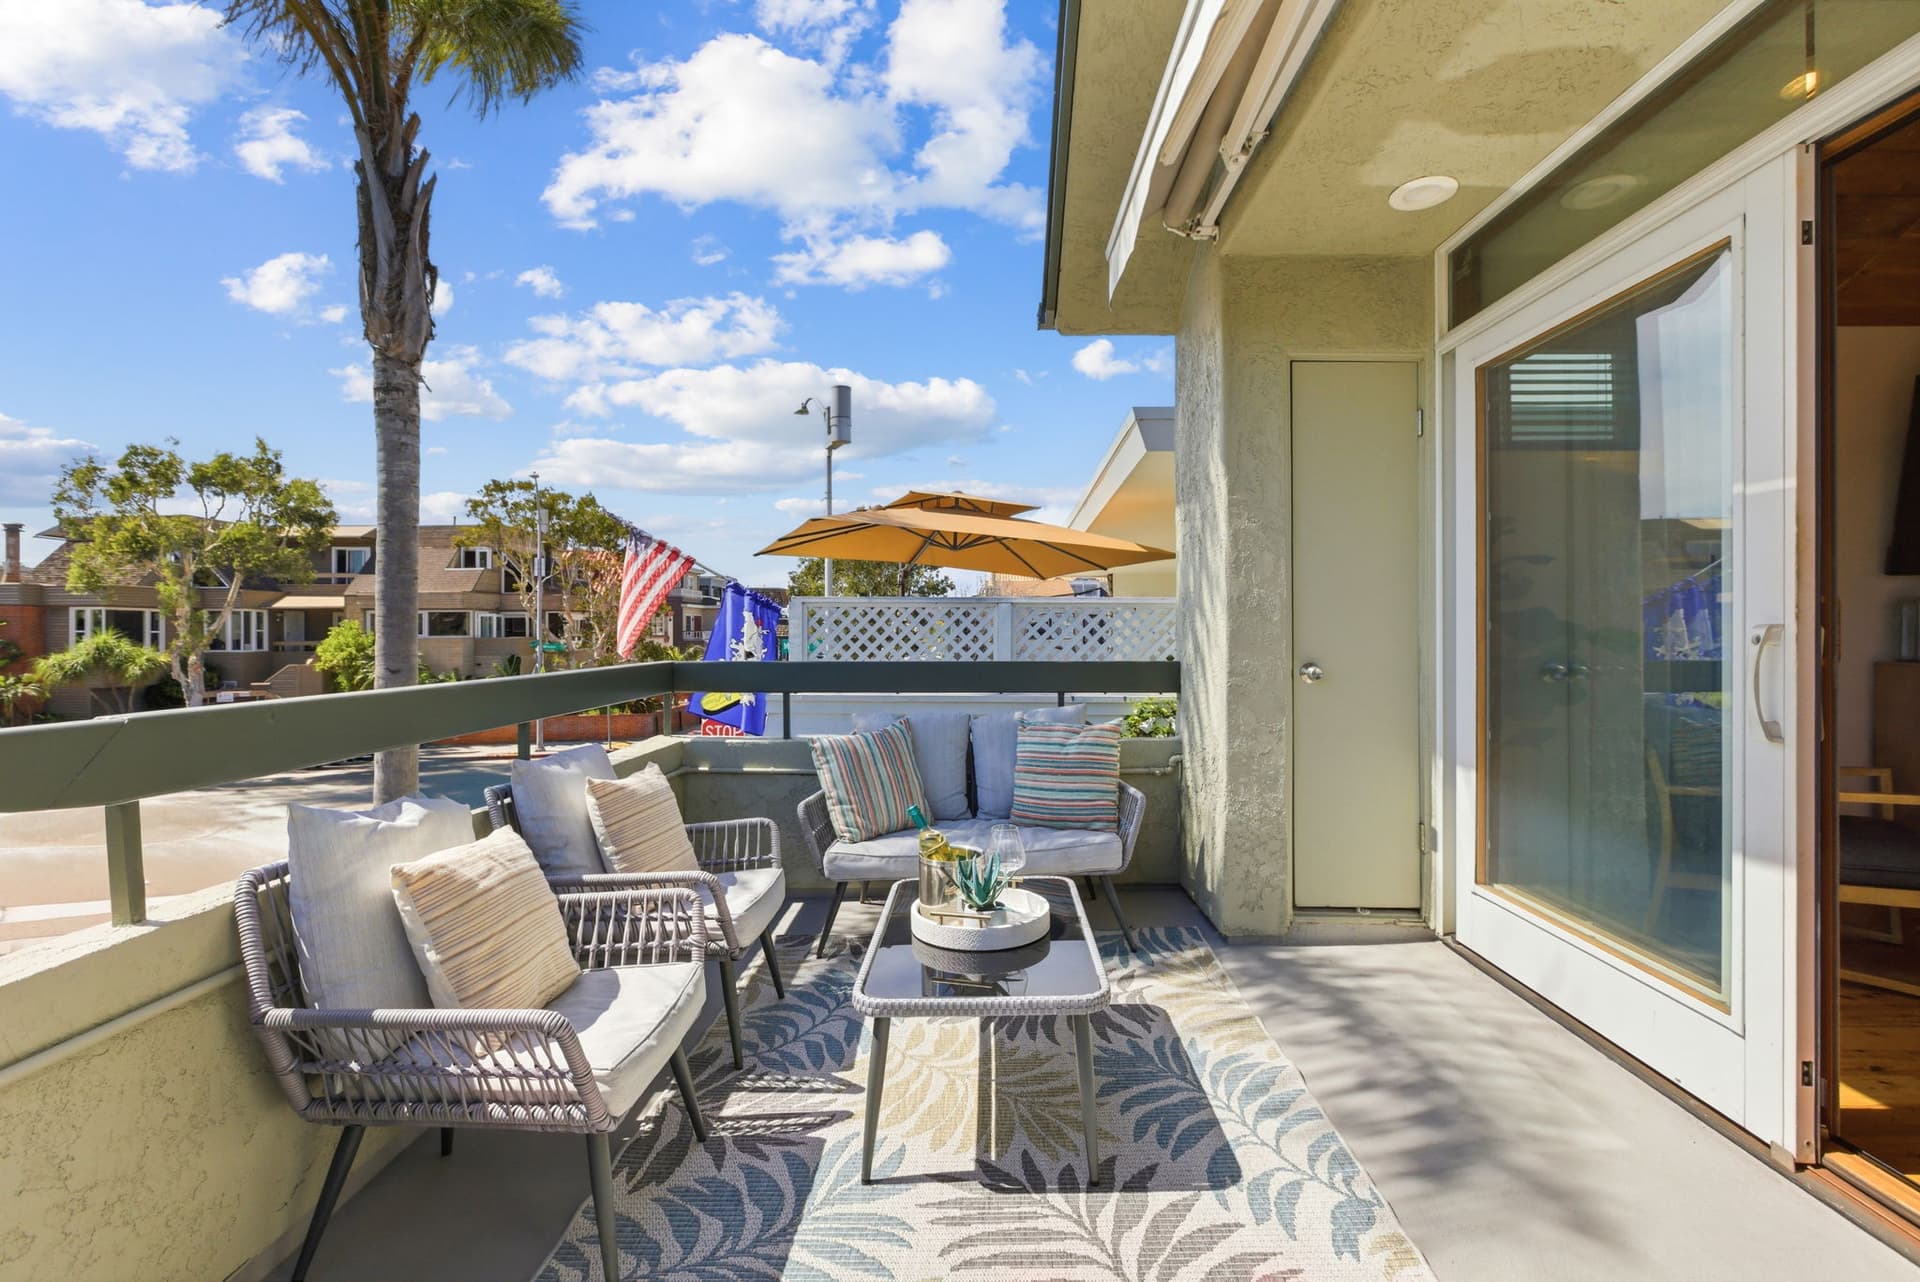
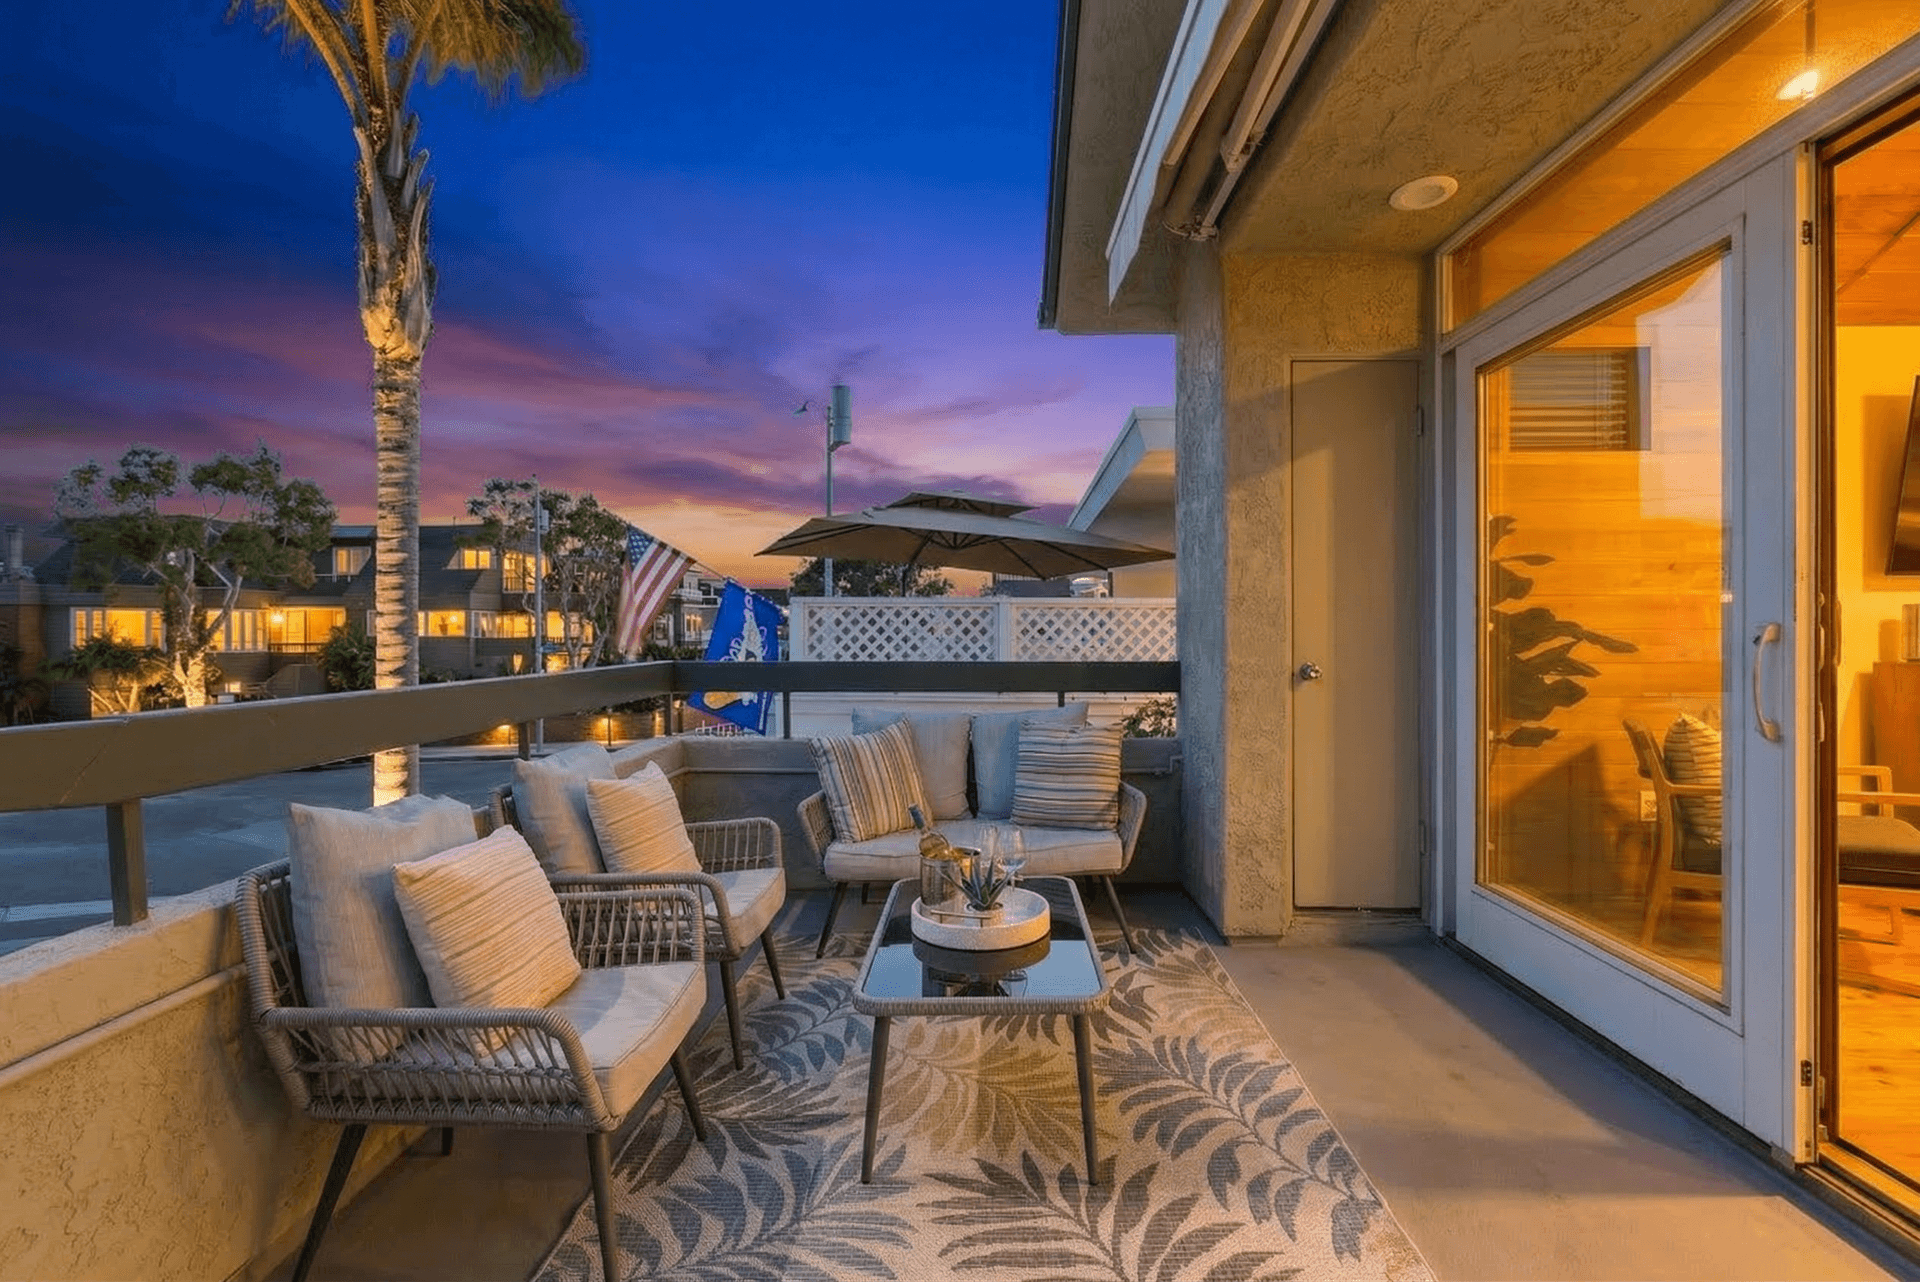
What Changed
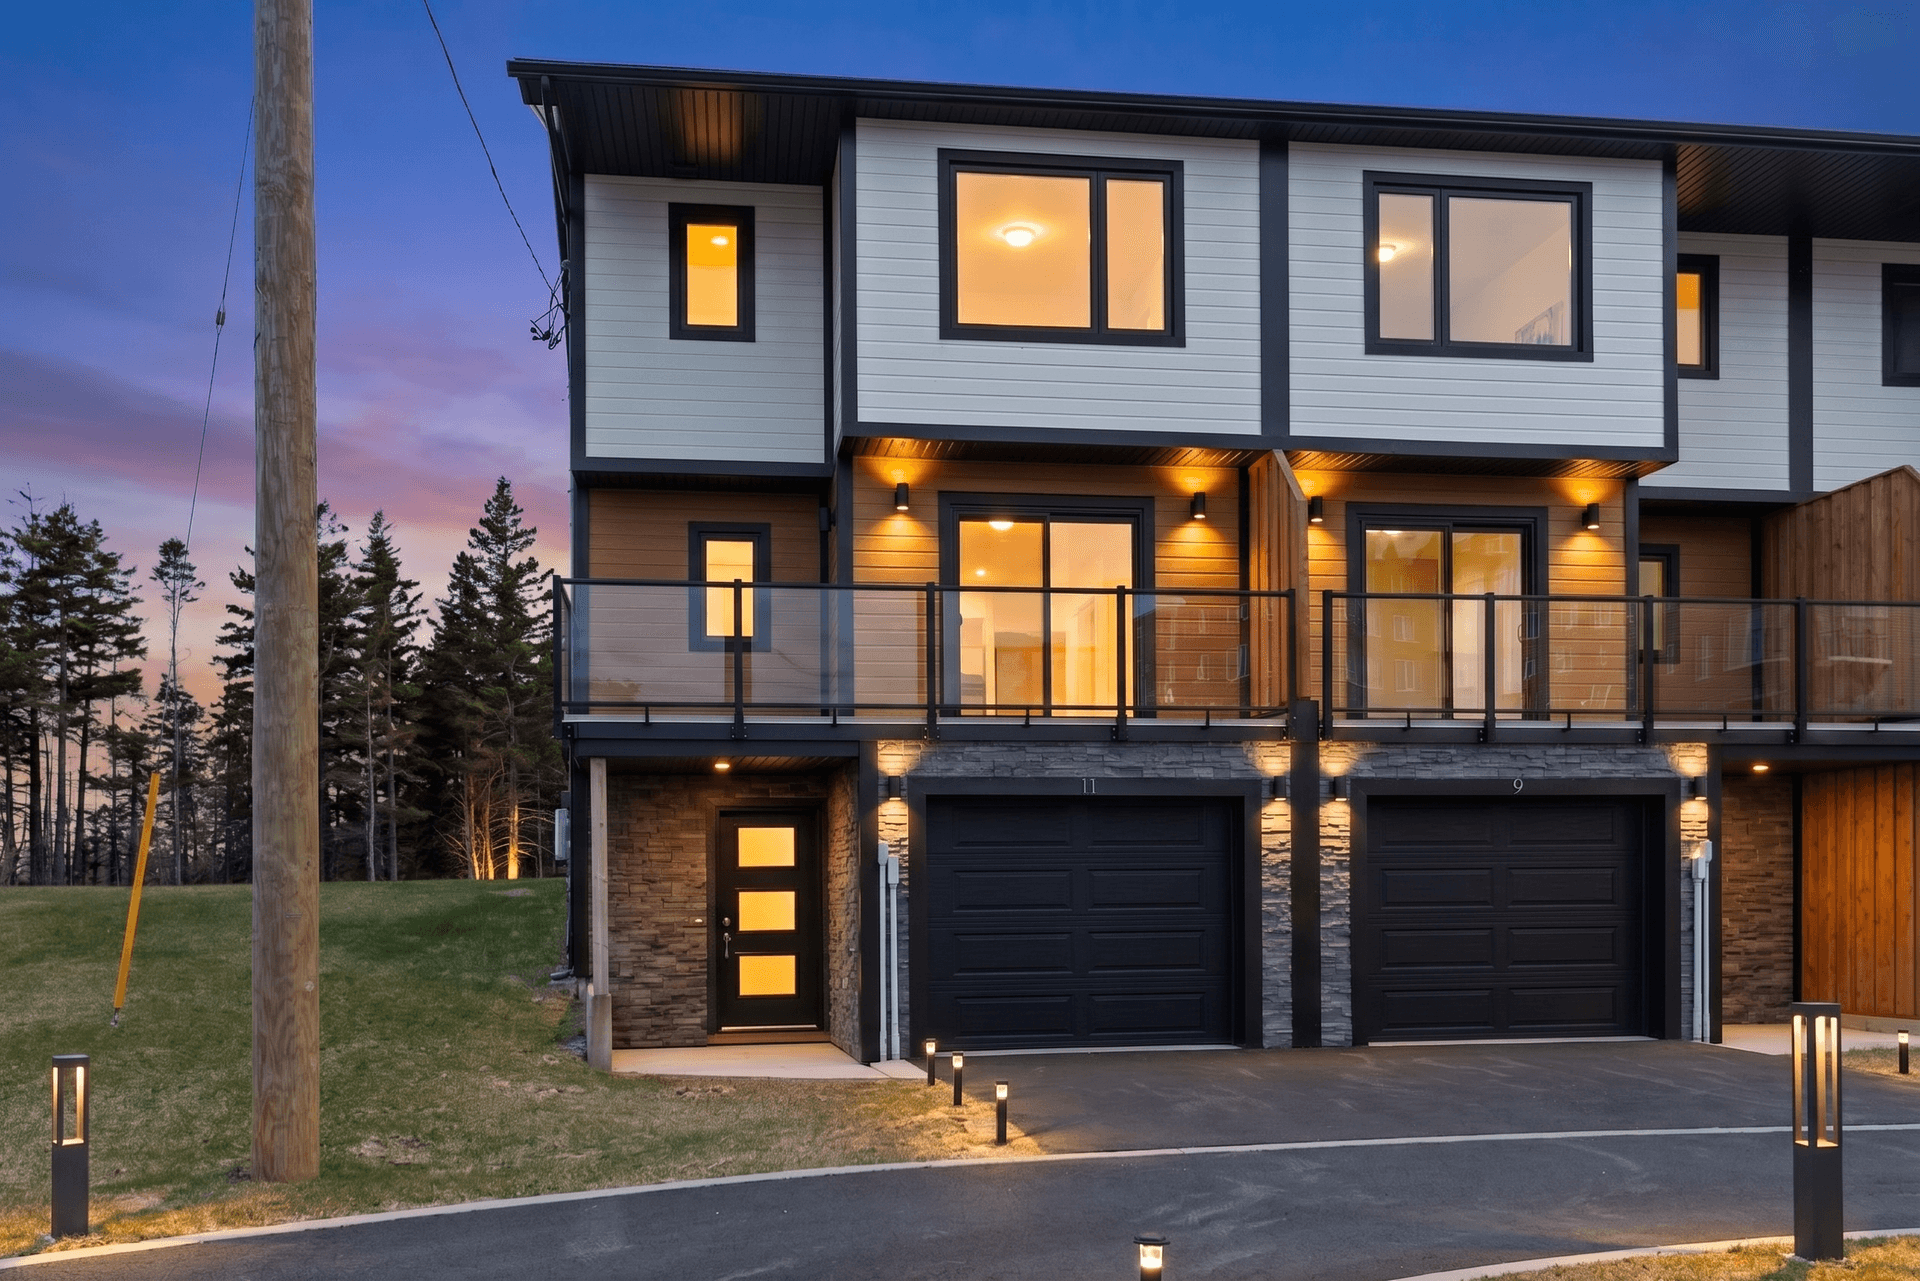
- The flat gray sky was replaced with a natural gradient twilight sky, transitioning from deep blue at the top to warm amber at the horizon
- Interior lights added through windows, creating the signature warm glow that makes properties feel inviting
- Landscape colors enhanced with the warm tones of golden hour
- Overall exposure adjusted to simulate the beautiful light of dusk
- Grass and foliage received a subtle saturation boost to look lush and well-maintained
This transformation takes a forgettable overcast exterior and turns it into a scroll-stopping hero image. It is the single edit most likely to increase your listing's click-through rate from search results.
For a deep dive into how twilight conversions work and why they are so effective, see our twilight photography guide.
Pool and Patio Area Transformations
If your property has a pool or an impressive outdoor entertaining area, these photos can be some of the most powerful in your listing. They sell the experience of the stay, not just the physical space.
Problem: Midday Harshness
Pool photos taken at midday suffer from harsh overhead sun that creates stark shadows, blows out the water surface to a blinding white, and drains the color from deck and patio materials. The pool looks functional rather than luxurious.
Key Pool and Patio Edits
- Highlight recovery on water surfaces and bright concrete or stone
- Shadow fill under umbrellas, in covered areas, and around furniture
- Water color enhancement to bring out the inviting blue or turquoise tone
- Vegetation boost to make surrounding plants and grass look vibrant
- Sky replacement or enhancement to create a picture-perfect backdrop
The edited version transforms a utilitarian pool shot into an aspirational lifestyle image --- the kind of photo that makes someone think, "I need to book this right now."
Common Airbnb Photo Problems and Their Fixes
Beyond room-specific edits, there are several universal photo problems that affect Airbnb listings across all room types.
Vertical Distortion
When you point a camera upward even slightly, vertical lines (walls, doorframes, windows) converge and appear to lean inward. This is one of the most common amateur photo tells, and it makes rooms look unstable and unprofessional. Perspective correction straightens these lines, immediately making the photo look polished.
Mixed Color Temperatures
Rooms lit by a combination of daylight (blue-ish), incandescent bulbs (orange), and LED lights (variable) can have areas of conflicting color temperatures. This makes photos feel chaotic. Color correction normalizes the temperature across the frame for a consistent, clean look.
Noise and Grain
Photos taken in low light --- common in bathrooms, hallways, and evening shots --- often have visible digital noise or grain. AI noise reduction cleans up these photos while preserving detail, resulting in smooth, clean images that look like they were shot with professional equipment.
Over-Processed HDR
Some hosts attempt to fix dark interior photos by cranking up an HDR filter, resulting in unnatural-looking images with halos around edges and flat, gray tones. Intelligent AI editing achieves the exposure-balancing goals of HDR while maintaining natural contrast and color, avoiding the "HDR look" that can actually hurt listing appeal.
For more examples of transformations across different edit types, see our real estate photo editing before and after gallery.
The Twilight Workflow for Batch Editing an Entire Property
Editing photos one by one is tedious and makes it difficult to maintain a consistent look across your full listing. Here is the workflow that top-performing hosts use with Twilight to edit an entire property set efficiently.
Step 1: Upload Your Full Photo Set
After your shoot, upload all your photos to Twilight at once. There is no need to pre-sort or pre-edit. The AI analyzes each image individually, detecting the room type, lighting conditions, and any issues that need correction.
Step 2: Choose Your Editing Style
Select a preset that matches the look you want for your listing. The "Bright and Airy" preset is the most popular choice for vacation rentals, creating a clean, modern, and inviting aesthetic across all room types. For a deeper look at this style, see our bright and airy photography guide.
Step 3: Review and Customize
The AI applies intelligent edits to every photo, but you retain full control. Preview each edited image, and if any photo needs a different treatment --- perhaps a moodier edit for a bedroom or extra sky enhancement for an exterior --- adjust individually.
Step 4: Create Your Hero Shot
Select your best exterior photo and apply a twilight conversion. This will become the first image in your listing, the one that stops the scroll and earns the click.
Step 5: Export and Upload
Download your complete edited set and upload to your listing platforms. The entire process, from upload to finished photos, typically takes under 10 minutes for a full property set of 25-40 images.
The Time and Cost Savings
- Traditional professional editing: $3-5 per photo, 2-3 day turnaround, $75-200 for a full set
- Manual DIY editing: Free but 2-4 hours of your time per property
- AI batch editing with Twilight: Under $5 for a full property set, under 10 minutes of your time
The math is compelling. AI editing gives you professional-quality results at a fraction of the cost and time investment of any alternative. For hosts managing multiple properties, the efficiency gains multiply.
The Impact on Bookings
Hosts who upgrade from unedited to professionally edited listing photos consistently report significant improvements:
- Higher click-through rates from search results, driven primarily by a stronger hero photo
- Increased booking conversion as guests feel more confident in the property's quality
- Higher nightly rates justified by the perceived quality of the listing presentation
- Better reviews because guests arrive with accurate, positive expectations
The investment in photo editing pays for itself many times over. When you consider that a single additional booking per month at even a modest nightly rate covers the annual cost of AI editing many times over, the return on investment is hard to argue with.
For a detailed analysis of the financial impact of better photos, read our ROI guide for short-term rental photography.
Start with Your Worst Photos
You do not need to re-edit your entire listing to see results. Start by identifying the 3-5 weakest photos in your current listing --- the ones that are darkest, most cluttered, or least inviting --- and run them through AI editing. Replace them in your listing and monitor the impact on views and bookings over the following two weeks.
Most hosts find that even this minimal intervention produces a noticeable improvement. From there, you can work through your full photo set at your own pace, steadily elevating the overall quality of your listing's visual presentation.
Related Articles
How to Write AI Prompts for Real Estate Photo Editing: A Practical Guide
The exact prompt patterns that produce reliable, professional edits for listing photos. Templates for day-to-dusk, sky replacement, decluttering, exposure correction, and more.
The Real Estate Agent's No-Nonsense Guide to AI Photo Editing
A plain-English guide to AI photo editing for real estate agents. Learn the five essential edits, avoid common mistakes, and get professional listing photos in 10 minutes flat.
AI Decluttering for Real Estate Photos: Remove Clutter in Seconds
Learn how AI decluttering transforms messy, lived-in property photos into clean, show-ready images. Step-by-step guide with before and after examples.