Twilight Photography for Real Estate: The Complete Guide
Discover why twilight photography sells homes faster and for more money. Learn how to shoot golden hour photos, overcome common challenges, and use AI to convert any daytime photo into a stunning twilight image.
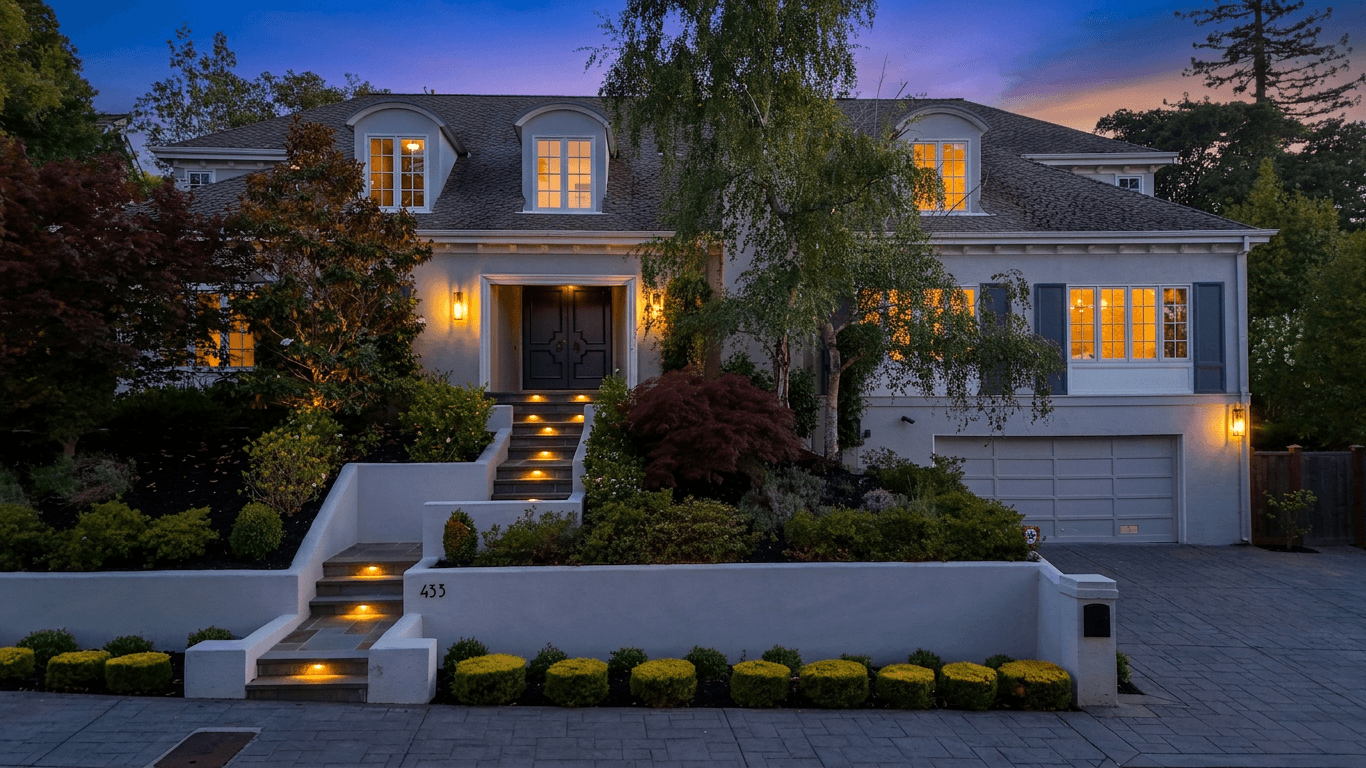
There is a reason that the most expensive listings in every market feature a twilight hero image. That warm glow of interior lights against a fading sky creates an immediate emotional reaction --- a sense of home, of warmth, of arriving somewhere you belong. It is arguably the most powerful single image you can use to market a property.
In this complete guide, we will cover everything you need to know about twilight photography for real estate: what it is, why it works, how to shoot it traditionally, and how modern AI technology has made this premium look accessible to every agent and photographer.
What Is Twilight Real Estate Photography?
Twilight photography (also called "dusk photography" or "golden hour photography") captures a property during the brief window after sunset when the sky transitions from warm golds and oranges to deep blues and purples. During this time, the ambient light outside drops to a level where interior lights become visible and even dominant in the image, creating a striking contrast between the warm glow of the home and the dramatic sky.
The technical term for this period is "civil twilight," which begins at sunset and ends when the sun is 6 degrees below the horizon. In practice, the ideal shooting window is even narrower --- typically 15 to 30 minutes after the sun disappears below the horizon.
Why Twilight Photos Work
The effectiveness of twilight photography is not just aesthetic preference. It is rooted in visual psychology:
- Warmth and emotion: The warm tones of interior lighting trigger feelings of comfort and safety. Buyers viewing a twilight photo are not just seeing a house; they are feeling what it would be like to come home.
- Dramatic contrast: The interplay between warm interior light and cool twilight sky creates visual depth and drama that daytime photos lack.
- Perceived value: Twilight photos signal quality and luxury. Even modest homes look more upscale when photographed at dusk.
- Stopping power: In a feed of daytime listing photos, a twilight image stands out immediately, earning more clicks and longer viewing times.
The Numbers Behind Twilight Photography
The data consistently supports what our eyes tell us:
- Listings with twilight hero images receive up to 76% more online views compared to standard daytime photos (based on MLS engagement data).
- Properties photographed at twilight sell an average of 6 days faster than comparable listings with only daytime photography.
- Real estate agents report that sellers who see twilight photos of their property are significantly more likely to feel confident in their agent's marketing efforts.
These are not marginal improvements. In a market where every advantage matters, twilight photography is one of the highest-ROI marketing investments available.
How to Shoot Twilight Photography Traditionally
If you want to capture twilight photos the traditional way, here is what you need to know.
Equipment
You do not need the most expensive camera on the market, but you do need a few essentials:
- A sturdy tripod: Non-negotiable. You will be shooting long exposures, and any camera movement will ruin the shot.
- A camera with manual controls: DSLR or mirrorless. You need to control aperture, shutter speed, and ISO independently.
- A wide-angle lens: 16-35mm on full frame (10-22mm on crop sensor) is the standard range for real estate exteriors.
- A remote shutter release or timer: To avoid vibration when triggering the exposure.
- Flashlights or portable lights (optional): Useful for lighting specific architectural features or landscaping.
Planning and Preparation
Twilight shoots require more planning than daytime photography:
-
Scout the property in advance if possible. Identify the best angles and determine which direction the front of the house faces. West-facing homes capture the last glow of sunset behind the camera, which is ideal.
-
Check sunset times for your specific location and date. Apps like PhotoPills or The Photographer's Ephemeris show exactly when and where the sun will set.
-
Arrive 30-45 minutes before sunset to set up your tripod positions, compose your shots, and take test frames while there is still daylight.
-
Turn on every light in the house. Every single one. Open blinds and curtains so interior light spills outward. This is what creates the signature warm glow.
-
Turn on exterior lights including porch lights, landscape lighting, and pool lights if applicable.
The Light Staging Secret
Ask the homeowner or listing agent to replace any cool-white (5000K+) bulbs visible from the exterior with warm-white (2700K-3000K) bulbs. The warm tone is what makes twilight photos look inviting rather than clinical.
Camera Settings
A reliable starting point for twilight exposure settings:
- Aperture: f/8 to f/11 (sharp across the frame with good depth of field)
- ISO: 100-400 (keep it as low as possible for clean images)
- Shutter speed: This will vary from 1 second to 30 seconds depending on the available light. Start around 2-4 seconds and adjust.
- White balance: Set to "Daylight" or around 5500K. This preserves the warm/cool contrast rather than neutralizing it.
- Shoot in RAW: Always. You will need the latitude in post-processing.
The Shooting Window
This is where experience matters most. The ideal window progresses through several phases:
Phase 1 - Early (0-10 minutes after sunset): Sky is still very bright. Interior lights are barely visible. Useful for establishing shots but not peak twilight.
Phase 2 - Prime (10-25 minutes after sunset): The sweet spot. Sky retains color and detail while interior lights glow prominently. The exposure balance between interior and exterior is at its best. Shoot as many compositions as possible during this phase.
Phase 3 - Late (25-40 minutes after sunset): Sky goes deep blue to near-black. Interior lights become the dominant light source. Can work for moody, dramatic shots but you lose sky detail quickly.
Common Challenges
Even experienced photographers face these issues with twilight shoots:
- Weather dependence: Overcast skies eliminate the dramatic color gradient. You need at least partly clear skies for good twilight.
- Tight timing: Miss the window and you either have a daytime photo or a nighttime photo. Neither is what you want.
- Scheduling conflicts: You cannot always get access to a property during the 20-minute ideal window, especially when juggling multiple listings.
- Return trips: Bad weather or scheduling issues often mean driving back to the property on another day.
- Season variation: In summer, sunset may be at 8:30 PM or later. In winter, it might be 4:30 PM. Your schedule has to flex with the seasons.
AI Twilight Conversion: A Game-Changing Alternative
This is where technology has fundamentally changed the equation. AI twilight conversion takes a standard daytime exterior photo and transforms it into a realistic twilight image --- complete with a dusk sky, warm interior window glow, and the soft ambient light characteristic of the golden hour.
How AI Twilight Conversion Works
Modern AI models have been trained on millions of real twilight photographs. They understand the complex relationships between sky color, ambient lighting, shadow direction, interior light spill, and material reflectance that define the twilight look. When you feed the model a daytime photo, it:
- Identifies the sky and replaces it with a realistic twilight gradient
- Detects windows and adds warm interior light glow, accounting for the angle and intensity that would be natural
- Adjusts ambient lighting across the entire scene to match twilight conditions
- Modifies shadows and reflections to be consistent with the new lighting direction
- Preserves architectural detail while adapting the overall color palette
The result is not a simple color filter or overlay. It is a genuine re-lighting of the scene that accounts for the physics of how light behaves at dusk.

When to Use AI Twilight vs. Traditional Shooting
AI twilight conversion is not meant to replace skilled twilight photography entirely. Here is when each approach makes the most sense:
Use AI twilight conversion when:
- You already have strong daytime exterior photos and want to add a twilight hero image without a return trip
- Weather prevented a traditional twilight shoot
- The listing budget does not support a dedicated twilight session
- You need the listing live quickly and cannot wait for ideal conditions
- You are an agent handling your own photography and cannot commit to a sunset-timed shoot
Consider traditional twilight photography when:
- The property is luxury or ultra-luxury and the marketing budget supports it
- The home has exceptional architectural lighting that you want to capture authentically
- You are building a portfolio and want to showcase your shooting skills
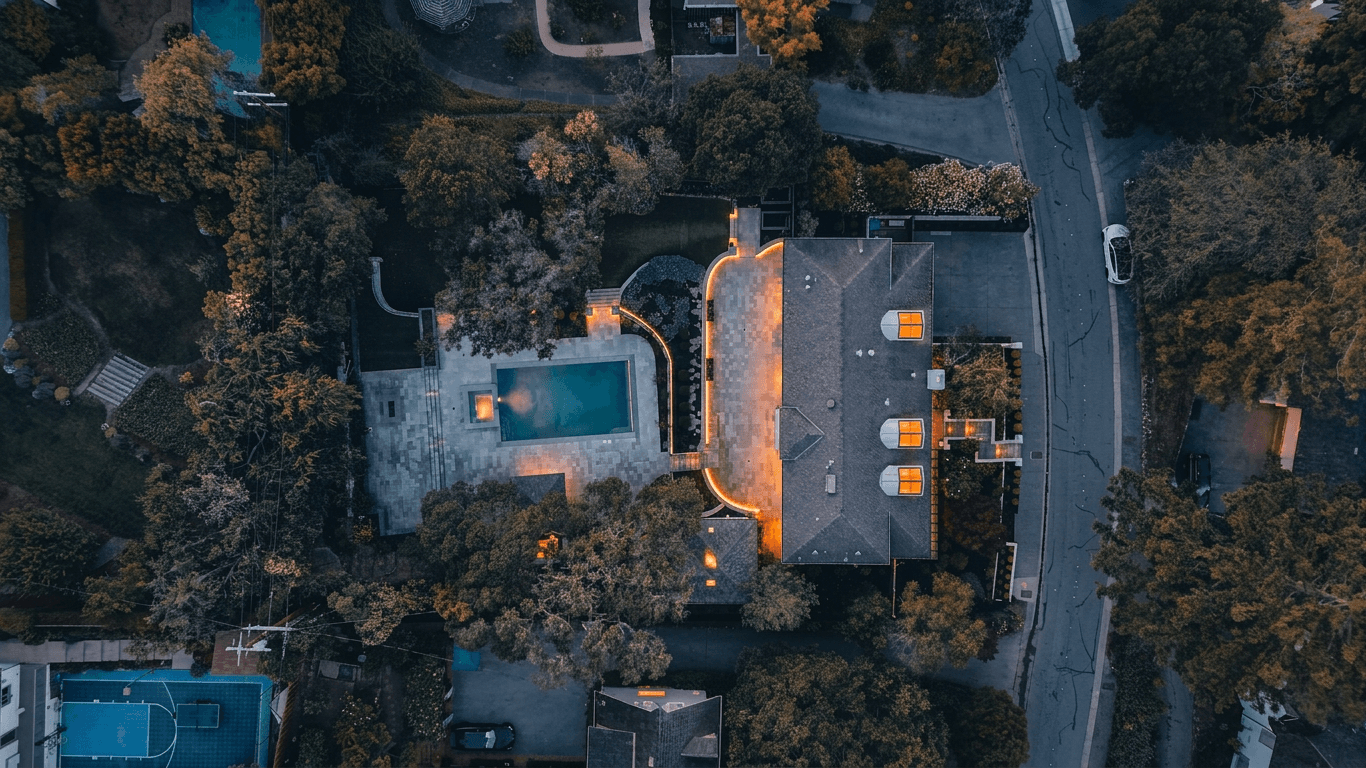
- The property has features (pools, fire pits, outdoor living areas) that look best with real light
A Common Workflow
Many professional real estate photographers use a hybrid approach: they shoot traditional twilight for their premium clients while offering AI twilight conversion as an add-on service for their standard packages. This lets them serve more clients without the scheduling constraints of traditional dusk shoots.
Getting the Best AI Twilight Results
Not all daytime photos convert equally well. Follow these tips for the best AI twilight conversions:
-
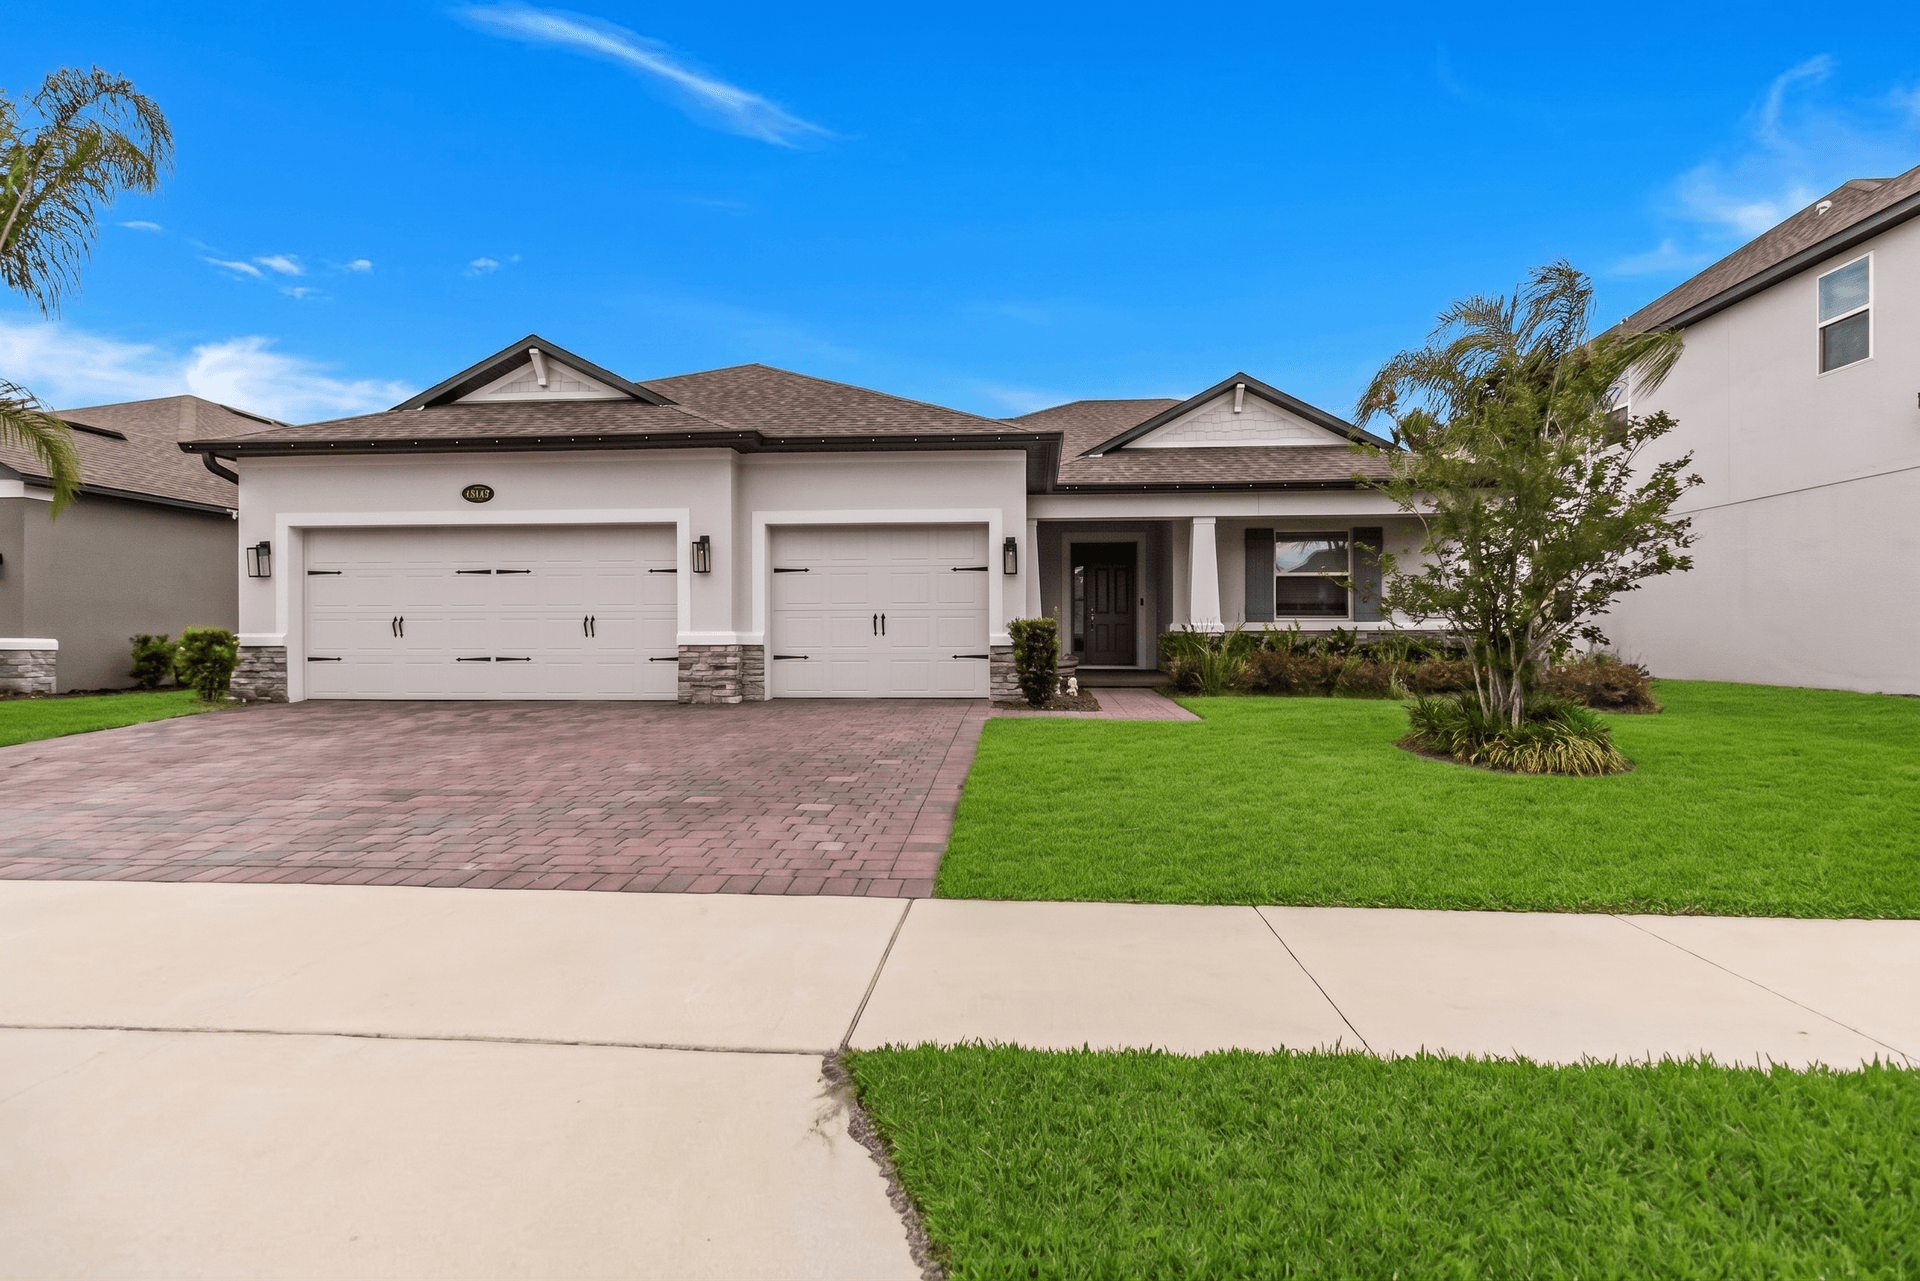
Shoot exteriors during overcast conditions or open shade if you plan to use AI conversion. Harsh midday shadows can be difficult for the AI to re-light convincingly.
-
Include the full facade in your composition. AI twilight conversion works best when windows and entry points are clearly visible, as these are where the warm interior glow will appear.
-
Ensure the sky is visible in your composition. The sky replacement is a major part of the twilight effect. Photos where the sky is mostly blocked by trees or neighboring buildings will have less dramatic results.
-
Turn on interior lights before shooting even for daytime photos. While the AI can add window glow, it produces the most natural results when there is already some light visible through the windows.
-
Keep landscaping tidy. Twilight conversion enhances everything in the scene, including overgrown lawns and cluttered yards. Stage the exterior just as carefully as you would for a traditional twilight shoot.
Editing and Enhancing Twilight Photos
Whether you shot traditional twilight or used AI conversion, some post-processing can take your images from good to exceptional.
Key Adjustments for Twilight Images
-
White balance fine-tuning: The warm/cool contrast is the heart of a twilight photo. Adjust white balance to ensure the sky leans cool (blue/purple) while interior light stays warm (amber/gold). Avoid auto white balance, which will try to neutralize both.
-
Shadow recovery: Open up shadow areas to reveal architectural detail that might be lost in the darker portions of the frame. Be careful not to overdo it, as some shadow depth is what gives twilight photos their drama.
-
Sky enhancement: If the sky looks flat, a gentle increase in vibrance or a graduated filter can bring out the sunset colors without looking unnatural.
-
Window glow: The warm light in windows should be prominent but not blown out. If highlights are clipping in the windows, pull them back slightly.
-
Sharpening: Apply moderate sharpening to bring out architectural details. Pay special attention to rooflines, trim, and stonework.
Common Mistakes to Avoid
- Over-saturating the sky: A twilight sky should look natural, not like a neon sign. If the colors look unreal, dial back the saturation.
- Inconsistent color temperature: Every light source visible in the image should look intentional. Random cool-white patches in an otherwise warm scene are distracting.
- Heavy-handed HDR: Some photographers apply aggressive HDR processing to twilight photos, producing a hyper-real look with halos around edges. This was trendy a decade ago but now looks dated and unprofessional.
- Forgetting verticals: Ensure your vertical lines are straight. A twilight photo with converging verticals (the building appearing to lean backward) looks sloppy no matter how beautiful the light.
Twilight Photography for Different Property Types
The approach to twilight photography varies depending on the property:
Single-Family Homes
The classic twilight subject. Shoot from the street or driveway at a slight angle that shows depth along the facade. Include landscaping in the foreground for context and framing.
Condos and Townhomes
Focus on the unit's exterior entry or balcony view. If the building has common areas with architectural lighting, these can make excellent twilight subjects.
Commercial Properties
Office buildings, retail spaces, and restaurants all benefit from twilight photography. The lit interior suggests activity and success --- a business that is open and thriving.
Vacant Land
Even raw land can benefit from a twilight sky. A beautiful sunset over an undeveloped lot helps buyers visualize the potential and emotional appeal of the location.
Building Twilight Photography Into Your Workflow
Whether you are an agent, photographer, or property manager, here is how to make twilight imagery a standard part of your listing marketing:
-
Make it the default for hero images. Every listing should have at least one twilight exterior, whether shot traditionally or converted with AI.
-
Pair twilight exteriors with bright interiors. The contrast between the dramatic exterior and the light, airy interior creates a compelling visual narrative as buyers browse the listing. For tips on achieving the perfect interior look, see our guide to bright and airy real estate photography.
-
Use twilight photos for social media. These images consistently outperform daytime photos in engagement metrics on Instagram, Facebook, and other platforms.
-
Include twilight images in print materials. Brochures, postcards, and just-listed mailers with twilight hero images make a stronger impression.
-
Add twilight to your listing presentation. When pitching to sellers, showing a twilight example of a similar property demonstrates the quality of your marketing.
Getting Started With AI Twilight Conversion
If you are ready to add twilight imagery to your listings without the complexity and scheduling challenges of traditional twilight shoots, Twilight's AI-powered platform makes it remarkably simple. Upload a daytime exterior, select the Twilight preset, and see the result in seconds.
You can try it right now with no account required at twilight.pics/try, or learn more about all the AI editing capabilities available in our tutorial on how to edit real estate photos with AI.
The agents who consistently win listings are the ones who present properties in their absolute best light --- and nothing does that quite like the warm, inviting glow of a twilight photograph.
Related Articles
MLS Photo Requirements: Complete Guide for Real Estate Agents
Learn everything about MLS photo requirements including resolution standards, file size limits, common rejection reasons, and how to ensure your listing photos pass every time.
Day-to-Dusk AI Conversion: A Technical Deep Dive for Real Estate Photographers
How AI converts a daytime exterior into a magazine-quality dusk shot. Inside the model, the prompt, and the failure modes, with a checklist for getting consistent results.
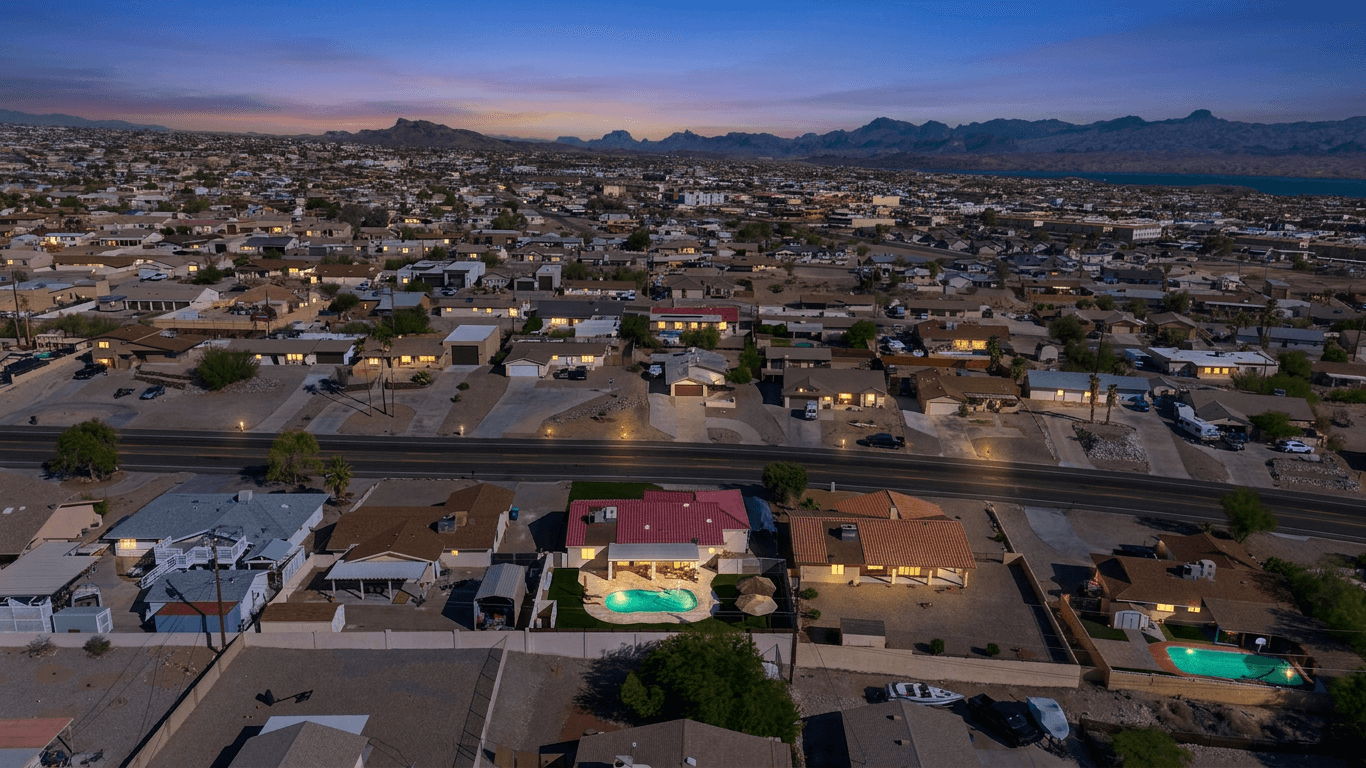
Drone and Aerial Photography for Real Estate: A Practical Guide
Everything you need to know about drone photography for real estate listings, including FAA Part 107 requirements, best practices for angles and altitude, editing tips, pricing, and when aerial shots actually add value.