Staging for Photos on a Budget: Low-Cost Tricks That Work
Learn how to stage homes for real estate photos on a tight budget. Covers the 30-minute declutter sweep, $50 room staging kits, styling with existing items, and how post-processing amplifies basic staging.
Professional home staging can cost anywhere from $2,000 to $10,000 or more for a full-home treatment. For luxury listings and high-value properties, that investment pays for itself many times over. But for the vast majority of listings -- the $250,000 starter home, the $400,000 suburban split-level, the mid-range condo -- a five-figure staging budget is not realistic. Sellers are already spending money on repairs, cleaning, and agent commissions. Asking them to add thousands more for staging often meets resistance.
The good news is that you do not need a professional stager to dramatically improve how a home photographs. With a methodical approach, a small investment in a few key items, and smart use of what is already in the home, you can transform listing photos from cluttered and chaotic to clean and inviting. Combined with AI-powered post-processing that enhances your staging work even further, budget staging delivers results that punch well above its cost.
This guide is for real estate agents who want to help their sellers prepare homes for photo day, photographers who want to offer basic staging as a value-add service, and sellers who want their listing photos to compete with professionally staged homes without the premium price tag.
The 30-Minute Declutter Sweep
Before you add anything to a home, you need to remove things. Decluttering is the single highest-impact, zero-cost staging action you can take, and it should happen before anyone picks up a camera.
The Protocol
Set a timer for 30 minutes and work through the home systematically. The goal is not deep cleaning or organization -- it is removing visual noise from every surface and sightline that will appear in listing photos.
Kitchen (8 minutes):
- Clear all countertops completely. Every appliance, dish rack, paper towel holder, knife block, and decorative item comes off the counter and goes into a cabinet or a box.
- Remove everything from the refrigerator door -- magnets, photos, kids' artwork, takeout menus.
- Clear the top of the refrigerator.
- Remove dish towels that are stained or branded.
- Put away dish soap, sponges, and cleaning supplies from around the sink.
Living and Family Rooms (6 minutes):
- Remove personal photos from mantels, shelves, and tables. Buyers need to imagine their own family here, not someone else's.
- Clear coffee tables and end tables down to 1-2 items maximum per surface.
- Remove all magazines, newspapers, mail, and paper clutter.
- Straighten throw pillows and fold blankets neatly.
- Hide remote controls, charging cables, and electronics accessories.
Bedrooms (5 minutes each):
- Make every bed with clean, unwrinkled bedding. This is non-negotiable.
- Clear nightstands down to one item each (a lamp counts).
- Remove all items from dressers and tops of furniture.
- Close closet doors.
- Remove laundry baskets and clothing from view.
Bathrooms (4 minutes each):
- Remove all personal toiletries from counters, shower ledges, and tub edges. Everything goes under the sink or into a box.
- Remove bath mats (they almost always look worse in photos than bare floor).
- Close the toilet lid.
- Hang fresh, matching towels.
- Remove trash cans from view.
Entryway and Hallways (3 minutes):
- Remove shoes, coats, and bags from entry areas.
- Clear console tables and hooks.
- Remove doormats that are worn or branded.
The Box Method
The fastest way to declutter for photos is the box method: bring 3-4 large moving boxes or laundry baskets to the home. As you move through each room, everything that comes off a surface goes into a box. The boxes get stacked in the garage, a closet, or the trunk of a car -- anywhere they will not be visible in photos. After the shoot, everything goes back.
This is not permanent organizing. It is temporary visual simplification for the camera. Sellers are much more willing to "box things up for an hour" than to permanently part with their belongings.
The $50 Per-Room Staging Kit
For under $50 per room, you can assemble a reusable staging kit that elevates photos significantly. Living room: A white or neutral throw blanket ($15), two coordinating throw pillows ($10 each), one coffee table book with an attractive cover ($10), a small potted plant or succulent ($5). Bathroom: Two sets of rolled white towels ($12), a small tray for the counter ($8), a candle in a neutral holder ($6), a small plant ($5). Kitchen: A cutting board ($10), a bowl of green apples or lemons ($5), a small herb plant ($5), a clean dish towel in a neutral color ($5). These kits pay for themselves on the first use and can be reused across dozens of listings.
Styling with Existing Items
Most homes already contain items that photograph well -- they just need to be curated and repositioned. The art of budget staging is recognizing what works and strategically relocating it within the home.
What to Look For
Walk through the home with fresh eyes and identify items that have photographic potential:
- Books with attractive spines. Hardcover books with neutral or colorful spines make excellent shelf and table decor. Stack 3-4 horizontally on a coffee table or shelf.
- Solid-colored throw pillows. If the homeowner has any throw pillows in solid colors (not heavily patterned or dated), redistribute them to the rooms being photographed first.
- Candles. Unscented pillar candles or candles in glass holders add warmth to bathrooms, bedrooms, and dining tables.
- Houseplants. Move the healthiest plants to the rooms that will be photographed most prominently. One thriving plant in the corner of a room adds life to the image.
- Matching towels. Find the best-looking set of towels in the home and use them for the bathroom that will be photographed.
- Clean dinnerware. Simple white plates and bowls can be used to set a basic table arrangement.
The Redistribution Strategy
Think of the home's existing decor as a shared inventory. The primary living spaces -- kitchen, living room, master bedroom, and main bathroom -- are the rooms buyers care about most and the rooms that need the most staging attention. Borrow items from secondary spaces (guest rooms, basement, home office) to enhance the primary rooms for photos.
A vase from the guest bedroom becomes the centerpiece of the dining table. Books from the home office stack neatly on the living room console. The nicest towels from the linen closet go into the master bath. You are not buying anything -- you are curating and concentrating the best-looking items where they will have the most photographic impact.
Room-by-Room Budget Staging Guide
Kitchen Counter Staging
The kitchen is one of the most photographed rooms in any listing and one of the most impactful for buyer impressions. After the 30-minute declutter has cleared the counters completely, add back just a few intentional items:
- The cutting board anchor. Place a clean wooden cutting board on one section of counter, leaning against the backsplash at a slight angle. This adds warmth and suggests cooking without clutter.
- Fresh produce. A bowl of green apples, a cluster of lemons, or a small arrangement of mixed fruit in a simple bowl adds color and freshness. Green and yellow tones photograph particularly well in kitchens.
- A plant or herb. A small potted herb (basil, rosemary) on the kitchen windowsill or counter suggests a lived-in, healthy kitchen.
- The towel detail. One clean, neutral-colored dish towel folded neatly and draped over the oven handle. This tiny touch communicates cleanliness.
What to avoid on kitchen counters: appliance collections, paper towel holders, soap dispensers with brand labels, cluttered spice racks, and anything plastic. The camera sees every item on a counter, and less is always more.
Bathroom Essentials
Bathrooms are small rooms where staging has outsized impact because every surface is visible in a single frame. After clearing all personal toiletries:
- The towel roll. Rolled white towels stacked in a pyramid or placed in a basket on the counter. This is the single most effective bathroom staging trick and costs almost nothing if the seller owns white towels.
- The counter tray. A small tray (wood, marble, or acrylic) placed on the counter with 2-3 items: a candle, a small plant, and one decorative soap or lotion bottle. This gives the counter a spa-like quality.
- Fresh flowers. A small arrangement of white or green flowers in a simple vase on the bathroom counter photographs beautifully and costs under $5 at most grocery stores.
- Close everything. Toilet lid down, cabinet doors closed, shower curtain pulled to one side (or removed entirely if the shower/tub is clean and attractive).
For Airbnb and vacation rental photography, these same bathroom staging techniques apply but with even more emphasis on the spa-like feel that guests expect.
Living Room Arrangement
The living room needs to feel spacious, inviting, and cohesive. After decluttering:
- Simplify the coffee table. Three items maximum: a stack of books, a candle, and a small decorative object or plant.
- Fluff and arrange pillows. Odd numbers (3 or 5 pillows on a sofa) photograph better than even numbers. Arrange them symmetrically with the largest in back.
- Add a throw. A folded throw blanket draped over one arm of the sofa or across one corner adds texture and warmth. Stick to neutral colors: white, cream, gray, or soft blue.
- Create a focal point. If the room has a fireplace, ensure the mantel is styled simply with 1-3 items. If there is no fireplace, the longest wall or the view from the main window becomes the focal point.
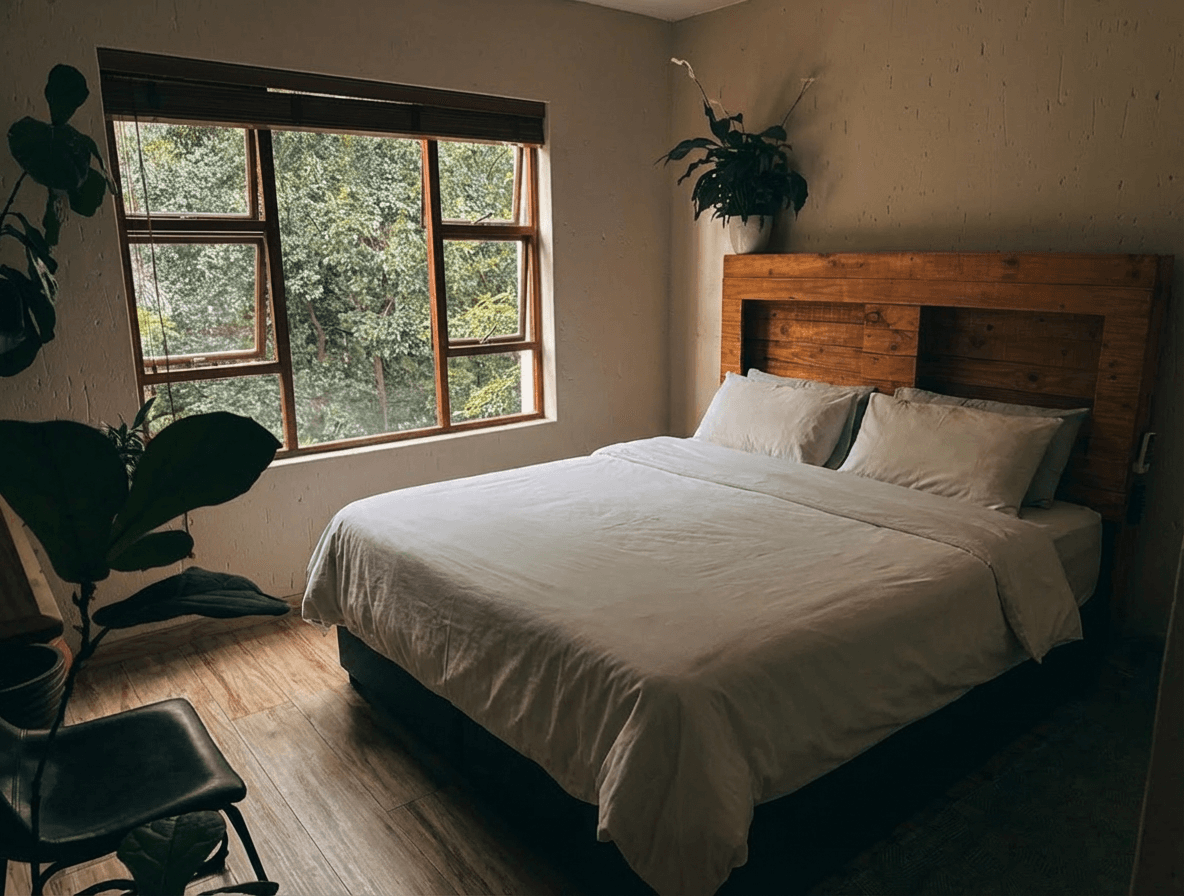
Bedroom Basics
Bedrooms need to feel restful and spacious. The bed is the dominant feature and needs to look its best:
- The bed is everything. Clean, wrinkle-free bedding in white or neutral tones. If the homeowner's bedding is dated or busy, a $30 white duvet cover transforms the room. Make the bed tightly, tuck edges, and add 2-4 accent pillows.
- Nightstand symmetry. Matching lamps on matching nightstands is the ideal. If only one nightstand exists, stage it simply with a lamp and one small item.
- Remove area rugs unless they are high-quality and complement the room. Worn or patterned rugs distract from the space itself.
- Open the curtains fully. Natural light makes bedrooms feel larger and more inviting, which is why bright and airy photography works so well for bedroom shots.
Fresh Flowers: Maximum Impact for Minimum Cost
If there is one single staging purchase that delivers the best return on investment, it is fresh flowers. A $10-15 bouquet from the grocery store, split into 2-3 small arrangements, can stage the most important rooms in the house.
What Works Best
- White flowers are the safest choice. They complement any color scheme and photograph cleanly.
- Green arrangements (eucalyptus, ferns, simple greenery) work in modern and minimalist homes.
- Avoid bright reds, oranges, and pinks unless they intentionally complement the room's color scheme. Bold flower colors can become the focal point of the image rather than the room itself.
Placement Strategy
- Entry table or console: Welcoming first impression
- Kitchen counter or island: Life and freshness
- Dining table center: Suggests meals and gathering
- Master bathroom counter: Spa-like detail
- Living room coffee table or console: Elegance
A single grocery store bouquet, divided and distributed strategically, gives the impression of a much more thoroughly staged home.
Common Over-Staging Mistakes
Budget staging can go wrong when you add too much or choose the wrong items. Less is always more in real estate photography, and the line between "nicely staged" and "cluttered with decor" is thinner than you might think.
Over-Staging Costs You
Over-staging is worse than no staging at all. A room stuffed with decorative items, themed accessories, and color-coordinated everything looks like a store display, not a home. Buyers become distracted by the staging rather than seeing the room itself. The camera is less forgiving than the human eye -- items that look fine in person can read as clutter in a wide-angle photo. When in doubt, remove one more thing.
Mistakes to Avoid
- Too many throw pillows. Five is the maximum for a sofa. Seven pillows piled on a bed make it look impossible to actually sleep in.
- Themed staging. Seashells in the bathroom, wine-themed decor in the kitchen, "Live Laugh Love" signs anywhere. Themes narrow the appeal rather than broadening it.
- Scented items visible. Air freshener plug-ins, scented candle jars with branded labels, and reed diffusers are utilitarian items that should not be visible in photos.
- Personal photos replaced with stock photos. Buyers can tell when the family photos have been replaced with generic prints from a big-box store. It is better to remove photos entirely than to replace them with obviously staged alternatives.
- Mismatched styles. A modern vase on a traditional console next to a farmhouse sign creates visual confusion. Keep your staging items within the home's existing style.
- Staging rooms the camera won't see. If a room is not going to be photographed, do not waste time staging it. Focus your limited budget and effort on the rooms that will appear in the listing photos.
How Post-Processing Amplifies Basic Staging
Here is where budget staging becomes genuinely powerful: when you combine even basic physical staging with AI-powered photo editing, the results can approach professionally staged quality.
What Editing Can Do for Staged Rooms
Post-processing cannot add furniture or decor that is not there, but it can dramatically enhance the presentation of what you have staged:
- Brightness and light quality. AI editing can make a dimly lit staged room feel bright and airy, enhancing the warmth that your staging items create. A Twilight preset can transform a dark living room with nice staging into a magazine-worthy image.
- Color enhancement. The green apples on the counter, the white towels in the bathroom, the fresh flowers on the table -- post-processing makes these staging elements pop with vibrant, true-to-life color.
- Window view enhancement. Budget staging focuses on the interior, but the view through the windows affects the overall image quality. AI editing can balance interior and exterior exposure so that your staged room looks great AND the view through the windows is visible.
- Exterior context. If you have staged the interior beautifully but the exterior photo was taken on an overcast day, AI sky replacement ensures the first image buyers see matches the quality of the interior staging work.
The Multiplier Effect
Think of post-processing as a multiplier for your staging efforts. If you do no staging, editing can only improve technical quality -- brightness, color, exposure. But if you stage well, editing amplifies everything you have done. Clean counters look cleaner. White towels look whiter. Fresh flowers look fresher. Tidy rooms look more spacious.
This multiplier effect is why the combination of budget staging plus AI editing often produces results that rival expensive professional staging with basic photography. You are optimizing both the physical preparation and the digital presentation.
The Photo-Day Staging Checklist
Print this checklist and bring it to every listing preparation. Work through it in order, and you will consistently produce photo-ready homes in under an hour.
30 Minutes Before the Photographer Arrives
- Open all blinds and curtains fully
- Turn on every light in the house (including closet lights, under-cabinet lights, and accent lights)
- Run the 30-minute declutter sweep (see protocol above)
- Place fresh towels in all bathrooms
- Make all beds with clean bedding
- Remove all trash cans from visible areas
- Close all toilet lids
- Remove pet items (bowls, beds, toys, litter boxes) from all rooms being photographed
- Hide laundry baskets and hampers
- Remove refrigerator magnets and papers
- Clear kitchen counters completely
15 Minutes Before the Photographer Arrives
- Place staging items: cutting board, fruit bowl, and plant in kitchen
- Set bathroom counter trays with candle and small plant
- Arrange living room pillows and throw blankets
- Place fresh flower arrangements in key rooms
- Do a final walk-through from the front door through each room
- Check every surface for items you missed
- Look at each room from the doorway -- this is approximately the camera angle
- Verify no personal items are visible (mail with names, prescription bottles, personal photos you meant to remove)
Just Before the Shoot
- Turn off all ceiling fans (they blur in photos)
- Close all interior doors except the ones being photographed through
- Remove your own personal items (purse, phone, keys, water bottle) from all surfaces
- Check the front yard for trash cans, garden hoses, and toys
- Park cars away from the front of the house for exterior photos
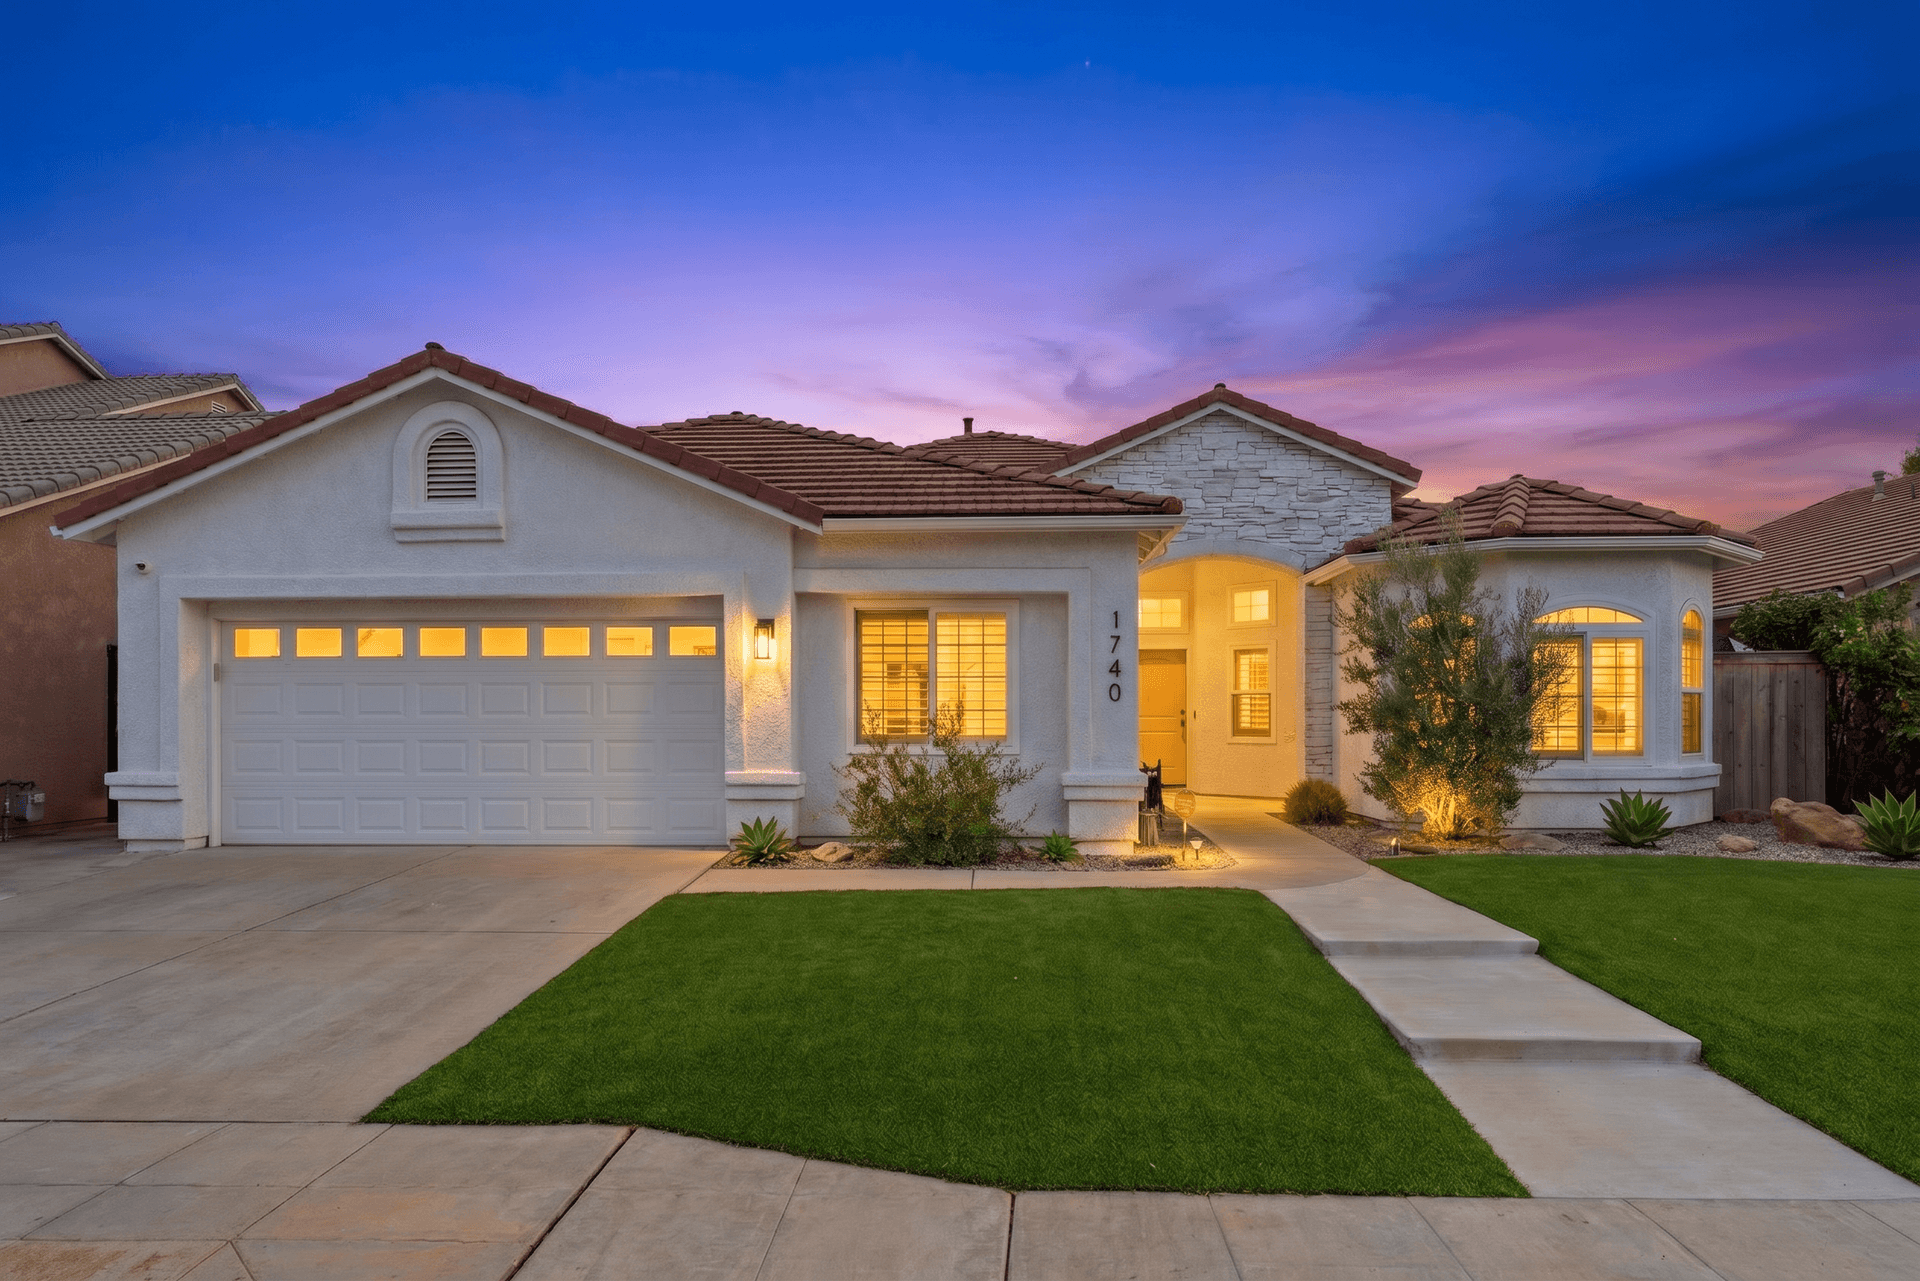
Outdoor Spaces on a Budget
Do not forget the exterior and outdoor living areas. Buyers pay close attention to patios, decks, porches, and yards in listing photos, and these spaces benefit from simple staging just as much as interiors.
Front Porch and Entry
- A clean doormat. Replace any worn or branded mats with a simple, clean one. A coir or neutral-tone mat costs under $15 and frames the front door nicely.
- Potted plants flanking the door. Two matching planters with simple greenery create a welcoming symmetry. Basic terra cotta pots with seasonal flowers cost $10-15 each.
- Sweep and clear. Remove all packages, recycling bins, garden hoses, and kids' toys. The front entry should look clean and intentional.
Patio and Deck
- Arrange existing furniture. Pull outdoor furniture into a conversational grouping rather than leaving it pushed against walls. Add a folded outdoor throw or a small plant to the table.
- Remove grills from the primary photo angle. Unless the grill is high-end and complements the space, move it out of the hero shot angle.
- Power wash if possible. A pressure-washed deck or patio looks dramatically better in photos. If power washing is not an option, at least sweep thoroughly and rinse with a hose.
When to Invest in Professional Staging
Budget staging is effective for the majority of listings, but there are situations where professional staging delivers a return that justifies the cost:
- Vacant properties. Empty rooms are extremely difficult to stage on a budget. A few accessories on counters cannot compensate for the complete absence of furniture. Vacant homes priced above $350,000 typically benefit from at least partial professional staging.
- Luxury listings. Homes priced significantly above the area median need staging that matches buyer expectations. Budget staging in a $2 million home looks exactly like what it is.
- Homes that have been on the market too long. If a listing has been active for 60+ days with poor showing traffic, restaging and rephotographing can generate renewed interest. This is often worth the professional staging investment.
- Dated or awkward layouts. Some homes have floor plans or decor that confuse buyers. Professional stagers excel at showing buyers how a space functions, which is beyond what budget staging can accomplish.
For Airbnb and short-term rental properties, budget staging is often more appropriate than professional staging because the goal is to communicate a comfortable, authentic stay rather than a magazine-perfect showroom.
The Bottom Line
Staging for real estate photography does not require a professional stager or a large budget. A systematic declutter, a few well-chosen accessories, and strategic use of items already in the home can transform listing photos from amateur to professional.
The 30-minute declutter sweep alone -- costing nothing but time -- produces a visible improvement in every room. Add a $50 per-room staging kit, and you have the tools to stage the most important rooms in any listing for under $200 total.
When you combine this physical staging work with AI-powered photo editing through Twilight, the results are remarkable. Budget staging provides the physical foundation -- clean surfaces, intentional accessories, visual harmony -- and post-processing amplifies every element to its best possible presentation.
Start with the declutter. Add the essentials. Let the editing tools do the rest. Your listings will look better, sell faster, and cost a fraction of what professional staging demands.
Related Articles
AI Decluttering for Real Estate Photos: Remove Clutter in Seconds
Learn how AI decluttering transforms messy, lived-in property photos into clean, show-ready images. Step-by-step guide with before and after examples.
How to Write AI Prompts for Real Estate Photo Editing: A Practical Guide
The exact prompt patterns that produce reliable, professional edits for listing photos. Templates for day-to-dusk, sky replacement, decluttering, exposure correction, and more.
Photography for Unique Airbnb Properties: Treehouses, Tiny Homes, Boats, and Beyond
Master the art of photographing unique Airbnb properties including treehouses, tiny homes, boats, yurts, and glamping sites. Learn small-space techniques, outdoor photography tips, and how to capture the experience guests are booking.