Starting a Real Estate Photography Business in 2026: The Complete Guide
Everything you need to know about launching a profitable real estate photography business. From equipment and pricing to finding clients and scaling with AI editing tools.
Real estate photography is one of the most accessible and profitable niches in professional photography. The barrier to entry is lower than wedding or commercial photography, the demand is steady year-round, and the business model scales well once you establish a client base. In 2026, with AI editing tools dramatically reducing post-processing time and costs, the economics of a real estate photography business are more attractive than ever.
The National Association of Realtors reports that 97% of home buyers use the internet in their home search, and listing photos are the number one factor influencing which properties they click on. Yet a surprising number of agents still rely on phone photos or mediocre photography services. This gap between demand and quality supply represents a genuine business opportunity.
This guide covers everything you need to launch and grow a real estate photography business, from choosing your first camera to scaling operations with a team and AI-powered workflows.
The Market Opportunity
Before investing in equipment and marketing, understand the market you are entering.
Market Size and Growth
The real estate photography market in the United States is valued at approximately $1.5 billion annually and growing at 5-7% per year. This growth is driven by several factors: increasing agent adoption of professional photography, rising listing photo quality expectations from buyers, and the expansion of services beyond still photography into video, drone, and 3D tours.
Who Are Your Customers?
Your primary clients will be:
- Real estate agents who list multiple properties per month (your bread and butter)
- Real estate teams and brokerages who want consistent quality across all their listings
- Property managers who need photos for rental listings
- Home builders and developers who photograph model homes and new construction
- Short-term rental hosts who need professional photos for platforms like Airbnb
Agents are by far the largest customer segment. A single productive agent may list 2-5 properties per month, each needing 25-40 photos. Securing even 5-10 regular agent clients creates a sustainable, recurring revenue stream.
Revenue Potential
A solo real estate photographer in a mid-size market can realistically earn:
- Year 1: $30,000-$60,000 (building clientele, part-time is common)
- Year 2: $60,000-$90,000 (established client base, regular bookings)
- Year 3+: $90,000-$150,000+ (premium pricing, additional services, possible team expansion)
In major metropolitan markets (New York, Los Angeles, Miami, Chicago), experienced photographers with strong reputations regularly exceed $150,000 annually. Adding services like drone photography, video walkthroughs, and 3D tours significantly increases per-shoot revenue.
Essential Equipment
Your equipment choices directly affect your photo quality, efficiency, and the impression you make on clients. Here is what you need at two investment levels.
Equipment Comparison: Budget vs Professional Tier
| Equipment | Budget Tier | Est. Cost | Professional Tier | Est. Cost |
|---|---|---|---|---|
| Camera body | Sony a6400 or Canon R50 | $900-$1,000 | Sony a7 IV or Canon R6 Mark II | $2,000-$2,500 |
| Wide-angle lens | Sigma 16mm f/1.4 (APS-C) | $350 | Sony 16-35mm f/2.8 GM or Canon RF 15-35mm f/2.8L | $2,000-$2,200 |
| Tripod | Manfrotto Compact Advanced | $100 | Manfrotto 190X with ball head | $300 |
| Flash | Godox TT685 II | $110 | Godox AD200Pro (x2) | $600 |
| Light stands | Basic stands (x2) | $50 | C-stands with boom arms (x2) | $200 |
| Memory cards | SanDisk Extreme 128GB (x2) | $40 | SanDisk Extreme Pro 128GB (x3) | $90 |
| Camera bag | Lowepro Adventura BP 150 | $50 | Peak Design Everyday Backpack 30L | $280 |
| Editing software | Twilight + Lightroom | $40/mo | Twilight + Lightroom + Photoshop | $50/mo |
| Total startup | ~$1,640 + $40/mo | ~$8,170 + $50/mo |
Camera Body
For real estate photography, you need a camera with good dynamic range (the ability to capture detail in both bright windows and dark corners), reliable autofocus, and compatibility with wide-angle lenses. Full-frame sensors provide better dynamic range and low-light performance, but modern APS-C cameras produce excellent results for real estate work.
The budget options (Sony a6400 or Canon R50) are more than adequate for starting out. Many working professionals still use APS-C bodies. Upgrade to full-frame when your revenue justifies the investment and you need the absolute best image quality.
Wide-Angle Lens
This is the single most important piece of equipment for real estate photography. A wide-angle lens (equivalent to 16-24mm on full-frame) captures entire rooms from a single position, making spaces look open and inviting. Invest in the best wide-angle lens you can afford --- it makes more difference than the camera body.
Avoid ultra-wide lenses below 14mm equivalent. While they capture more of a room, the extreme distortion makes walls curve, straight lines bend, and rooms look unnatural. The 16-20mm range is the sweet spot for interiors.
Lighting Equipment
Natural light alone is rarely sufficient for professional real estate photography. Off-camera flash allows you to balance the exposure between bright windows and dark interiors, fill in shadows, and create the clean, bright look that agents and buyers expect.
Start with a single speedlight on a light stand, bounced off the ceiling. This simple setup dramatically improves interior lighting with minimal equipment and setup time. As you advance, multiple flashes placed strategically around a room create the polished look that distinguishes premium photography services.
Build Your Portfolio Before Buying Pro Gear
Start with budget equipment and upgrade as your business grows. Many successful real estate photographers shot their first 100 listings with an entry-level camera and a single lens. Your portfolio, relationships, and reputation matter far more than your gear list. No agent has ever asked what camera body you use --- they only care about the final photos.
Building Your Portfolio
You need a portfolio before you have paying clients, and you need paying clients to build a portfolio. Here is how to break the cycle.
The Free Shoot Strategy
Approach 3-5 agents in your area and offer to photograph one listing each for free. Be upfront about why: you are building your real estate photography portfolio and want to provide them with professional images they can use immediately.
This approach works because:
- Agents always have listings that need photos
- They risk nothing by saying yes
- If your photos are good, they have a strong incentive to hire you for future listings
- You get real-world experience shooting actual properties under real conditions
What to Include in Your Portfolio
Your portfolio should demonstrate range and consistency:
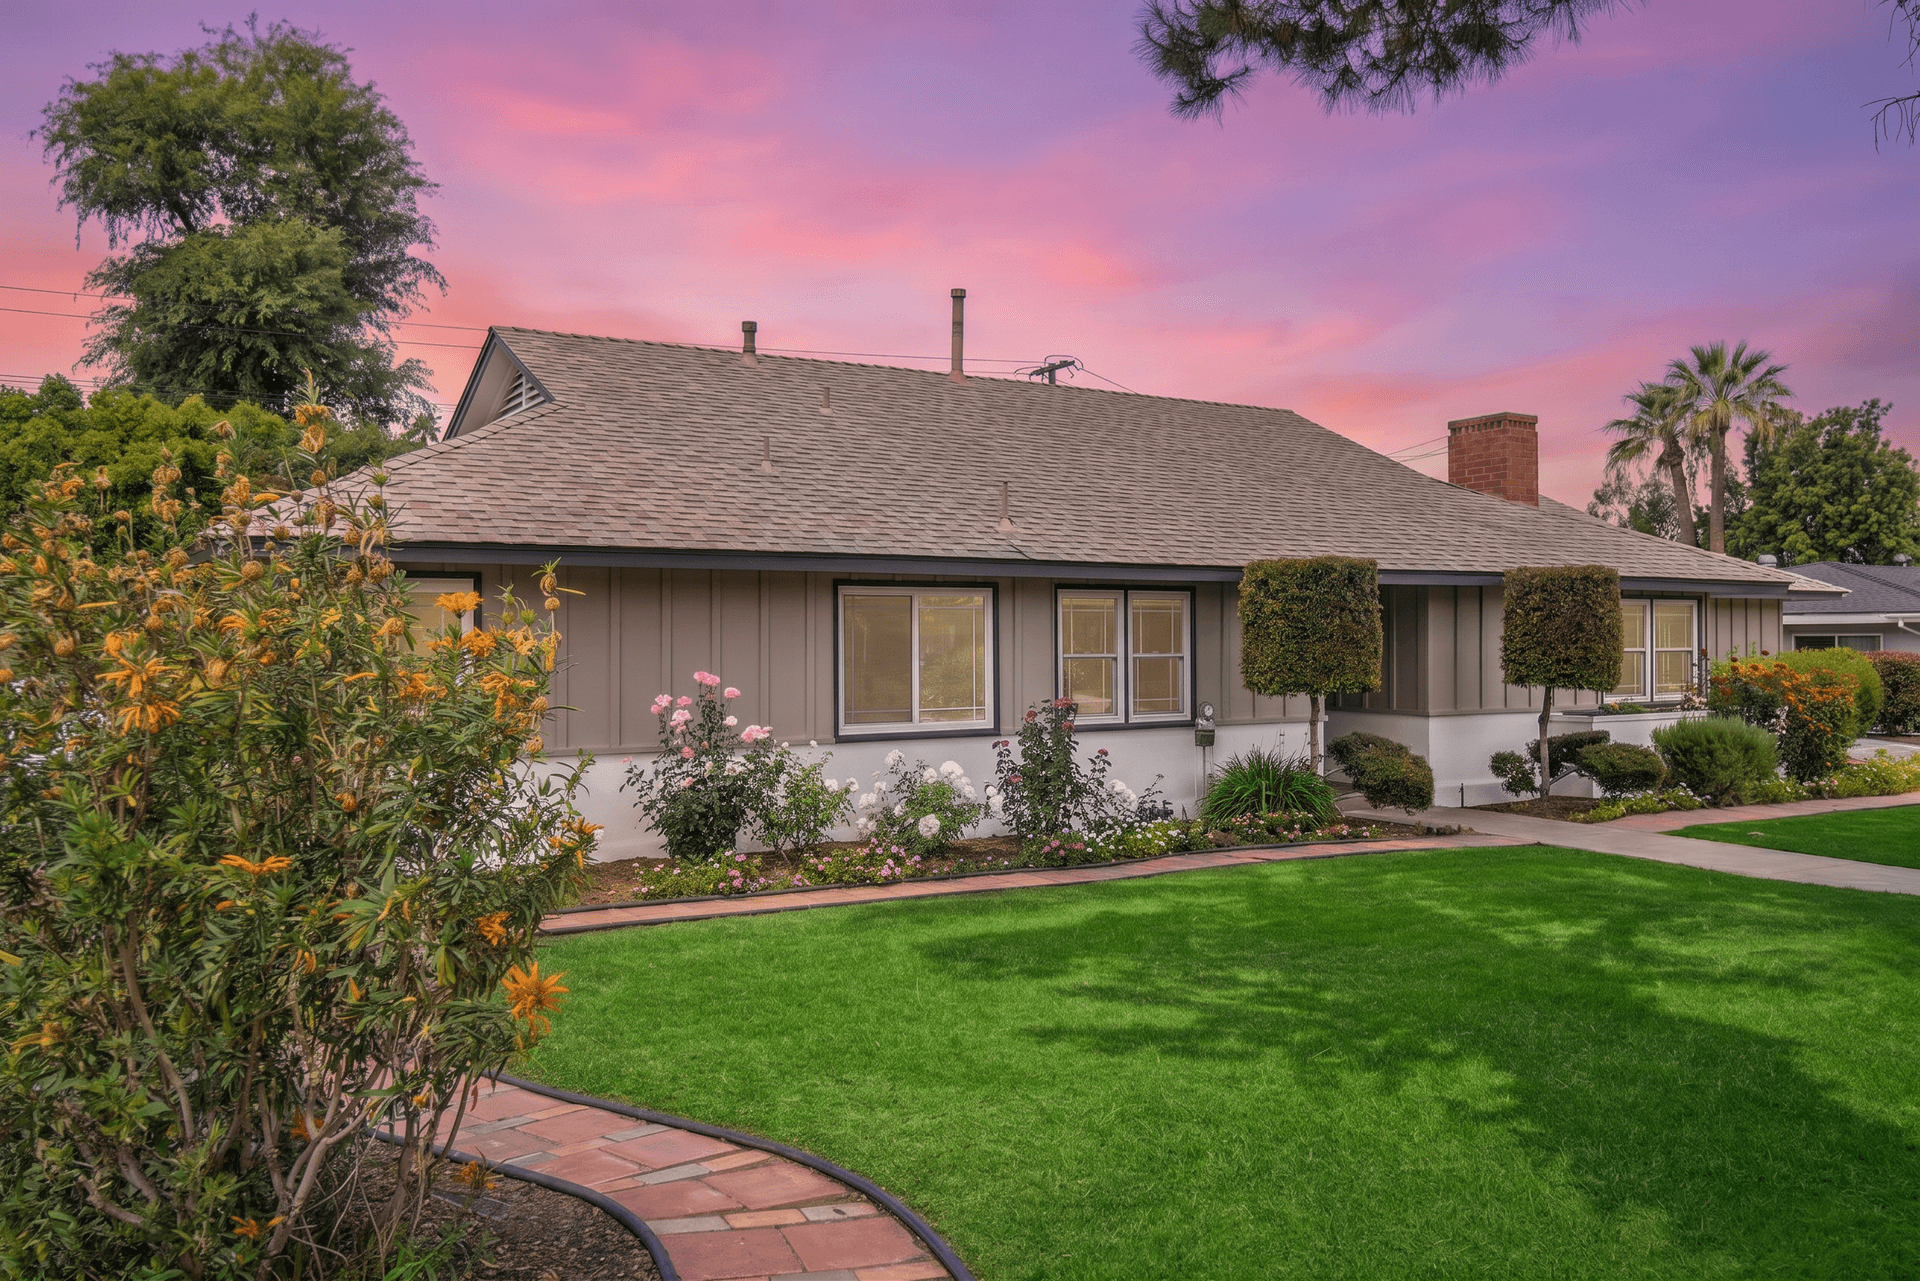
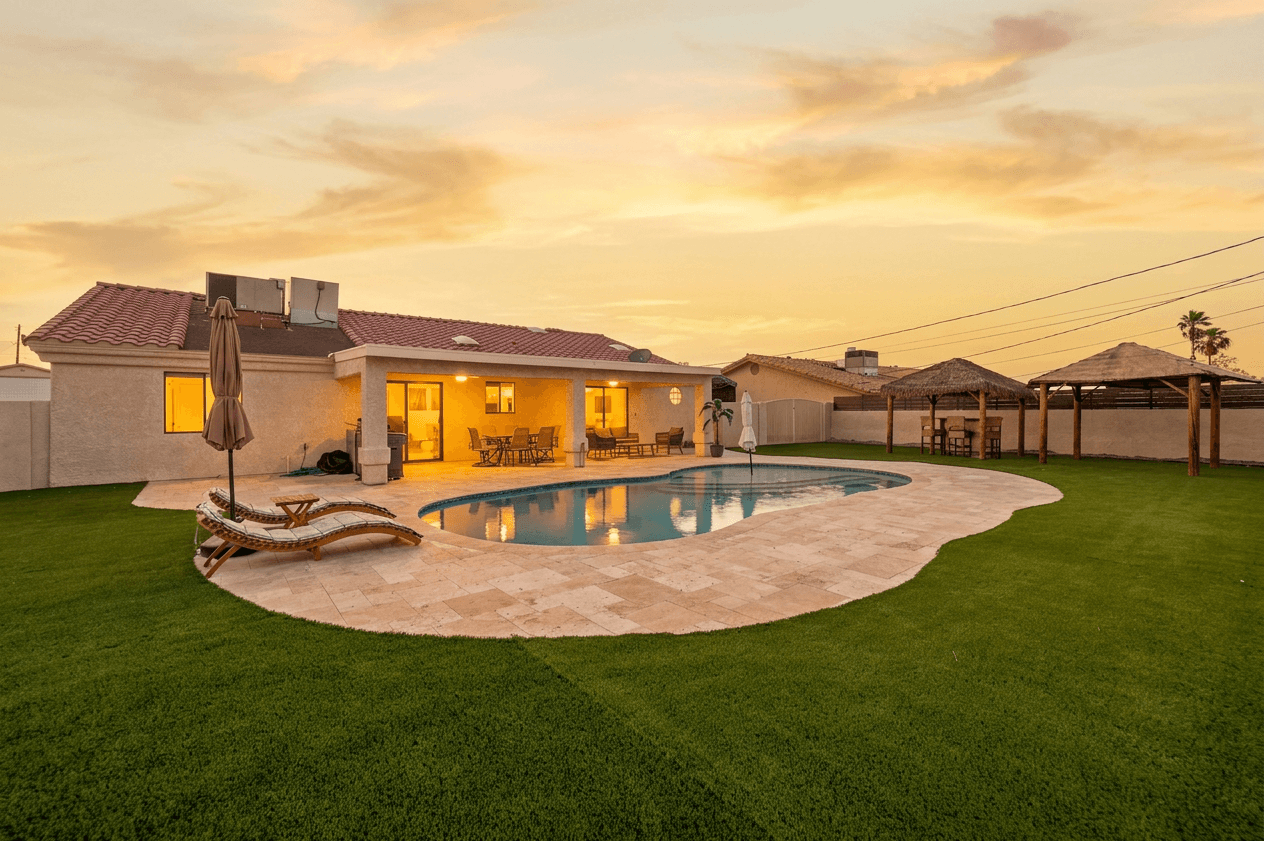
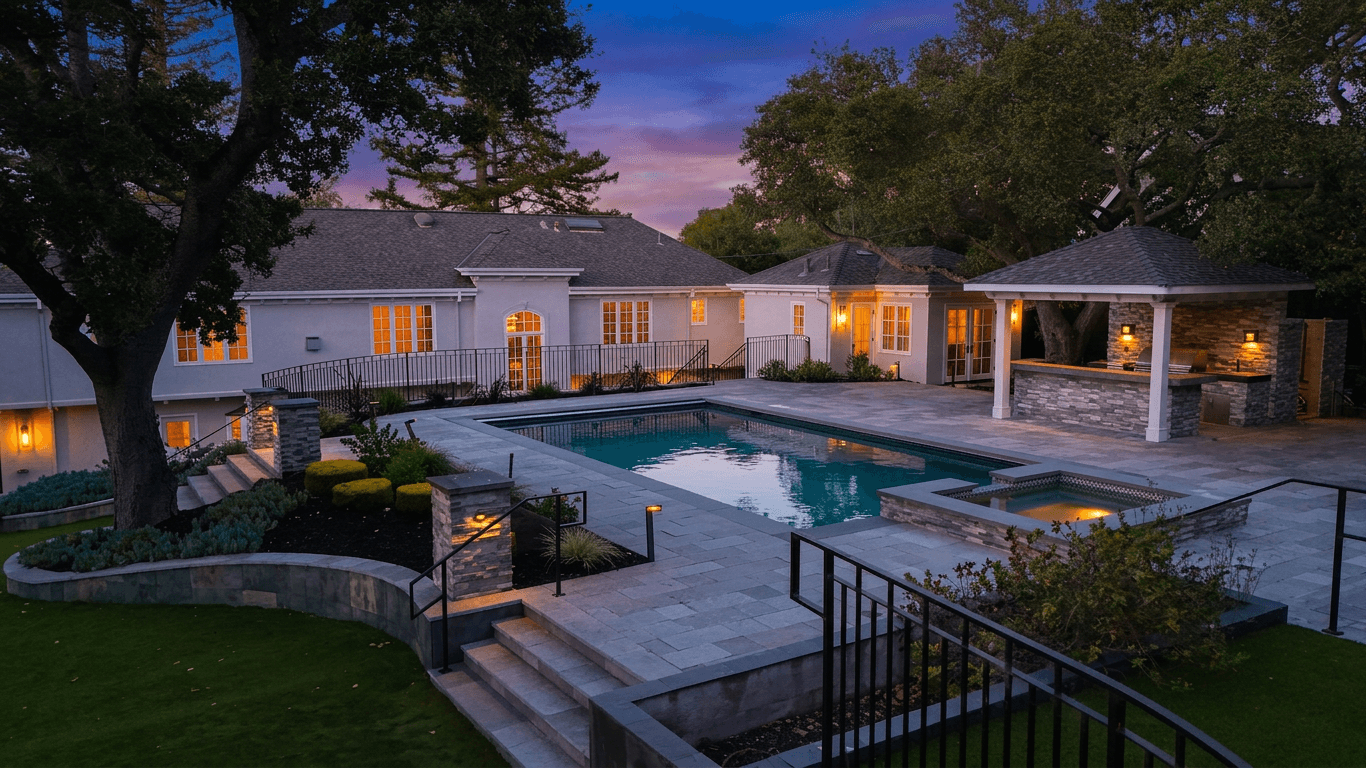
- Exterior shots in different lighting conditions (daylight, twilight, overcast with sky replacement)
- Interior wide-angle shots showing kitchens, living rooms, bedrooms, and bathrooms
- Detail shots that showcase unique features (fireplaces, built-ins, luxury finishes)
- Before/after comparisons showing raw vs. edited versions (this demonstrates your full skill set)
- Different property types if possible (single-family, condo, luxury, new construction)
Where to Display Your Portfolio
- Your own website --- a simple portfolio site using Squarespace, Wix, or WordPress costs under $200/year and is essential
- Instagram --- the visual format is perfect for real estate photography and many agents discover photographers here
- Google Business Profile --- helps agents find you through local search
- Zillow, Realtor.com, and local MLS forums --- some allow photographer listings or directory entries
Pricing Your Services
Pricing is where many new photographers struggle. Charge too little and you cannot sustain the business. Charge too much before you have the portfolio to back it up and you lose potential clients.
Pricing Models
There are three common pricing approaches in real estate photography:
Per-property flat rate: The most common model. You charge a fixed price based on property size or photo count. Example: $150 for up to 25 photos, $200 for up to 40 photos, $300 for luxury properties.
Per-image pricing: Less common but used by some photographers who offer different service levels. Example: $5-$10 per delivered image.
Subscription/retainer: For agents who list frequently. Example: $500/month for up to 4 shoots. This provides predictable income and locks in client relationships.
Pricing Benchmarks by Market
| Market Size | Basic Package (25 photos) | Standard Package (40 photos + twilight) | Premium Package (photos + video + drone) |
|---|---|---|---|
| Small market | $100-$150 | $175-$250 | $350-$500 |
| Mid-size market | $150-$200 | $250-$350 | $500-$800 |
| Major metro | $200-$300 | $350-$500 | $800-$1,500 |
These are delivered-photo prices including editing. Your pricing should reflect the total value of the final product, not just your time on-site.
The Value Conversation
When agents push back on pricing, reframe the conversation around value. Professional listing photos have been shown to sell homes faster and for higher prices. A $200 photography investment on a $400,000 listing that sells one week faster saves the seller a mortgage payment ($2,000+) and gets the agent their commission sooner. The ROI is undeniable.
For deeper strategies on structuring your pricing, see our real estate photography pricing guide.
Finding and Retaining Agent Clients
Your business lives or dies based on your ability to attract and keep real estate agent clients.
Finding Your First Clients
Direct outreach: Identify agents in your area who are actively listing properties. Look at their current listing photos. If the photos are mediocre, that agent is a prime prospect. Reach out with a brief, professional message offering a free or discounted first shoot.
Open house visits: Attend open houses as a visitor and introduce yourself to the listing agent. Bring business cards and a tablet with your portfolio. This in-person approach is highly effective because agents can see your work immediately.
Social media presence: Post your best work consistently on Instagram and tag the listing agents. When agents see their properties looking stunning on social media, they notice. Other agents in their network see it too.
Referrals from agents: Once you have a few happy clients, ask for referrals to other agents in their brokerage. Agent-to-agent referrals are the highest-converting lead source in this business.
Real estate office presentations: Contact managing brokers and offer to do a brief presentation at their next team meeting. Show before/after examples, explain your process, and offer a group discount for agents at that brokerage.
Retaining Clients Long-Term
Acquiring a new client costs 5-10 times more than retaining an existing one. Focus on retention through:
- Consistency: Deliver the same high quality every time. One bad shoot can lose a client permanently.
- Speed: Agents need listing photos fast. Aim for same-day or next-day delivery. This is where AI editing tools become a massive competitive advantage.
- Communication: Confirm appointments, send delivery estimates, and follow up after each job. Be the easiest vendor in their workflow to work with.
- Reliability: Show up on time, every time. In real estate, schedules are tight and properties may have limited access windows.
- Ongoing value: Share tips, offer seasonal discounts, and congratulate agents on their sales. Build the relationship beyond the transaction.
Scaling With AI Editing
Post-processing is traditionally the biggest bottleneck in a real estate photography business. A 30-photo shoot takes 30-60 minutes to capture but 2-4 hours to edit in Lightroom or Photoshop. This means your editing time, not your shooting time, caps your capacity.
The AI Editing Advantage
AI-powered editing tools like Twilight reduce post-processing time from hours to minutes. Upload a full set of photos, apply a consistent editing style, and receive professionally edited results in seconds per image.
The business impact is transformative:
- Shoot more in a day. When editing takes 15 minutes instead of 3 hours, you can add 1-2 additional shoots per day.
- Deliver faster. Same-day delivery becomes easy when editing is not the bottleneck. This delights agents and differentiates you from competitors.
- Maintain consistency. AI applies the same standard to every image, eliminating the quality variation that creeps in during long manual editing sessions.
- Offer services you could not before. Twilight conversions and sky replacements that would require advanced Photoshop skills and 30+ minutes per image can now be delivered as standard offerings.
A Modern Photographer's Workflow
Here is how successful real estate photographers are integrating AI into their daily workflow in 2026:
- Shoot the property (30-60 minutes on-site)
- Cull in Lightroom --- select the best 25-40 shots (15 minutes)
- Basic RAW adjustments in Lightroom --- lens correction, straightening (10 minutes)
- Export JPEGs and upload to Twilight for AI enhancement (5 minutes)
- Review AI-edited results, request any re-edits (5 minutes)
- Deliver to the agent via your delivery platform (2 minutes)
Total post-processing time: approximately 35 minutes instead of 2-4 hours. Over the course of a year with 300+ shoots, that time savings is measured in hundreds of hours --- hours you can spend shooting more properties or growing your business.
For more workflow optimization strategies, see our guide on real estate photography workflow efficiency.
Legal and Insurance Basics
Running a legitimate photography business requires attention to legal and insurance fundamentals. Skipping these steps saves money in the short term but creates significant risk.
Business Structure
Register your business as an LLC (Limited Liability Company) in your state. This separates your personal assets from business liabilities and provides tax flexibility. Filing typically costs $50-$500 depending on your state. Consult a local accountant or use an online filing service like LegalZoom or your state's Secretary of State website.
Insurance
You need two types of insurance at minimum:
General liability insurance: Covers property damage and bodily injury claims if something goes wrong during a shoot (you trip and damage a fixture, someone trips over your light stand). Typical cost: $300-$500 per year for a solo photographer.
Equipment insurance: Covers your camera gear against theft, damage, and accidental breakage. Given that your equipment represents a $2,000-$10,000 investment, this is essential. Typical cost: $150-$300 per year.
Drone Photography Requires Additional Licensing
If you plan to offer aerial and drone photography, you need an FAA Part 107 Remote Pilot Certificate. This requires passing a written exam administered at FAA-approved testing centers. You will also need drone-specific liability insurance, which is separate from your general photography insurance. Drone services command premium pricing ($100-$200+ per shoot as an add-on), making the certification investment worthwhile. For more on drone photography, see our aerial photography guide.
Contracts
Use a simple service agreement for every shoot that covers:
- Scope of work: Number of photos, services included, delivery timeline
- Pricing and payment terms: Total cost, when payment is due, accepted methods
- Usage rights: Who can use the photos and for what purposes (MLS, social media, print, etc.)
- Cancellation policy: What happens if the shoot is canceled with less than 24 hours notice
- Liability limitations: Your maximum liability in case of issues
A real estate photography contract does not need to be complicated. A one-page agreement that both parties sign (or digitally agree to) protects everyone and sets professional expectations.
Copyright and Usage Rights
By default, the photographer owns the copyright to the images. However, real estate photography contracts typically grant the agent a broad usage license covering MLS uploads, website use, social media, and print marketing. Clarify this in your contract to avoid disputes.
Most real estate photographers provide a perpetual, non-exclusive license for real estate marketing purposes. This means the agent can use the photos indefinitely for that specific listing, but the photographer retains the right to use the images in their own portfolio and marketing.
The Competitive Landscape
Understanding your competition helps you find your positioning and avoid common strategic errors.
Who You Are Competing Against
- Other professional photographers in your market who specialize in real estate
- General photographers who occasionally do real estate work
- Agents using phone cameras who have not yet seen the value of professional photography
- National franchises like HomeJab and Virtuance that offer standardized packages
- DIY agents using AI editing who take their own photos and enhance them with tools like Twilight
Finding Your Competitive Edge
The most sustainable competitive advantages in real estate photography are:
- Turnaround speed. Deliver same-day and you eliminate the most common complaint agents have about photographers.
- Consistency. Agents want every listing to look equally professional. AI-assisted editing helps ensure this.
- Relationship depth. Be more than a vendor. Understand each agent's brand, their market position, and their client expectations.
- Service breadth. Offering photography, drone, video, and twilight in one package is more convenient than agents coordinating multiple vendors.
- Local market knowledge. Understanding which features sell homes in your specific market helps you photograph properties more effectively.
For a comparison of the editing tools that can give you an edge, see our software comparison guide.
Common Mistakes New Photographers Make
Learn from others' errors so you do not repeat them.
Mistake 1: Racing to the Bottom on Price
Competing on price is a losing strategy. There will always be someone willing to charge less. Instead, compete on quality, speed, and reliability. An agent who pays $200 for photos that generate more showings and faster sales will not switch to a $100 photographer whose quality is noticeably lower.
Mistake 2: Neglecting the Business Side
Many photographers are excellent behind the camera but terrible at running a business. Invoicing, follow-ups, scheduling, bookkeeping, and marketing are not optional --- they are half the job. Set up systems (even simple ones) from day one.
Mistake 3: Over-Investing in Equipment Too Early
You do not need a $5,000 camera and $3,000 lens to start. A $1,500 setup with good technique and AI-enhanced editing produces results that are indistinguishable from shots taken with top-tier gear. Let your revenue fund your upgrades.
Mistake 4: Ignoring Post-Processing
Some photographers pride themselves on delivering photos "straight from the camera." In real estate, this is a disadvantage. Every successful real estate photographer edits their images. The question is not whether to edit, but how efficiently.
Mistake 5: Relying on a Single Client
If one agent accounts for 50% or more of your revenue, your business is fragile. Actively diversify your client base so that losing any single client does not threaten your livelihood.
Your First 90 Days: A Launch Plan
Here is a practical timeline for launching your real estate photography business.
Weeks 1-2: Foundation
- Register your LLC and open a business bank account
- Purchase equipment (start with budget tier)
- Set up a simple portfolio website
- Create social media profiles (Instagram and Facebook minimum)
- Practice shooting interiors in your own home or a friend's property
Weeks 3-4: Portfolio Building
- Offer free shoots to 3-5 local agents
- Photograph at least 3 properties to build portfolio variety
- Edit all photos using AI tools for speed and consistency
- Get testimonials from the agents you worked with
Weeks 5-8: Client Acquisition
- Begin direct outreach to agents with weak listing photos
- Attend open houses and introduce yourself
- Post portfolio work on social media consistently
- Contact 2-3 brokerage offices about presentations
Weeks 9-12: Optimization
- Refine your pricing based on initial market feedback
- Establish your editing workflow for maximum efficiency
- Follow up with free-shoot agents for paid bookings
- Set up a simple booking and invoicing system
By the end of 90 days, you should have 3-5 paying clients and a clear trajectory toward a sustainable business.
Related Articles
How Real Estate Photographers Can Upsell Editing Services and Scale Revenue
A business guide for real estate photographers: add AI-powered editing upsells, increase per-shoot revenue, and scale without hiring editors.
Real Estate Photography Workflow: Shoot to Delivery in Under 2 Hours
The complete workflow for real estate photographers -- from pre-shoot planning through AI-assisted editing to client delivery. Save hours per listing.
Property Management Photography: Systems for Consistent Listing Quality Across Portfolios
Build scalable photography systems for property management portfolios. Covers shot list templates, staff training, photo refresh scheduling, asset management, budget allocation, and AI batch editing for consistent quality across hundreds of units.