New Construction Photography: Showcasing Builder Homes and Developments
A complete guide to photographing new construction homes and developments. Learn how to handle bare yards, construction debris, unfinished areas, and how AI editing can transform builder home photos.
New construction photography sits in a category of its own. Unlike resale homes that come with mature landscaping, lived-in warmth, and established neighborhoods, builder homes present a unique set of challenges that can make or break a listing's first impression. You are often photographing a property that is technically beautiful but visually incomplete -- surrounded by dirt lots, construction equipment, and neighboring homes still wrapped in Tyvek.
The stakes are high. Builders and developers invest millions into their projects and rely on marketing photography to sell units before the community is finished. Buyers browsing new construction listings need to see the potential of a home, not the mess of an active job site. Getting this right requires a combination of smart timing, intentional composition, and strategic post-processing.
Whether you are a real estate photographer expanding into builder work or an agent helping a developer market a new community, this guide covers everything you need to know about capturing new construction homes that sell.
Understanding the Unique Challenges
New construction photography differs from standard real estate photography in several fundamental ways. Recognizing these challenges before you arrive on site is essential to planning a successful shoot.
The Landscaping Problem
The single biggest challenge with new construction is the lack of mature landscaping. A freshly built home often sits on a bare dirt lot with a few newly planted saplings, rolls of fresh sod that have not yet taken root, and a yard that looks nothing like it will in two years. This matters because curb appeal is the number one driver of first impressions in real estate photography, and landscaping is a huge component of curb appeal.
Strategies for dealing with bare yards:
- Shoot tight on the structure. Use focal lengths and angles that minimize the amount of yard visible in the frame. Get closer to the home and shoot upward slightly to fill the frame with architecture rather than dirt.
- Use the driveway as foreground. A clean concrete driveway provides a finished-looking surface that leads the eye toward the home.
- Wait for sod installation. If the builder is installing sod, coordinate your shoot for immediately after. Even fresh sod photographs dramatically better than bare dirt.
- Leverage AI sky replacement. When the ground is not cooperating, make sure the sky is spectacular. A brilliant blue sky with dramatic clouds draws the viewer's attention upward and away from the unfinished yard. Tools like Twilight make sky replacement a one-click operation.
Construction Debris and Active Job Sites
Even homes that are "complete" often have remnants of construction nearby. Dumpsters, port-a-potties, material pallets, and equipment from neighboring builds are common. You may also encounter:
- Sticker residue on windows. Manufacturer stickers are often left on windows and glass doors until the final walkthrough.
- Protective coverings on countertops and floors. Builders leave protective paper or plastic on surfaces to prevent damage during final touches.
- Unfinished neighbor homes. In a development setting, the homes on either side may still be framed or under construction.
Plan to spend extra time on site clearing minor debris from the immediate vicinity of the home. Move trash cans, sweep the front porch, and remove any construction tape or signage that is not part of the permanent structure. For larger eyesores like dumpsters and neighboring construction, strategic angle selection and post-processing cropping are your best tools.
Timing Is Everything
Schedule new construction shoots for mid-week mornings when construction crews are less active. Monday and Friday tend to be the busiest days on job sites. A Tuesday or Wednesday at 8 AM often gives you a quieter site with better light and fewer trucks parked in driveways.
Timing Your Shoot Relative to Construction Progress
One of the most important decisions in new construction photography is when to shoot. Too early and the home looks unfinished. Too late and you have missed the marketing window. Builders typically need photos at several stages.
Pre-Completion Marketing Shots
Many builders begin marketing homes before they are finished. For these early shoots, focus on:
- Architectural details that are complete: rooflines, stonework, front entry features
- Interior progress that shows layout and scale: open framing can actually be compelling for buyers who want to see structural quality
- Development context shots: community signage, amenity areas, model home exteriors
These images are used on the builder's website and social media to generate interest and pre-sales. They do not need to be "final" quality, but they should convey progress and professionalism.
The Final Product Shoot
This is the primary marketing shoot and should be scheduled when:
- All interior finishes are installed (countertops, fixtures, flooring, paint)
- Protective coverings have been removed
- The home has been professionally cleaned
- Landscaping, even if minimal, is in place
- The driveway and walkways are poured and clean
If possible, schedule this shoot 2-3 days after the builder's punch list walkthrough, when all final touch-ups have been completed but before the first homeowner moves in.
Progress Documentation
Some builders also want documentation photos at key milestones -- foundation, framing, drywall, and completion. These are not glamour shots but serve as marketing content showing the building process. Consistency in angle and position for these milestone shots creates compelling before-and-after content for the builder's social media and sales materials.
Photographing Model Homes vs Spec Homes
The approach differs significantly depending on whether you are shooting a staged model home or an empty spec home.
Model Home Photography
Model homes are the builder's showpiece. They are professionally staged, often with upgraded finishes that may not be standard in other units. When photographing a model:
- Document every room thoroughly. The builder has invested heavily in staging, and these images will be used across all marketing channels for months or years.
- Highlight upgraded features. If the model has premium countertops, built-in cabinetry, or specialty lighting, give these elements dedicated detail shots.
- Capture the lifestyle. Model homes are staged to sell a lifestyle, not just a floor plan. Photograph the set dining table, the reading nook, the spa-like master bath. These vignettes help buyers imagine themselves living there.
- Shoot wide and tight. Wide shots establish room layout and flow. Tight shots showcase materials, textures, and finish quality. The builder needs both.
Spec Home Photography
Spec homes -- built on speculation without a buyer lined up -- present the challenge of photographing vacant properties. Without furniture, rooms can look smaller, proportions can feel off, and there is nothing for the viewer's eye to anchor on.
For spec homes, consider:
- Emphasizing architectural features. Without furniture to distract, let the architecture speak: window placement, ceiling height, built-in details, flooring patterns.
- Using natural light strategically. Empty rooms with great natural light photograph better than empty rooms with harsh artificial lighting. Open all blinds, turn off overhead lights, and let the windows do the work.
- Suggesting scale with context. Include doorways, windows, and built-in elements that give the viewer a sense of room size.
- Discussing virtual staging with the builder. Many builders are now opting for virtual staging of spec homes rather than paying for physical staging of every unit. This can be a valuable add-on service to offer.
Exterior Enhancement Strategies
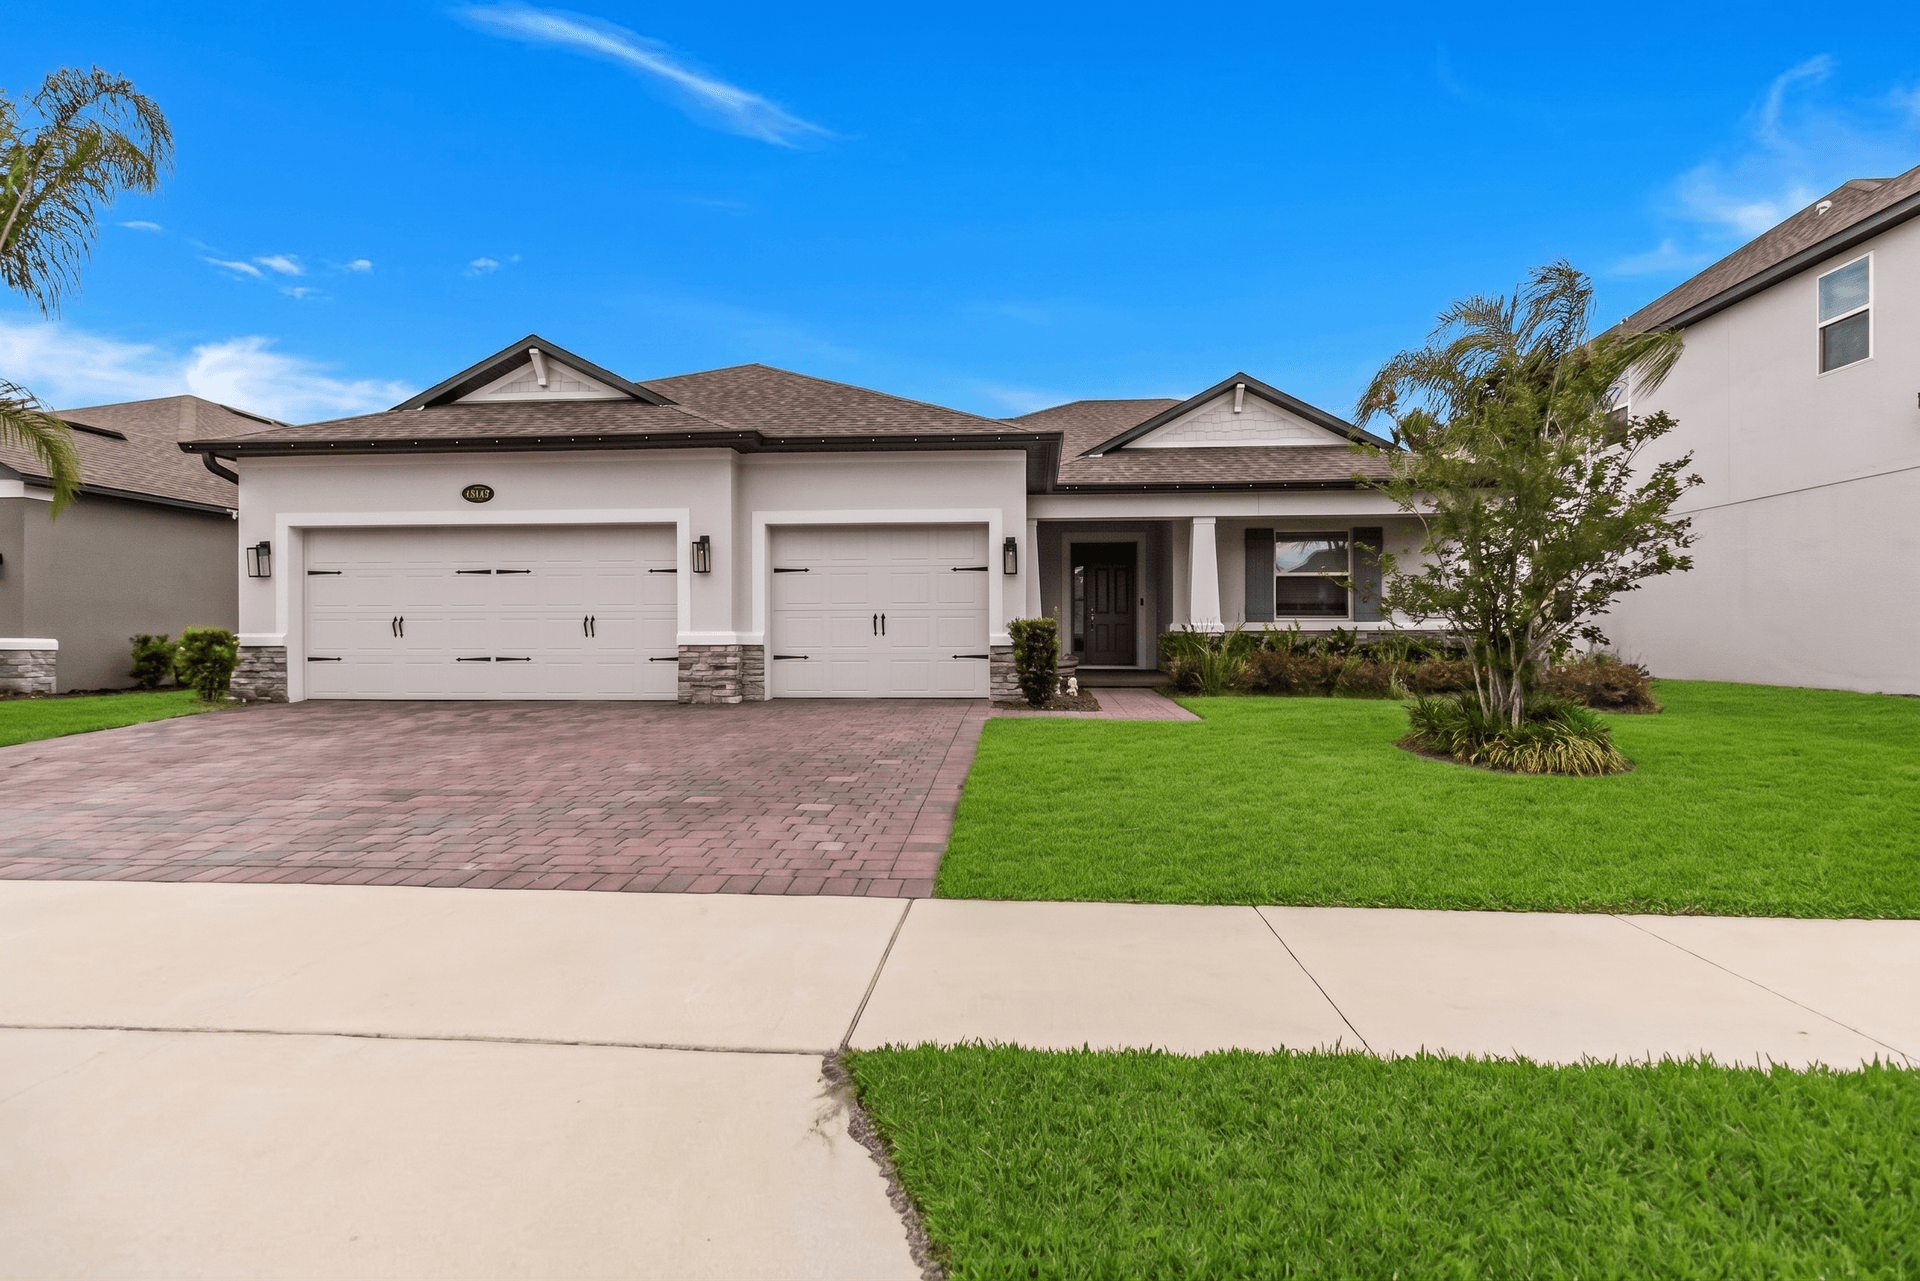
The exterior hero shot is the most important image for any new construction listing. It appears as the thumbnail on every listing portal and is the image that determines whether a buyer clicks to learn more.
Maximizing Curb Appeal Before the Landscape Matures
Since you cannot wait years for trees to grow, you need to maximize what is available:
- Shoot from the best angle. Walk the entire perimeter of the lot and find the angle that shows the most finished landscaping while minimizing bare areas. Sometimes the best angle is not straight-on from the street.
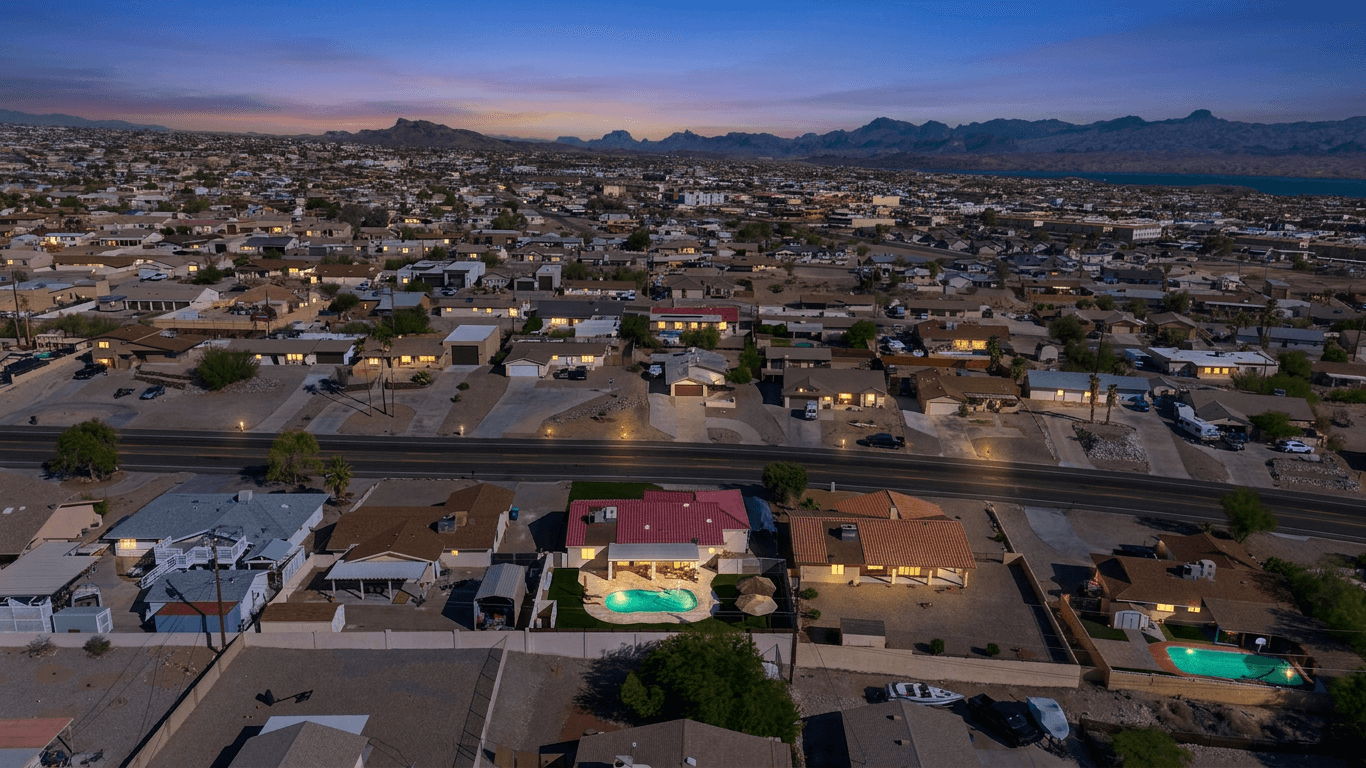
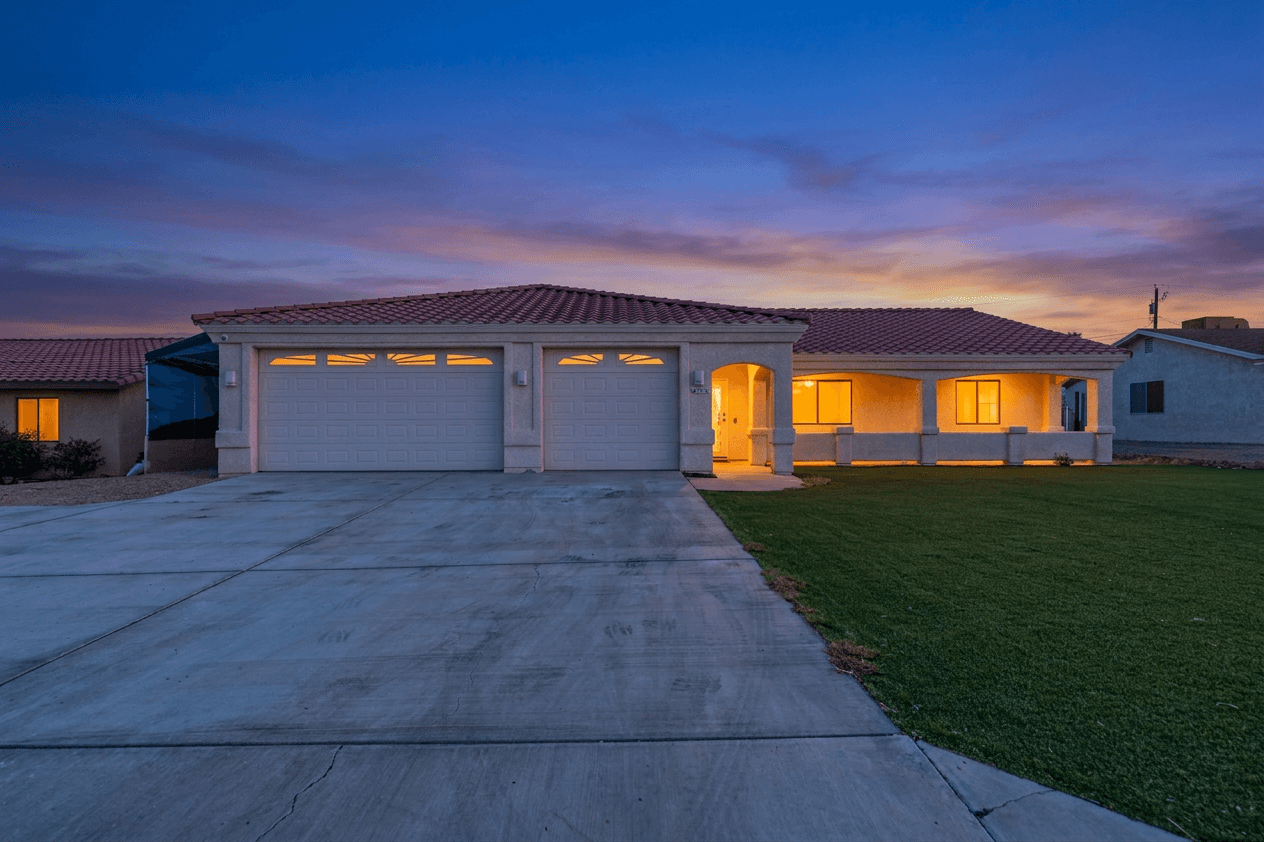
- Use the golden hour. Early morning and late afternoon light adds warmth and dimension to new construction. The warm tones of golden hour light make fresh materials like stone, brick, and siding look their best.
- Include the streetscape. If the street, sidewalks, and common areas of the development are finished, including them in the frame adds context and maturity to the image.
- Clean the driveway. New construction driveways often have mortar stains, dirt tracks, and construction residue. A quick sweep or even a bucket of water to rinse the entry makes a noticeable difference in photos.
AI-Powered Exterior Enhancement
Post-processing is where new construction exteriors are truly transformed. AI editing tools can address the most common issues in a fraction of the time manual editing would require:
- Sky replacement turns overcast construction-day skies into brilliant blue backdrops. This single edit can elevate a new construction exterior from "nice house on a gray day" to "dream home under perfect skies."
- Brightness and color correction ensures the home's materials look their best. Fresh paint, new siding, and clean windows should pop in the final image.
- Grass and landscape enhancement can subtly improve the appearance of newly planted landscaping, making fresh sod look more established and new plantings more vibrant.
Twilight's one-click presets are particularly effective for new construction exteriors because the homes themselves are in pristine condition -- they just need the surrounding environment to match.
What Builders Expect
Builders typically expect a faster turnaround than individual agents. They are marketing multiple homes simultaneously and often need photos within 24-48 hours of a shoot. Having a fast editing workflow -- whether through AI tools like Twilight or established outsourcing relationships -- is essential for builder work. Many builders also expect a higher volume of images per property (30-50 versus the standard 25 for resale listings) because they use photos across multiple marketing channels.
Interior Photography for New Construction
New construction interiors present their own set of opportunities and challenges. The finishes are pristine, the paint is fresh, and there is no wear -- but without personal touches, the spaces can feel sterile.
Highlighting Builder Features
Every builder has signature features they want prominently displayed:
- Kitchen layouts with island details, cabinet finishes, and appliance packages
- Master bathroom fixtures, tile work, and specialty features like walk-in showers or freestanding tubs
- Open floor plan connections between living, dining, and kitchen areas
- Storage solutions including walk-in closets, pantries, and garage organization systems
- Energy-efficient features like smart thermostats, tankless water heaters, and upgraded insulation (yes, photograph the mechanical room if requested)
Dealing with Empty Room Challenges
Empty new construction rooms can feel cold in photographs. To combat this:
- Shoot from doorways and corners to show maximum floor area and the relationship between spaces.
- Include window views when possible. If the home has nice sightlines, positioning yourself to include the view through windows adds depth and interest to otherwise empty rooms.
- Use vertical framing for tight spaces like bathrooms and laundry rooms where a horizontal composition would emphasize the lack of furnishings.
- Apply bright and airy editing in post-processing. Clean, bright editing makes new construction interiors feel fresh and inviting rather than stark and cold.
The White Wall Problem
New construction often features builder-grade white or off-white walls in every room. This creates a challenge for white balance and exposure. Tips for handling it:
- Expose for the walls. Slightly underexpose to maintain detail in the white walls rather than blowing them out.
- Use consistent white balance. Set a manual white balance using a gray card in the first room and maintain it throughout the shoot for consistency.
- Add warmth in post-processing. A subtle warm color grade makes white walls feel inviting rather than clinical.
Working with Builders and Developers
Building a relationship with a builder or development company can be one of the most lucrative moves in real estate photography. Unlike individual agents who need you once per listing, builders need you repeatedly for every new home they complete.
Understanding the Builder's Sales Cycle
Builders sell differently than individual sellers:
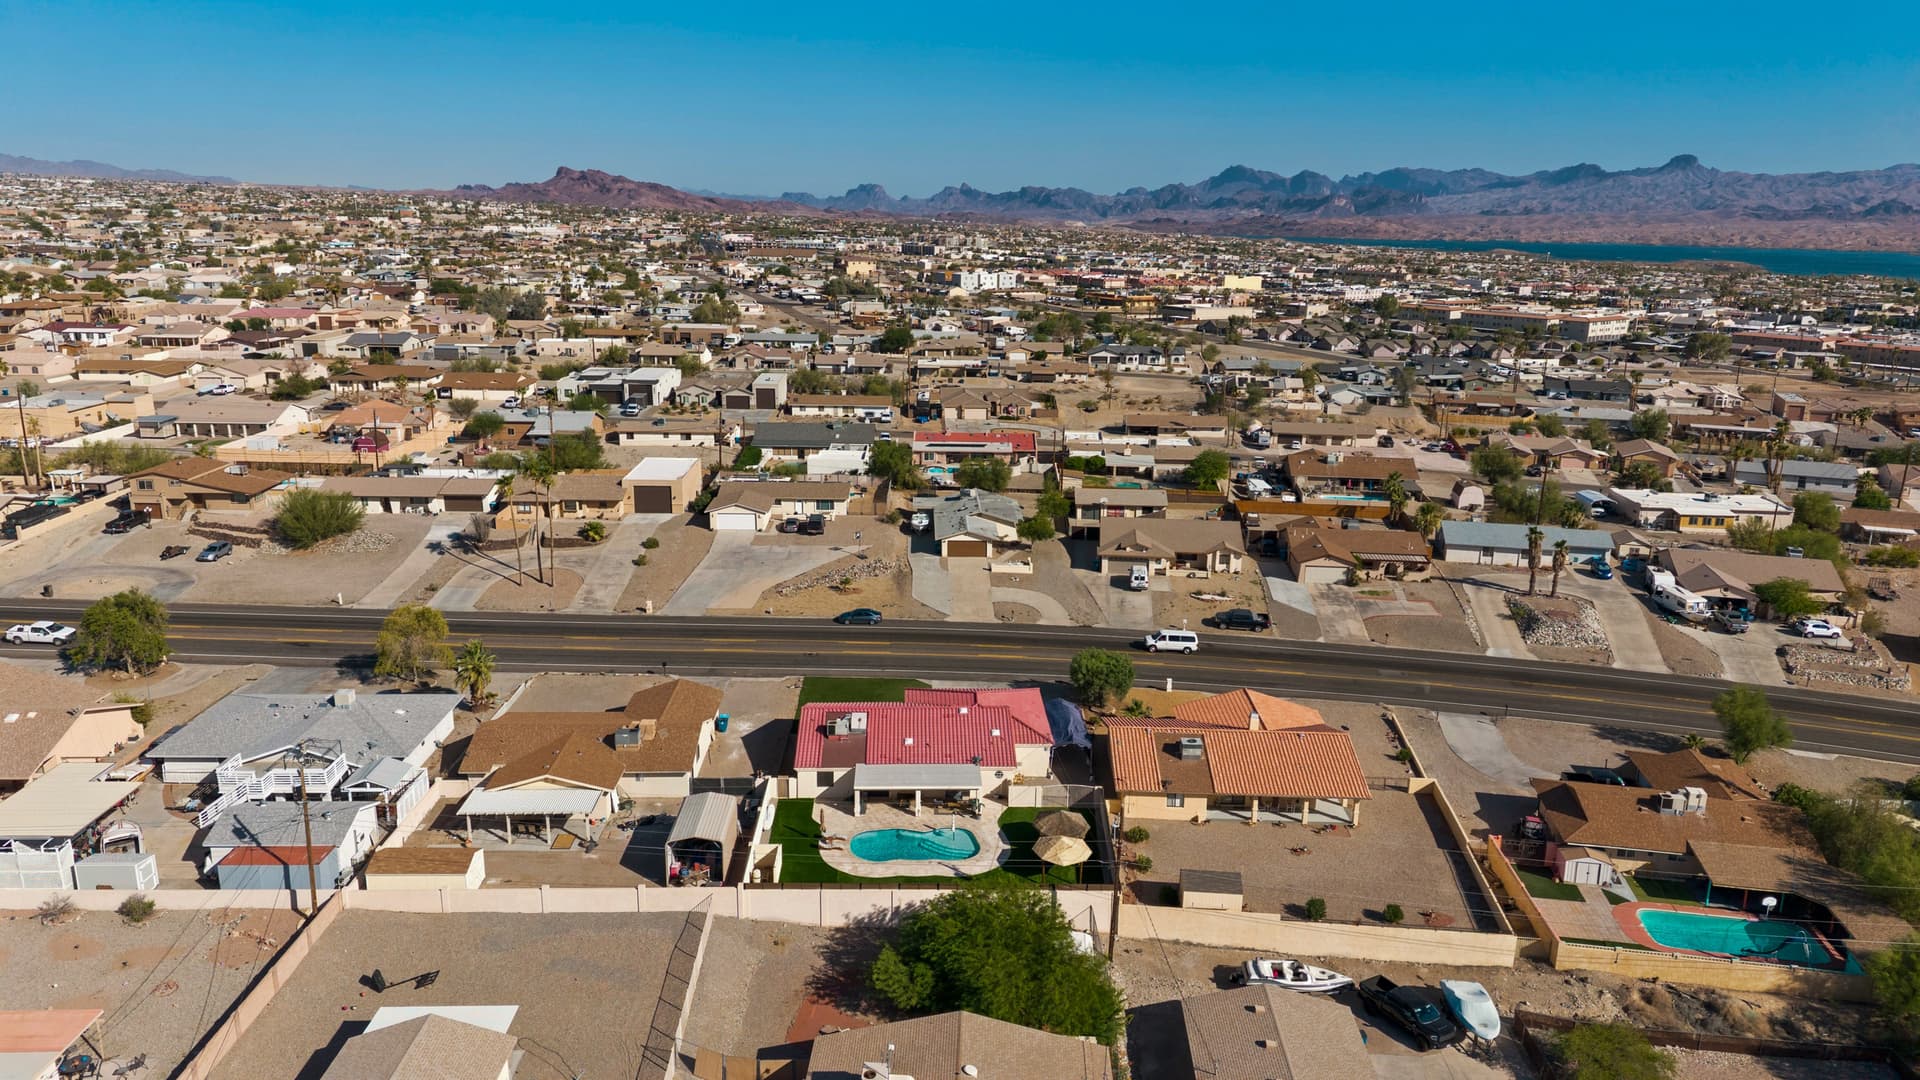
- They market communities, not just homes. You need to capture the overall development, amenities, and lifestyle -- not just individual units.
- They sell from floor plans. Your photos of the model home or first completed unit of each floor plan will be used to sell dozens of identical or similar homes.
- They have marketing teams. You will often work with a marketing director rather than an individual agent. These professionals expect reliable schedules, consistent quality, and fast turnaround.
Pricing Builder Work
Builder photography pricing typically differs from standard real estate work:
- Volume discounts are expected. If a builder needs 10 homes photographed per month, they expect a better per-home rate than a one-off shoot.
- Recurring contracts are common. Many photographers offer monthly retainer agreements for builders with consistent production schedules.
- Extended shot lists are the norm. Builders want more images per home than a typical resale listing, covering every room, feature, and selling point.
- Drone and video may be included. Developments benefit from aerial photography that shows the community layout, and builders increasingly want video walkthroughs for their websites.
Delivering Consistent Quality at Scale
When you are photographing 5-10 homes per month for the same builder, consistency becomes your most important quality metric. The builder wants every home in their marketing to look like it came from the same photographer on the same day.
This is where having a repeatable editing workflow is essential. Using Twilight's presets ensures that the color profile, brightness, and overall feel of every image matches across every home in the development. Manual editing makes consistency harder to maintain, especially when you are processing hundreds of images per month.
Building a New Construction Photography Portfolio
If you want to break into builder photography, you need portfolio images that demonstrate you understand the niche.
What Builders Want to See
- Clean architectural exteriors with strong composition and beautiful skies
- Bright, consistent interiors that showcase finishes and floor plans
- Detail shots of premium features and materials
- Community context shots including streetscapes, amenities, and signage
- Consistent editing across an entire property set
Getting Your First Builder Client
- Photograph a new community spec home and present the images to the builder's sales team. Many builders will give you access to an unsold home for a portfolio shoot if you ask.
- Network at home builder association events. Local HBA chapters host regular events where builders, developers, and vendors connect.
- Partner with agents who specialize in new construction. Some agents focus exclusively on representing builders, and they need reliable photographers.
- Offer a trial shoot at a reduced rate. Builders are cautious about switching photographers because consistency matters so much to their brand. A trial shoot reduces their risk.
Post-Processing Workflow for New Construction
An efficient editing workflow is critical for builder photography because of the volume involved. Here is a streamlined approach:
Step 1: Cull and Select
From a typical 30-50 image spec home shoot, you will deliver 30-40 final images. Cull duplicates and technically flawed shots first.
Step 2: Batch Apply Base Corrections
Apply lens correction, white balance, and exposure adjustments in batch. New construction homes within the same development often have identical lighting conditions, so batch corrections are highly effective.
Step 3: Enhance Exteriors
This is where the most dramatic improvements happen. Use Twilight to apply sky replacement, brightness enhancement, and color correction to all exterior shots. The before-and-after difference on new construction exteriors is often the most striking of any property type.
Step 4: Polish Interiors
Apply consistent brightness and color correction to interior shots. For new construction, the bright and airy preset typically produces the best results, keeping the fresh, clean feeling that buyers associate with a brand-new home.
Step 5: Detail and Feature Shots
Give feature shots individual attention. These close-ups of countertops, fixtures, and architectural details may need slightly different treatment than wide room shots.
Step 6: Quality Check and Deliver
Review the full set for consistency, verify white balance matches across all images, and deliver in the builder's required format and resolution.
Equipment Considerations for New Construction
New construction photography does not require fundamentally different gear than standard real estate work, but a few additions to your kit will make a significant difference.
Must-Have Items
- A sturdy tripod with a level. New construction features lots of straight lines -- walls, countertops, window frames -- and any tilt is immediately visible. A tripod with a built-in bubble level or electronic level indicator is essential.
- A wide-angle lens in the 14-24mm range. New construction rooms, especially in production homes, tend to be modest in size. A wide lens helps you show the full room without making buyers feel cramped.
- A leaf blower or broom. Seriously. New construction sites accumulate dust, sawdust, and debris faster than you can believe. A quick sweep of the front porch, driveway, or patio before shooting makes a real difference.
- Shoe covers. Builders and homeowners appreciate photographers who protect fresh flooring. Bring a box of disposable booties.
- Window cleaning supplies. New construction windows often have adhesive residue, handprints from workers, and construction dust. A quick wipe of the windows in the most photographed rooms takes five minutes and dramatically improves how natural light enters the space.
Nice-to-Have Items
- A drone for community and aerial shots. Developments benefit enormously from aerial perspectives that show the layout of streets, lot sizes, and proximity to amenities.
- A color checker or gray card. New construction interiors with white walls and mixed lighting (natural plus construction-grade temporary fixtures) can be tricky for white balance. A reference card ensures accuracy.
Common Mistakes to Avoid
Even experienced real estate photographers make mistakes when transitioning to new construction work. Here are the most common:
- Ignoring construction debris in the frame. Always walk the property and clear what you can before shooting. A single orange traffic cone in the background can undermine an otherwise perfect shot.
- Shooting too early. Resist the pressure to shoot before the home is truly ready. A few extra days of waiting for final cleaning and touch-ups is worth the difference in photo quality.
- Using the same approach as resale homes. New construction requires more attention to architecture and finishes and less emphasis on "lived-in" warmth. Adjust your style accordingly.
- Neglecting the community context. Buyers of new construction are buying into a neighborhood, not just a house. Include shots that sell the community.
- Delivering inconsistent editing. Builders will notice if home #3 in a development has a different color profile than homes #1 and #2. Maintain strict consistency.
The Bottom Line
New construction photography is a rewarding niche that offers consistent work, higher volume, and the opportunity to build long-term relationships with builders and developers. The key is understanding the unique challenges -- bare landscaping, construction debris, empty rooms -- and having the tools and techniques to overcome them.
AI-powered editing tools like Twilight are particularly valuable for new construction work because they deliver the speed, consistency, and quality that builders demand. One-click sky replacement transforms bare-lot exteriors into compelling hero shots, and consistent preset application ensures every home in a development matches the builder's brand standards.
Master the techniques in this guide, build a portfolio that speaks to builders, and you will find that new construction becomes one of the most profitable segments of your real estate photography business.
Related Articles
Day-to-Dusk AI Conversion: A Technical Deep Dive for Real Estate Photographers
How AI converts a daytime exterior into a magazine-quality dusk shot. Inside the model, the prompt, and the failure modes, with a checklist for getting consistent results.
The Efficient Real Estate Photography Workflow: From Shoot to Listing in Under 2 Hours
A step-by-step guide to an efficient real estate photography workflow. Learn how to go from arriving at a property to delivering listing-ready photos in under 2 hours using AI-assisted editing.
How to Write AI Prompts for Real Estate Photo Editing: A Practical Guide
The exact prompt patterns that produce reliable, professional edits for listing photos. Templates for day-to-dusk, sky replacement, decluttering, exposure correction, and more.