Curb Appeal Photography: How to Make Any Exterior Look Its Best
Master exterior real estate photography with practical tips on timing, angles, landscaping enhancement, sky replacement, and twilight conversions that maximize curb appeal and attract more buyers.
The exterior shot is the first photo buyers see. It is the thumbnail in search results, the hero image on the listing page, and the picture that determines whether someone clicks or keeps scrolling. According to the National Association of Realtors, 97% of home buyers use the internet in their search, and the exterior photo is their very first impression of every property they consider.
Yet exterior photography is often treated as an afterthought. Photographers arrive, snap a quick front-facing shot, and rush inside where the "real" work happens. This is a missed opportunity. A compelling exterior photo does more than show what the house looks like from the street. It sets an emotional tone, communicates pride of ownership, and creates anticipation for what awaits inside.
The good news is that creating powerful curb appeal photography does not require expensive equipment or perfect conditions. It requires understanding a handful of principles about timing, angles, preparation, and post-processing that transform ordinary exterior shots into the kind of images that make buyers stop scrolling and start dreaming.
Best Time of Day for Exterior Photography
Timing is the single biggest variable in exterior photography. The same house can look completely different depending on when you photograph it. Unlike interior photography where you control the lighting, exterior shots are at the mercy of the sun.
The Golden Hours
The ideal windows for exterior real estate photography are:
- Morning golden hour: 30-60 minutes after sunrise
- Evening golden hour: 60-30 minutes before sunset
During these windows, sunlight arrives at a low angle that creates gentle shadows, warm tones, and dimensional depth. The light wraps around the home's facade rather than hitting it flat, revealing architectural details and texture in siding, stone, and brickwork.
The Problem With Midday
Shooting exteriors between 11 AM and 2 PM creates harsh overhead shadows, blown-out highlights on light-colored surfaces, and deep black shadows under eaves and porches. The light is flat and unflattering. If the home faces south, the entire facade may be so bright that details wash out completely.
Front-Facing Direction Matters
The direction the home's front facade faces determines your ideal shooting window:
| Facade Direction | Best Morning | Best Afternoon | Avoid |
|---|---|---|---|
| East-facing | Sunrise to 10 AM | Afternoon (backlit) | Late afternoon |
| West-facing | Morning (backlit) | 3 PM to sunset | Early morning |
| South-facing | Early morning or late afternoon | Midday (harsh) | 11 AM - 2 PM |
| North-facing | Overcast days preferred | Overcast days preferred | Direct sun (facade in shadow) |
For north-facing homes, an overcast day is actually your best friend. The diffused light illuminates the facade evenly without casting the front into shadow. Pair this with an AI sky replacement to add a blue sky with clouds, and you get the best of both worlds.
A Note on Over-Enhancement
AI sky replacement and lawn enhancement are powerful tools, but they must be used responsibly. Replacing a gray sky with a vibrant blue one is widely accepted in real estate photography. But adding elements that do not exist, like trees that are not there or a porch that was never built, crosses into misleading territory. Use enhancement tools to present the property at its best, not to misrepresent it. Check your local MLS rules for specific guidelines.
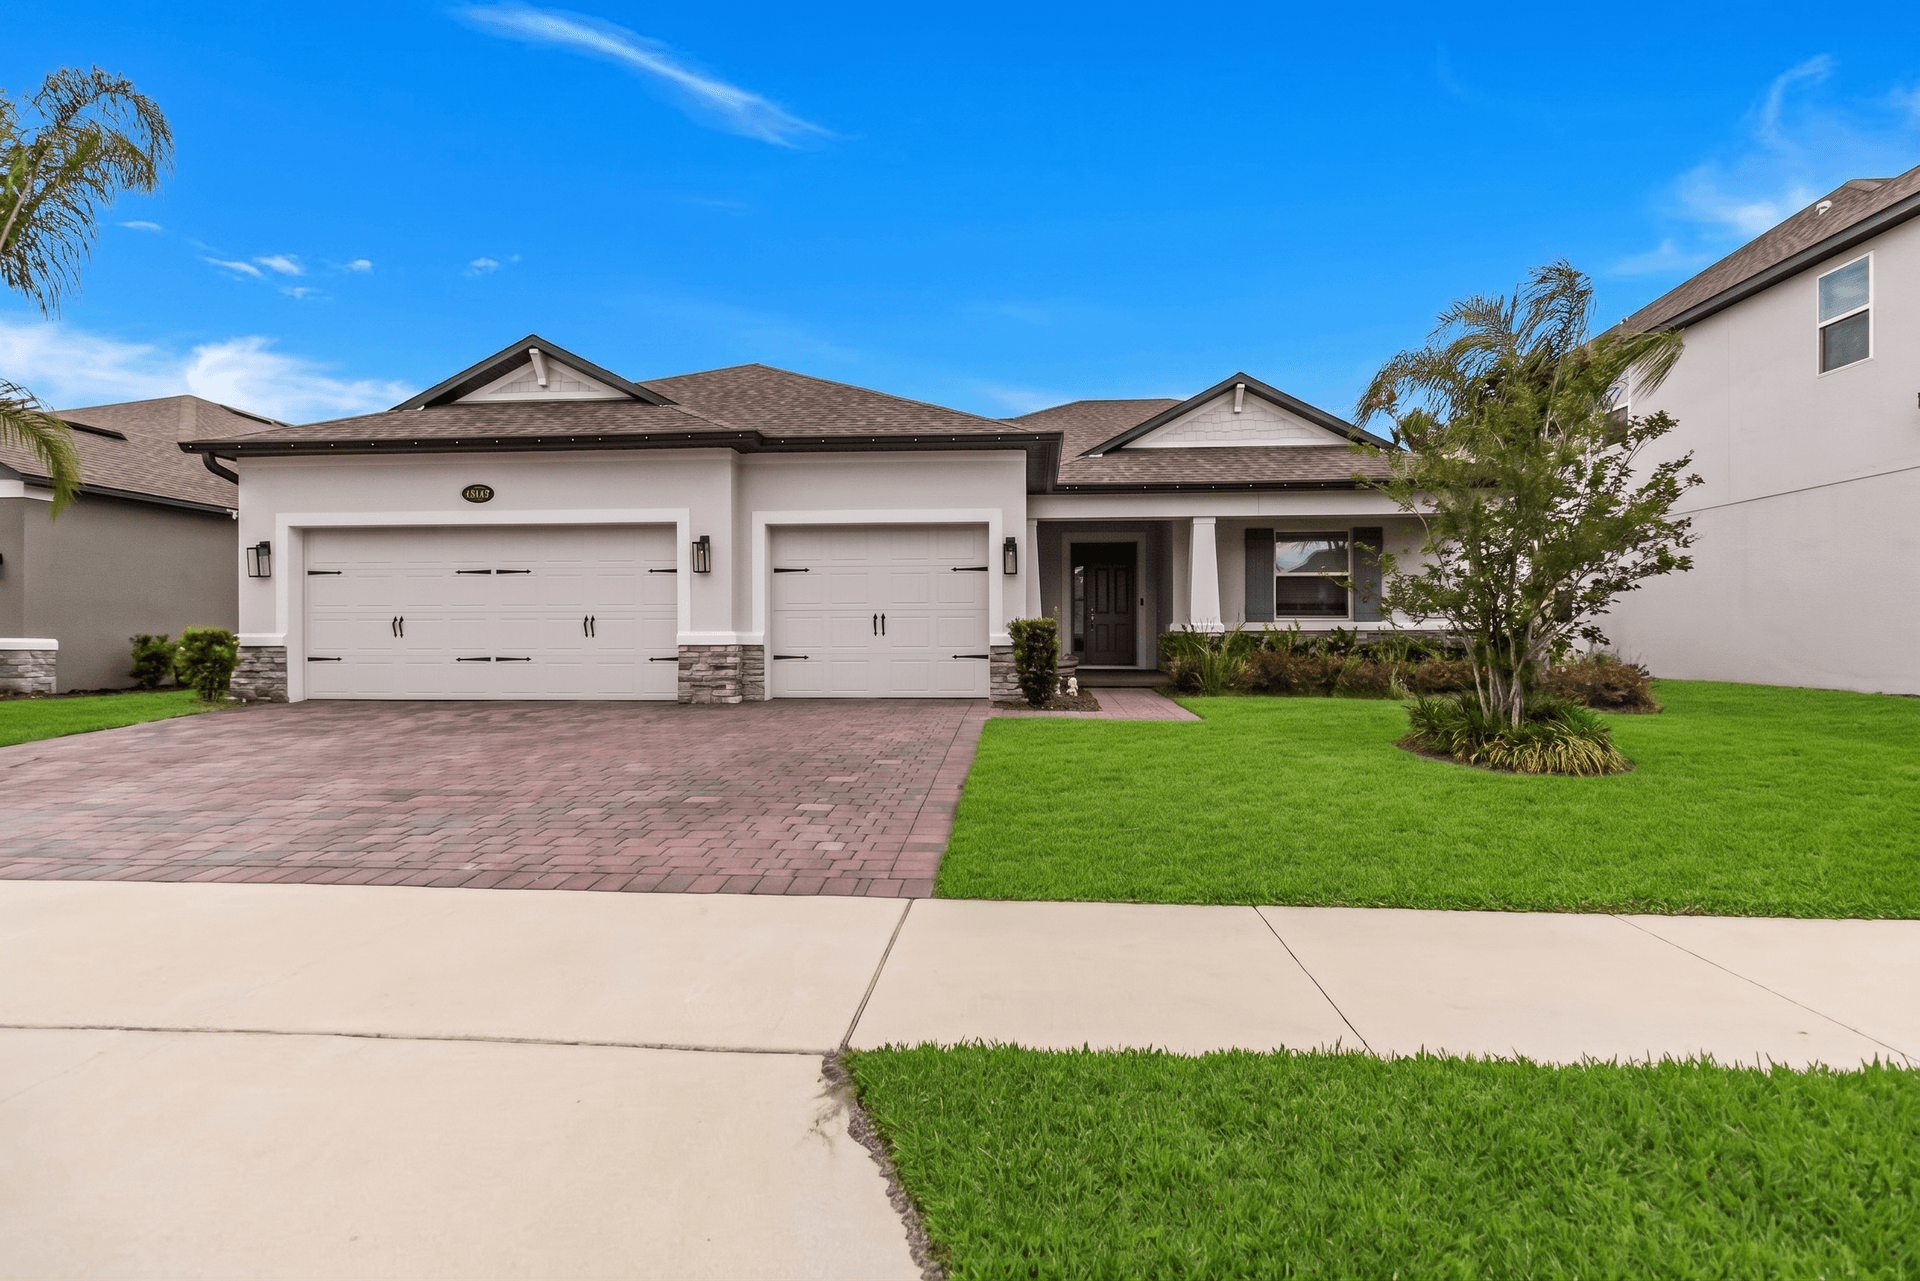
Angle Selection: Finding the Hero Shot
The angle from which you photograph the exterior has an enormous impact on how imposing, inviting, and well-proportioned the home appears. Most photographers default to a straight-on shot from the sidewalk, which is functional but rarely inspiring.
The Three-Quarter Angle
The most flattering angle for the majority of homes is the three-quarter view, shot from roughly 30-45 degrees off the perpendicular to the front facade. This angle shows two sides of the home, creating depth and dimension that a flat front-on shot cannot achieve.
Position yourself so that:
- The front facade takes up about two-thirds of the frame
- A side wall or garage wing is visible in the remaining third
- The roof line creates a strong diagonal line across the top of the frame
- Any prominent features (porch, columns, bay windows) are clearly visible
Camera Height for Exteriors
For single-story homes, shoot from standing height (5-6 feet). This presents the home at the natural viewing angle of someone approaching from the street.
For two-story or taller homes, you may want to lower the camera slightly to about 4 feet. This tilts the perspective upward just enough to emphasize the home's height and grandeur without creating obvious perspective distortion.
The Driveway Approach
One of the most underused exterior compositions is the driveway approach shot. Position yourself at the end of the driveway and shoot toward the home with the driveway leading the eye into the image. This composition mimics the experience of driving up to the property for the first time and creates a strong sense of arrival.
This technique is especially effective for:
- Homes with circular or curved driveways
- Properties with long driveways that create dramatic leading lines
- Homes where the garage is a prominent architectural feature
Preparing the Exterior Before Shooting
A few minutes of preparation before you pull out the camera can save hours of editing time and produce noticeably better results. Professional real estate photographers treat exterior prep as non-negotiable.
The Exterior Preparation Checklist
Driveway and walkways:
- Move all vehicles out of the driveway (or position one attractive car strategically if the driveway is very long)
- Roll trash cans and recycling bins to the backyard
- Clear any debris, leaves, or stains visible in the shooting area
- Coil and hide garden hoses
Lawn and landscaping:
- Mow the lawn the day before or morning of the shoot if possible
- Trim any hedges or bushes that block architectural features
- Remove dead plants, weeds in flower beds, and fallen branches
- Turn on any landscape lighting if shooting during blue hour
The home itself:
- Close all garage doors
- Open or close all window blinds consistently (all open is usually best)
- Turn on interior lights so windows glow warmly
- Turn on porch lights and exterior sconces
- Remove any temporary items: packages, doormats with personal messages, seasonal decorations (unless seasonally appropriate)
What to Do When Preparation Is Not Possible
Sometimes you arrive at a property and cannot control the environment. The homeowner's car is parked in the driveway. The neighbors have trash bins out. The lawn has not been mowed in weeks. In these cases, your camera angle becomes your primary tool for working around problems, and AI editing handles the rest.
A skilled photographer can often reposition to crop out offending elements. And modern AI tools make it possible to enhance green lawn color, remove minor objects, and clean up visual distractions without physical preparation.
Landscaping Enhancement Through Photography and Editing
The relationship between landscaping and home value is well documented. Properties with well-maintained landscaping sell for 5-12% more than comparable homes with neglected yards. Your job as a photographer is to capture landscaping at its best, and when necessary, use editing tools to bridge the gap between reality and potential.
Photographing Landscaping Effectively
- Shoot after watering: Wet foliage is more saturated and vibrant. If the homeowner can water the lawn and plants an hour before the shoot, colors will pop.
- Use foreground plantings: Position yourself so flower beds, shrubs, or ornamental grasses frame the bottom of your image. This creates depth layers.
- Include mature trees: Trees add value perception. If the property has large, healthy trees, ensure they are visible and use them to frame the sky.
- Capture seasonal color: Spring blooms, autumn leaves, and even well-placed snow can enhance curb appeal if they look clean and intentional.
AI Lawn and Landscaping Enhancement
When the lawn is brown, patchy, or overgrown, AI tools can bring it back to life. Twilight's editing engine can enhance lawn color from stressed yellow-brown to healthy green, filling in patchy areas while maintaining a natural, realistic appearance.
The key is subtlety. A brown lawn transformed into golf-course green looks fake. The goal is to make the lawn look like it would during its best growing season with proper maintenance, not like it was spray-painted.
Sky Replacement for Exterior Photos
The sky is the largest single element in most exterior real estate photos, occupying anywhere from one-third to one-half of the frame. A gray, overcast, or washed-out sky drags down the entire image, making even a beautiful home look dull and uninviting.
Sky replacement has become one of the most commonly used AI editing techniques in real estate photography. The process replaces the existing sky with a more attractive alternative, typically a blue sky with scattered white clouds.
When to Use Sky Replacement
- Overcast days where the sky is flat white or gray
- Blown-out skies where the exposure was set for the home and the sky is pure white
- Hazy conditions where the sky is a dull, milky blue
- Heavy clouds that create a dark, foreboding mood
Best Practices for Sky Replacement
- Match the lighting direction. If the sun is clearly coming from the left (visible in shadows), the replacement sky should have clouds and light consistent with that direction.
- Match the color temperature. A warm golden-hour home with a cool midday sky looks wrong. Choose sky replacements that match the lighting mood.
- Keep it believable. Dramatic sunset skies look incredible but may not match daytime lighting on the home. Blue sky with white clouds is the safest, most universally appropriate choice.
- Watch the tree line. Complex edges where trees meet the sky are the hardest part of sky replacement. AI tools handle this well, but always zoom in and check the transitions.
For a deep dive into sky replacement techniques and tools, see our complete guide on sky replacement for real estate photos.
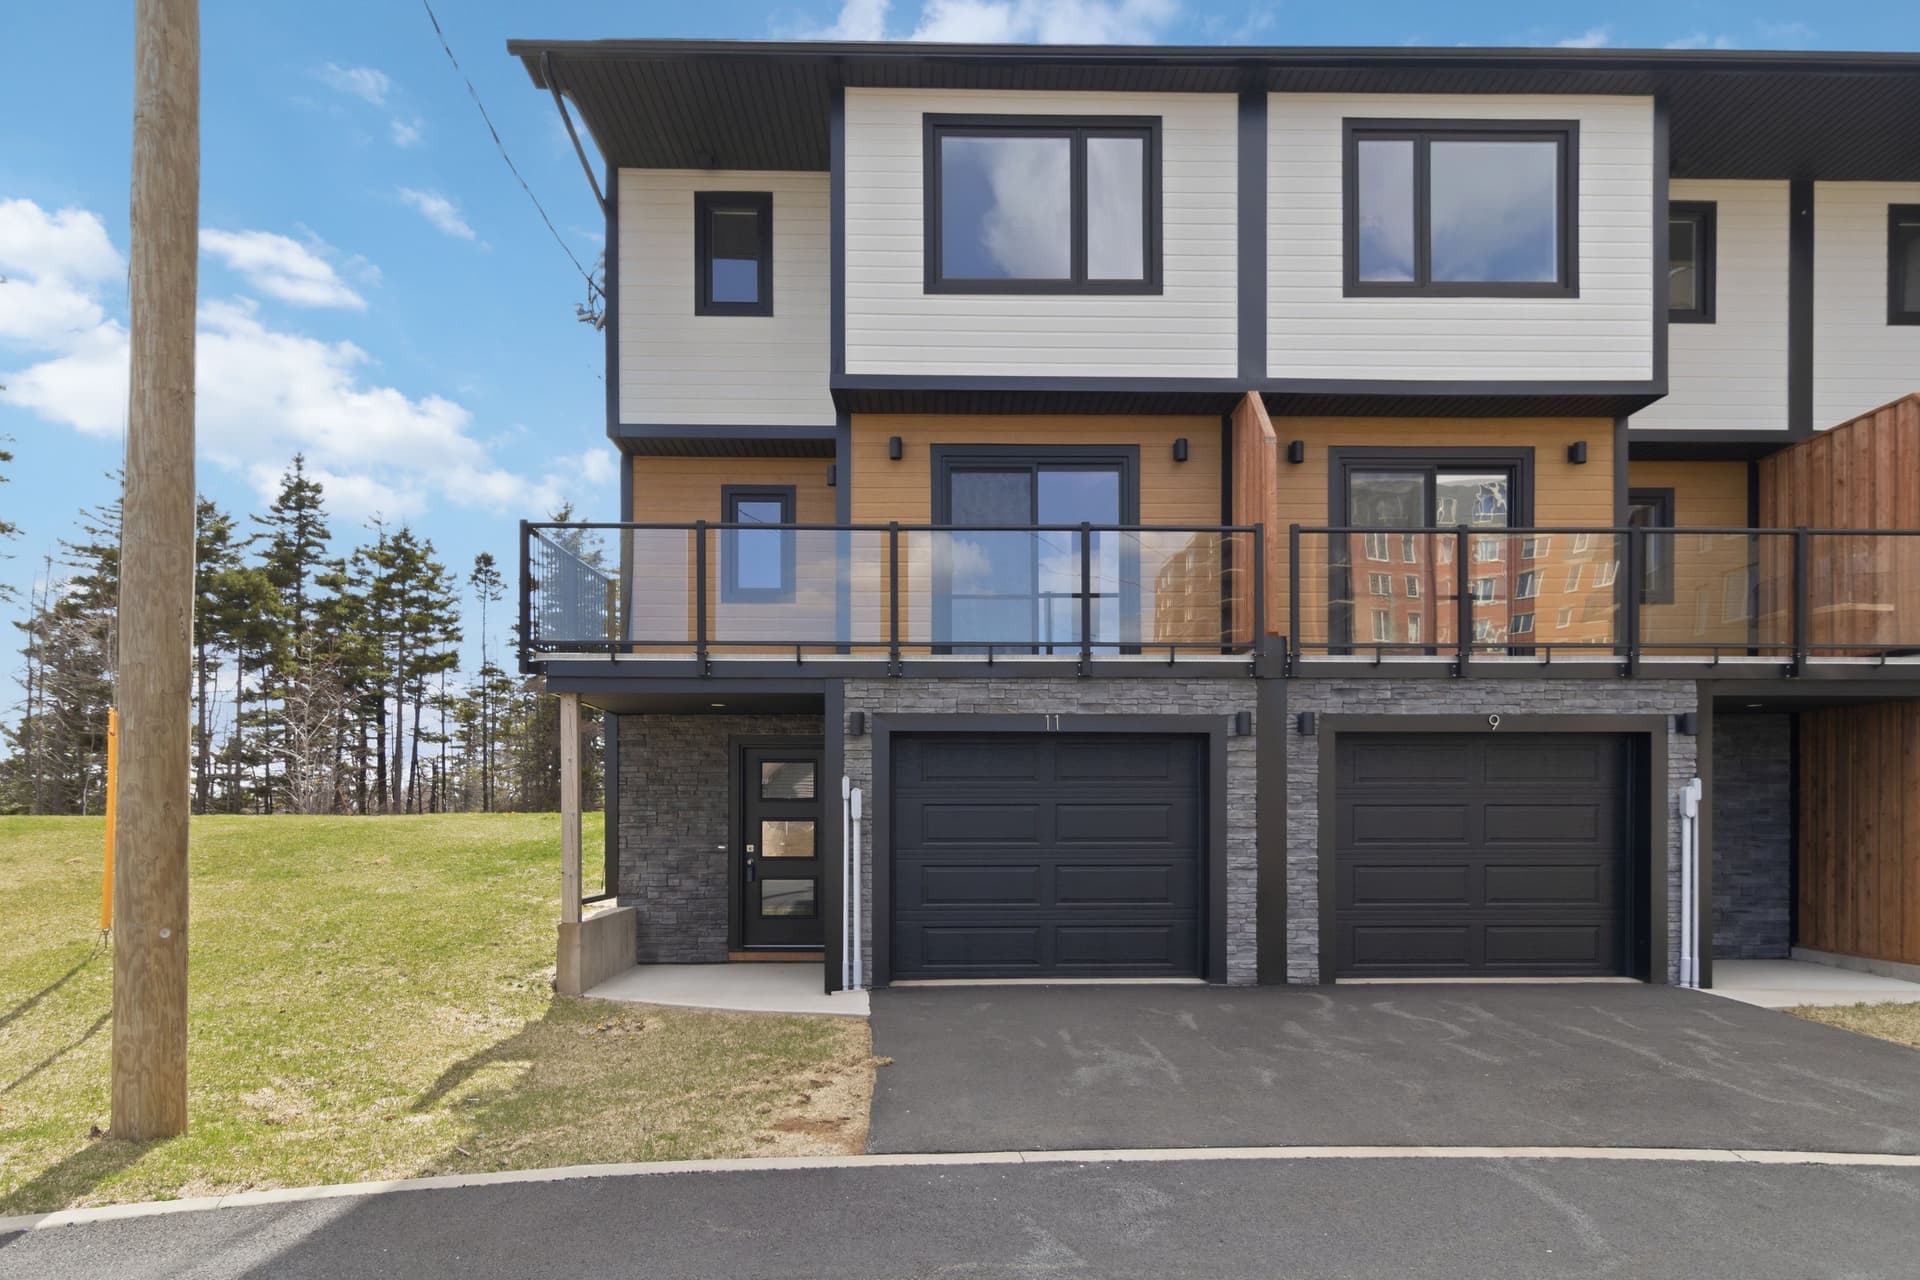
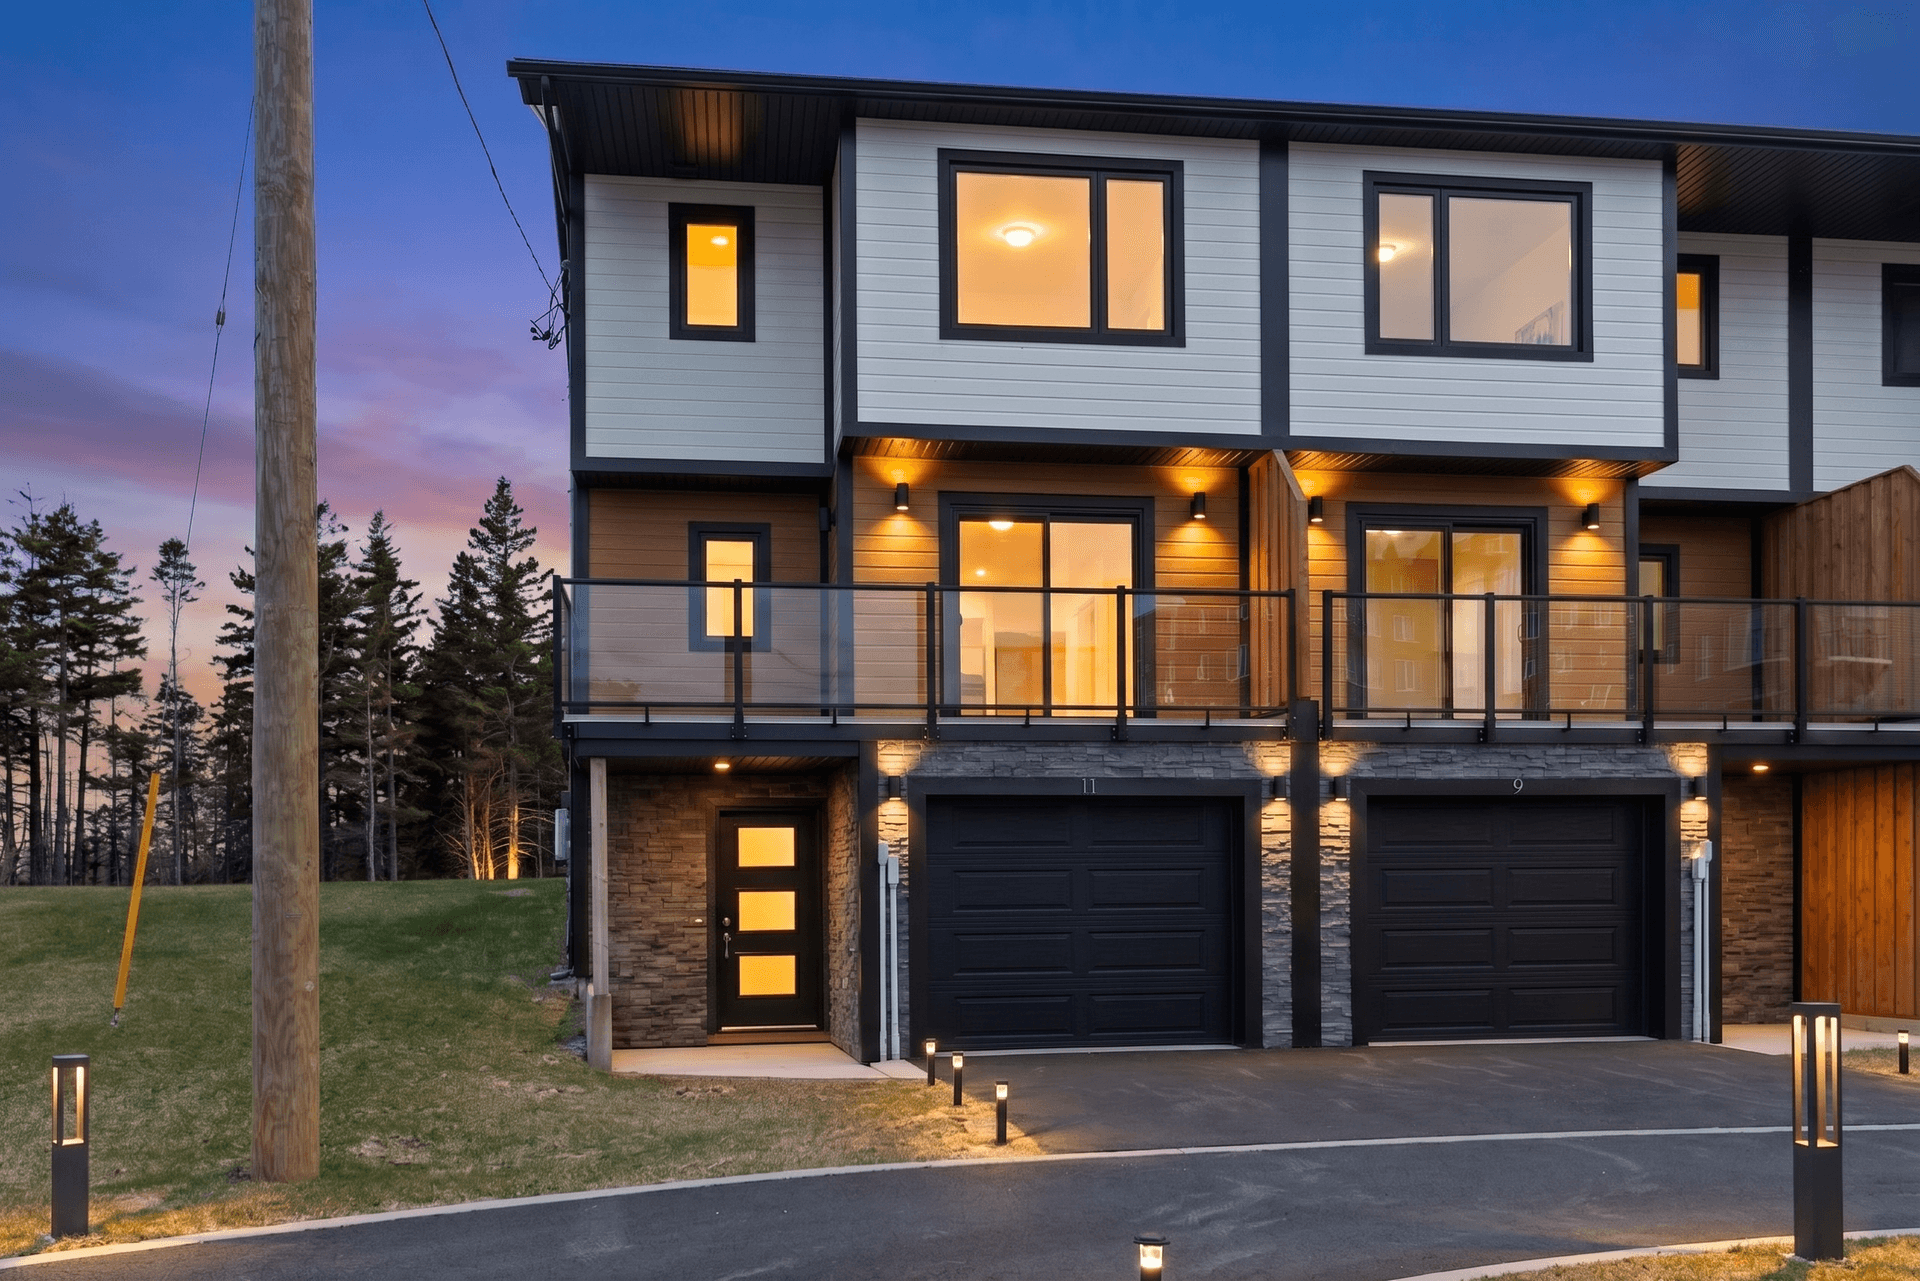
Twilight Conversion for Exteriors
Twilight photography, where the home is photographed at dusk with interior lights glowing warmly against a deep blue sky, produces some of the most dramatic and desirable real estate images possible. These photos consistently generate more engagement, more saves, and higher perceived value than daytime exterior shots.
The challenge is that true twilight photography requires being on-site during a narrow 15-20 minute window at dusk, with all interior and exterior lights turned on. For many photographers and agents, this is logistically difficult or impossible.
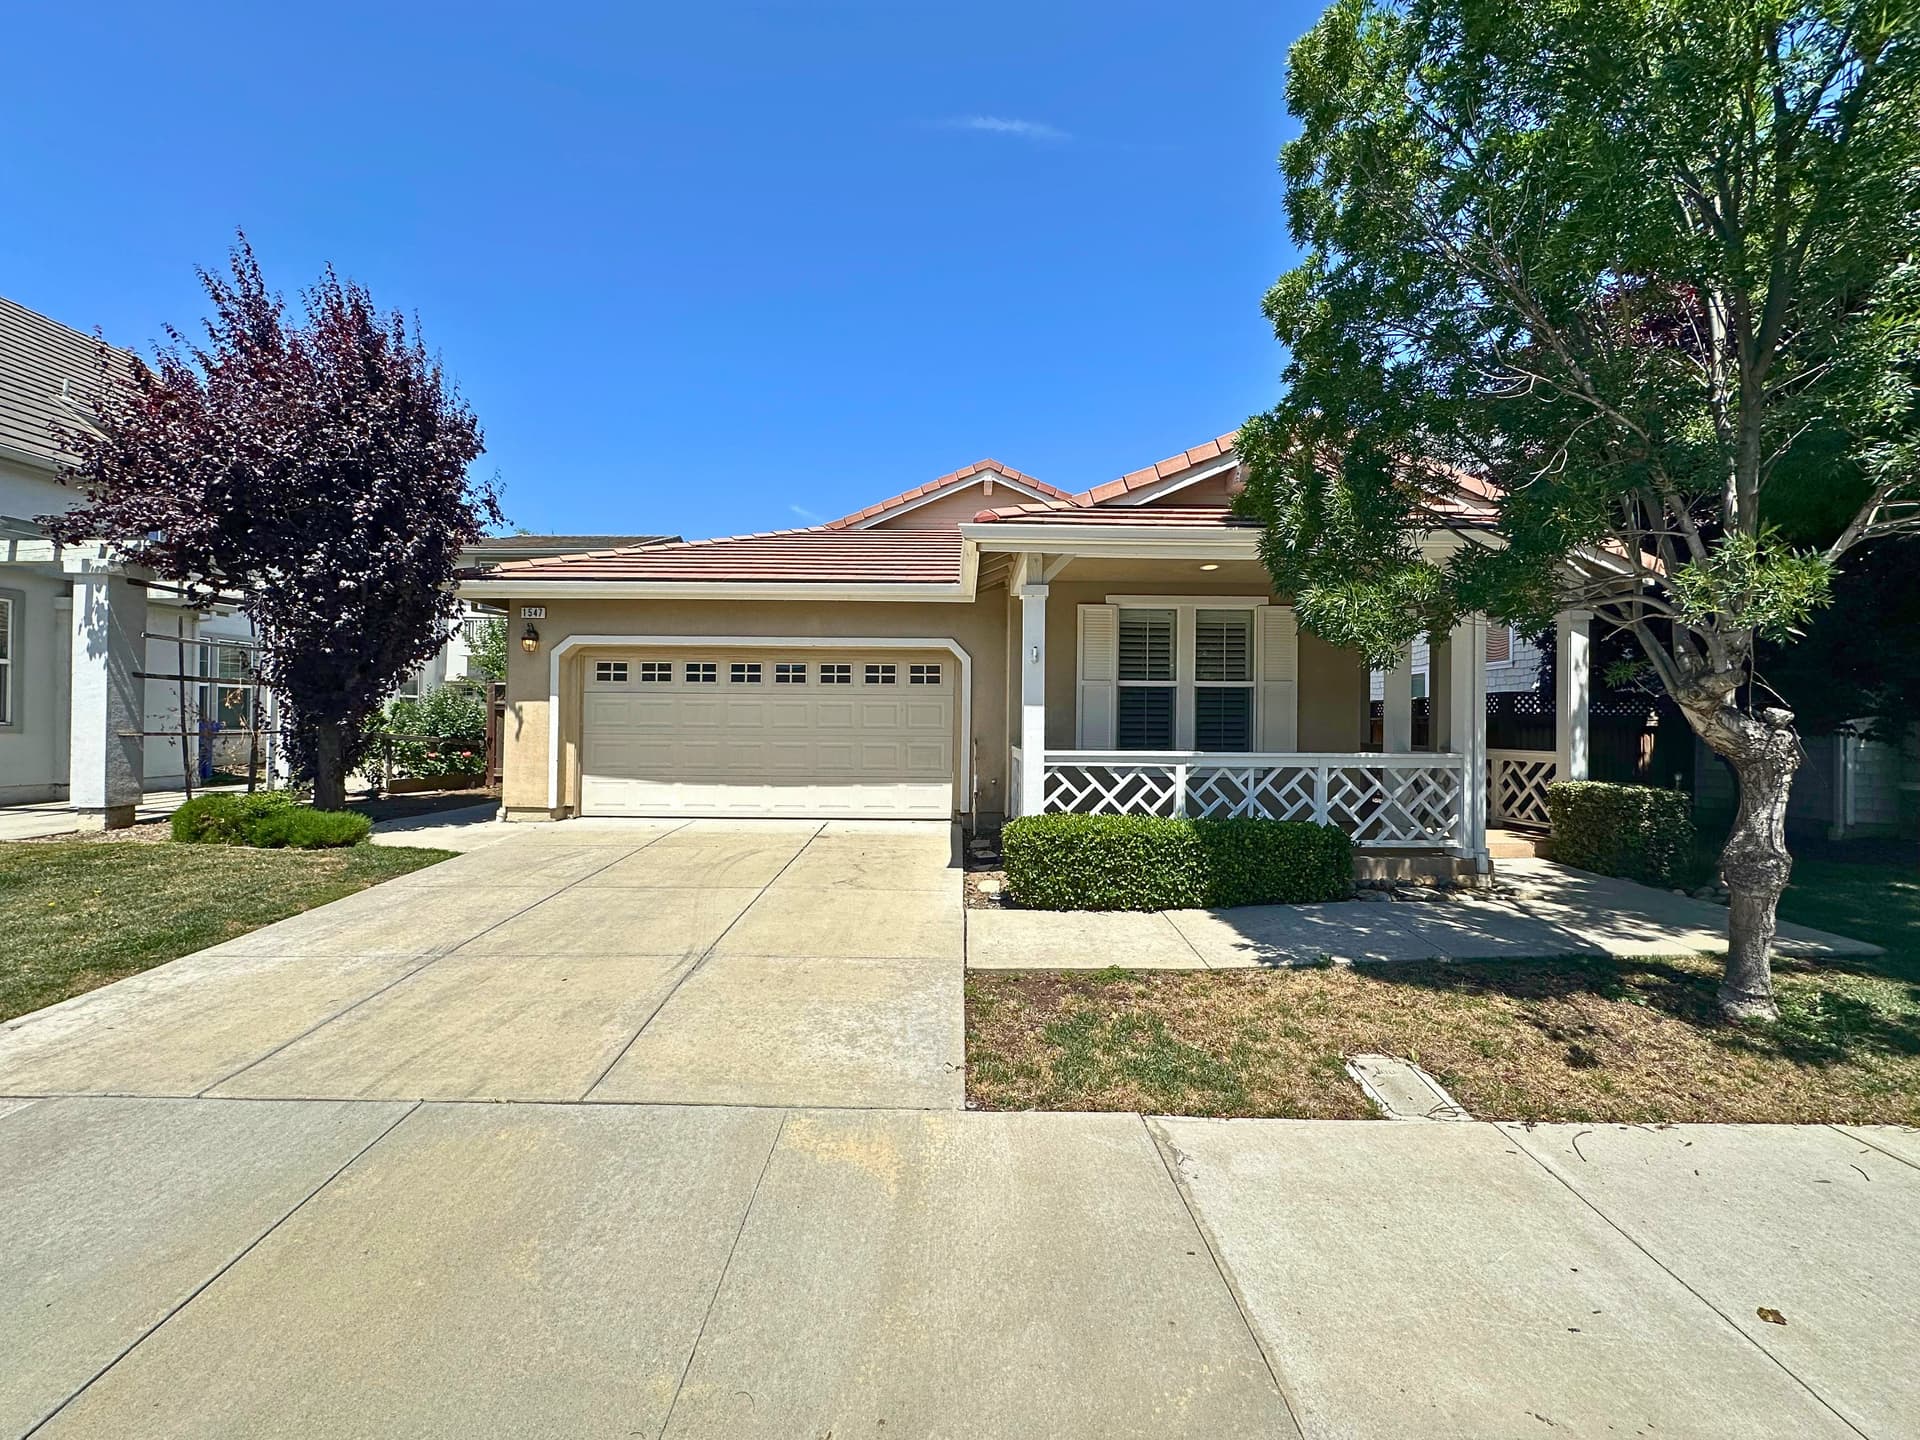
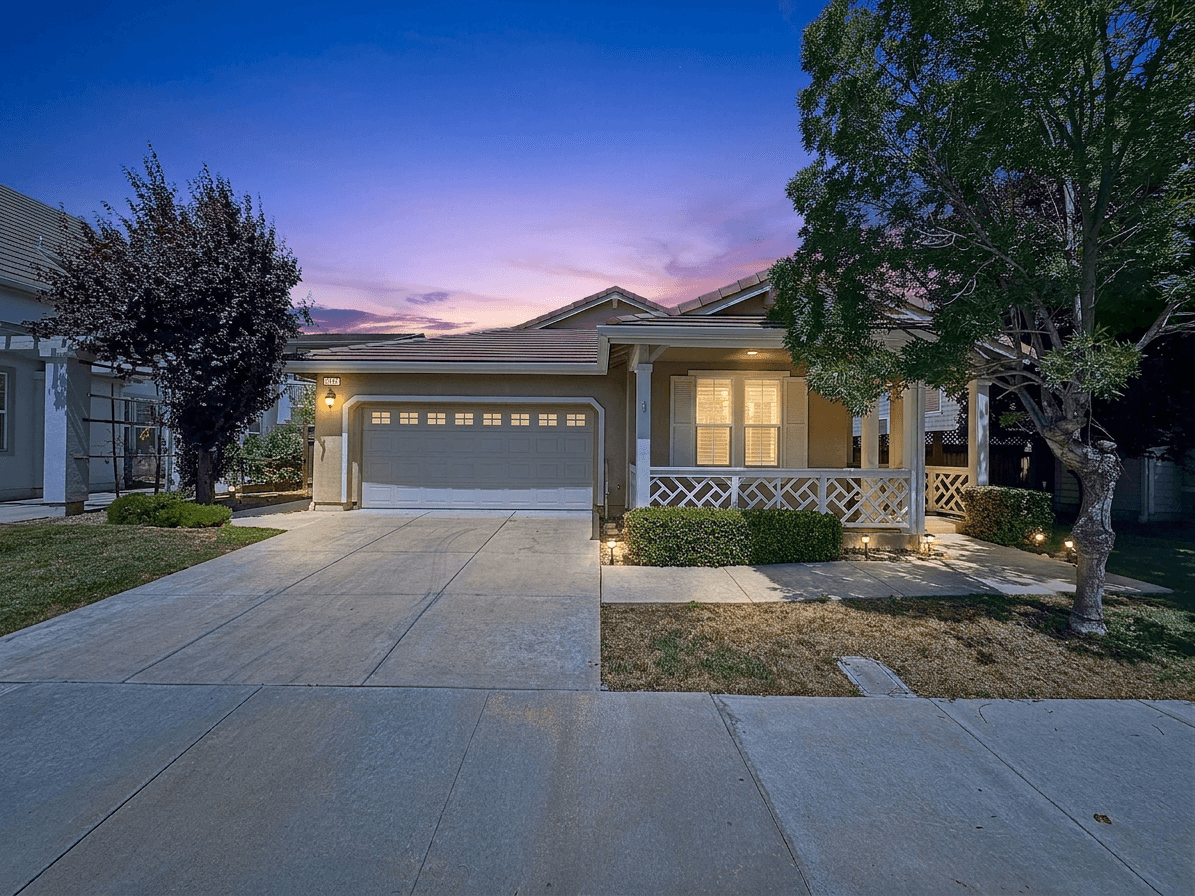
AI-powered twilight conversion solves this by transforming a daytime exterior photo into a realistic twilight scene. The AI replaces the sky with a dusk gradient, adds warm window glow, and adjusts the overall lighting to match the look of a professional twilight shoot.
When Twilight Conversion Works Best
- The daytime photo was shot during golden hour (warm existing light helps)
- Interior lights were on during the daytime shoot (provides natural glow through windows)
- The home has prominent windows that will showcase the warm interior glow
- The property is high-value and warrants the premium presentation
When to Skip Twilight Conversion
- Simple starter homes where the dramatic look may feel mismatched
- Photos with very harsh midday lighting that is difficult to convincingly transform
- Properties where the exterior has minimal window area
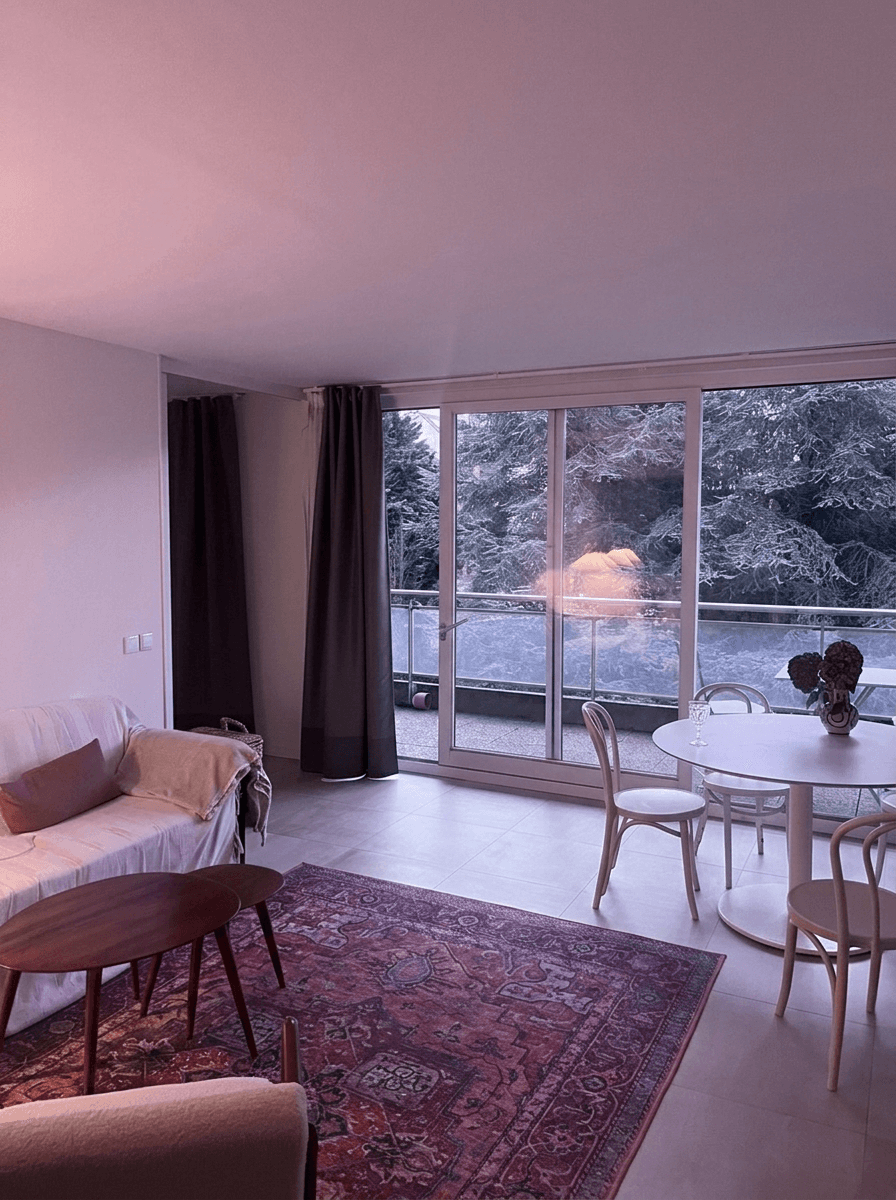
Outdoor Living Spaces
Do not stop at the front facade. Outdoor living spaces, including patios, decks, pools, gardens, and outdoor kitchens, are major selling features that deserve their own dedicated shots.
Photographing Outdoor Spaces Effectively
- Show scale: Include enough of the surrounding area to convey the size of the outdoor space
- Stage minimally: A set table, a few cushions on outdoor furniture, and a clean pool go a long way
- Shoot from inside out: Position yourself inside a covered patio looking outward to create a sense of shelter and comfort
- Capture the view: If the property has a notable view (mountains, water, city skyline, golf course), make it the focal point of at least one exterior shot
For Airbnb outdoor space photography, these spaces often matter even more than they do for traditional sales, since guests specifically search for properties with attractive outdoor areas.
Equipment for Exterior Photography
You do not need a professional setup to capture strong exterior photos, but a few key pieces of equipment help significantly.
Essential Gear
- Wide-angle lens: 16-24mm on full frame (10-16mm on crop sensor) captures the full facade without standing too far back
- Tripod: Essential for sharp images during golden hour and twilight when light levels drop
- Polarizing filter: Reduces glare on windows and enriches sky color. This is the single most useful filter for exterior real estate photography.
- Remote shutter release or timer: Prevents camera shake during longer exposures
Optional But Helpful
- Flash or off-camera strobe: Can illuminate a dark porch or fill in harsh shadows on the facade
- Graduated ND filter: Balances exposure between a bright sky and darker home (though HDR and AI editing largely replace this)
- Drone: For aerial perspectives, discussed in detail in our drone photography guide
Meeting MLS Requirements for Exterior Photos
Most MLS systems require at least one exterior front photo, and many have specific technical requirements for these images. Ensuring your exterior photos meet MLS requirements avoids rejection and delays in listing publication.
Common MLS Rules for Exteriors
- Minimum resolution: Typically 1024x768 or higher
- No watermarks or branding on MLS-submitted images
- No misleading content: Sky replacement is generally accepted, but virtual additions (virtual landscaping, virtual fencing) may violate rules depending on the MLS
- Current condition: Photos must represent the property's current state
- Correct orientation: Landscape (horizontal) orientation is strongly preferred
Putting It All Together: The Exterior Photography Workflow
Here is a complete workflow for capturing and editing compelling curb appeal photography:
Pre-Shoot (15-30 Minutes Before)
- Check the sun direction and position relative to the facade
- Walk the property and identify the best shooting angles
- Execute the exterior preparation checklist
- Turn on all interior and exterior lights
During the Shoot (20-30 Minutes)
- Start with the hero three-quarter angle shot
- Capture a straight-on front facade shot
- Shoot the driveway approach composition
- Photograph any notable outdoor living spaces
- Capture detail shots of unique exterior features (front door, stone work, architectural details)
- Shoot multiple exposures for HDR if needed
Post-Processing (5-15 Minutes per Image)
- Select the strongest composition from each angle
- Correct color balance and exposure
- Apply sky replacement if the sky is overcast or blown out
- Enhance lawn and landscaping color if needed
- Consider twilight conversion for the hero shot if the property warrants it
- Crop and straighten for final composition refinement
The exterior photo may account for just one or two images in a full listing set, but its impact is disproportionately large. It is the image that earns or loses the click, the photo that sets expectations, and the first moment where a buyer begins to imagine themselves calling a property home. Invest the time and attention it deserves, and every listing you photograph will perform better because of it.
Related Articles

Curb Appeal Photography: How to Shoot and Edit Stunning Exteriors
Master exterior real estate photography with tips on timing, composition, and AI editing for sky replacement, twilight conversion, and curb appeal.
Day-to-Dusk AI Conversion: A Technical Deep Dive for Real Estate Photographers
How AI converts a daytime exterior into a magazine-quality dusk shot. Inside the model, the prompt, and the failure modes, with a checklist for getting consistent results.
Optimizing Real Estate Photos for Social Media: Instagram, Facebook, and TikTok
Learn how to optimize real estate listing photos for Instagram, Facebook, and TikTok. Covers ideal dimensions, engagement strategies, before/after content, hashtags, and content calendars for agents.