iPhone Real Estate Photography: Pro Tips for Agents on a Budget
Master real estate photography with just your iPhone. Learn camera settings, composition techniques, lighting tips, must-have apps, and how AI post-processing can make iPhone photos look professional.
Not every listing justifies hiring a professional photographer. For a $180K condo or a rental property, spending $200-400 on photography may not make financial sense. But that does not mean the photos should look bad. Your iPhone is a genuinely capable camera, and with the right technique and post-processing, it can produce listing photos that compete with professional results.
This guide covers everything you need to know about shooting real estate photos with your iPhone: camera settings, composition rules, lighting strategies, useful apps, and how AI post-processing can close the gap between phone photos and professional DSLR shots.
Why iPhone Photography Actually Works for Real Estate
Before diving into technique, let us address the elephant in the room: can an iPhone really produce good enough photos for a listing?
The short answer is yes, with caveats. Here is why:
Modern iPhone Cameras Are Remarkably Good
Recent iPhones (14 Pro and later) include:
- Ultra-wide lens (0.5x) -- equivalent to approximately 13mm, which is actually wider than many dedicated real estate photography lenses
- Wide lens (1x) -- approximately 24mm equivalent, a standard focal length for interiors
- Computational photography -- Smart HDR, Deep Fusion, and Night Mode automatically handle many exposure challenges
- 48MP main sensor (Pro models) -- more than enough resolution for any MLS requirement
- LiDAR scanner (Pro models) -- enables improved low-light focus and depth mapping
The main limitations compared to a DSLR with a wide-angle lens are dynamic range (though Smart HDR helps significantly), noise in low light, and the inability to use off-camera lighting without adapters.
When iPhone Is the Right Choice
- Listings under $350K where photography ROI is marginal
- Rental properties and investor clients focused on efficiency
- Coming-soon social media posts before the professional shoot
- Supplementary photos for rooms the photographer missed
- Quick documentation of property condition or progress
When to Hire a Professional
- Luxury listings ($750K+) where buyer expectations are higher
- Properties with challenging lighting (dark rooms, dramatic views)
- Listings where you are competing with professionally photographed comparable properties
- Any time you want twilight, aerial, or specialized photography
The Hybrid Approach
Many successful agents use a hybrid approach: hire a professional for properties above a certain price point, and shoot iPhone photos (with AI enhancement) for everything else. This optimizes both budget and quality across your portfolio.
Essential iPhone Camera Settings for Real Estate
Before you shoot a single photo, configure your iPhone for optimal real estate photography.
Use the Native Camera App
Third-party camera apps offer manual controls, but for most real estate shooting, the native Camera app with its computational photography pipeline produces the best results. The Smart HDR processing is specifically designed to handle high-contrast scenes like room interiors with bright windows, which is exactly the challenge you face in real estate.
Shoot in the Highest Quality
Go to Settings > Camera and configure:
- Formats: High Efficiency (HEIF) for maximum quality, or Most Compatible (JPEG) if you need universal compatibility
- Preserve Settings: Turn on for Camera Mode and Creative Controls so your settings persist between sessions
- Grid: Turn on (this is essential for composition -- covered below)
- Level: Turn on (available on iPhone 12 and later, helps ensure your camera is perfectly horizontal)
On iPhone 15 Pro and later:
- Resolution: Set to 48MP (HEIF Max) for the highest quality capture
- ProRAW: Consider enabling for maximum editing flexibility, but be aware files are 50-75MB each
Lock Your Exposure
This is the single most important technical tip for iPhone real estate photography. Tap and hold on the screen to lock focus and exposure (you will see "AE/AF Lock" appear). Then swipe up or down to adjust exposure compensation.
Why this matters: without locking exposure, the iPhone adjusts brightness for every shot. One photo of the kitchen will be bright, the next will be darker because a window was in frame. Locking exposure and adjusting manually gives you consistent results from room to room.
Use the Ultra-Wide Lens Wisely
The 0.5x ultra-wide lens is your primary real estate lens. It captures more of the room in a single frame and makes spaces feel larger. However, it introduces significant distortion at the edges, with walls appearing to bow outward and objects near the frame edge looking stretched.
Best practices for ultra-wide:
- Keep the camera level (not tilted up or down) to minimize vertical convergence
- Place subjects of interest away from the extreme edges where distortion is worst
- Plan to correct distortion in post-processing (AI tools handle this automatically)
- Use 1x for vignettes, detail shots, and kitchen/bathroom close-ups where ultra-wide distortion would be distracting
Composition Rules That Make or Break the Shot
Composition is where most amateur real estate photography fails, and it has nothing to do with camera quality. A $5,000 DSLR with bad composition produces worse photos than an iPhone with good composition. For a comprehensive deep dive into framing, angles, and perspective, check out our complete guide to real estate photo composition rules.
The Two-Wall Rule
The most universally flattering interior composition shows two walls, creating depth and dimension. Position yourself in a corner or doorway so the camera sees two walls and the space between them. Avoid straight-on shots of a single wall, which look flat and make rooms appear smaller.
Shoot from Corners and Doorways
The best vantage points for real estate interiors are:
- Room corners. Step into the corner and shoot diagonally across the room. This maximizes the amount of space visible and creates a natural perspective that draws the eye through the room.
- Doorways. Standing in the doorway of a room and shooting inward is a classic real estate photography angle. It provides context (the door frame creates a natural border) and shows the full room.
- Hallways looking into rooms. Shooting from a hallway through an open door shows the room in context and creates a sense of flow through the home.
Camera Height
Hold the camera at approximately 4-5 feet off the ground -- roughly chest to chin height for most people. This is critical:
- Too high (eye level or above) shows too much floor and not enough of the room.
- Too low (waist level or below) creates dramatic angles that look artistic but misrepresent room proportions and are not appropriate for listing photos.
- Chest height closely matches what a person sees when they walk into a room, making the photo feel natural and accurate.
Consider a small smartphone tripod set to the right height. Holding the phone by hand introduces camera shake, slightly off-level horizons, and inconsistent heights from room to room.
The Grid and the Rule of Thirds
With the camera grid enabled (you did this in settings, right?), use the gridlines to:
- Keep the horizon level. The horizontal gridlines should be parallel with the room's horizontal lines (countertops, window sills, baseboards).
- Align verticals. The vertical gridlines help you keep walls and doorframes truly vertical.
- Place key elements on intersections. Architectural features, focal points, and furniture groupings placed near the grid intersections create naturally pleasing compositions.
What to Include and Exclude
Include:
- At least two walls for depth
- The floor (establishes grounding and shows flooring material)
- Ceiling in at least some shots (shows room height)
- Natural light sources (windows)
- Key features of the room (fireplace, built-ins, island)
Exclude:
- Toilets (yes, even in bathroom photos -- angle the camera to avoid them)
- Mirrors reflecting you and your phone
- Personal items (family photos, mail, medications)
- Clutter on surfaces
- Your own reflection in any surface
The Mirror Problem
Bathrooms, bedrooms with mirrored closets, and entryways with mirrors are challenging because they capture your reflection. Position yourself at an angle to the mirror, or stand to one side where the mirror reflects the room instead of you. If you cannot avoid it, AI editing can sometimes remove reflections, but prevention is better.
Lighting: The Most Important Factor
Lighting quality affects real estate photos more than any other single factor. Good lighting makes even a modest property look clean and inviting. Bad lighting makes even a luxury home look dingy.
Natural Light is King
Schedule your shoot for the time of day when the property gets the most natural light. For most homes, this means:
- East-facing rooms: Morning (8-10 AM)
- South-facing rooms: Midday (11 AM-1 PM)
- West-facing rooms: Afternoon (2-4 PM)
- North-facing rooms: Midday for the most ambient light
If you cannot time your visit perfectly, prioritize shooting the most important rooms (living room, kitchen, primary bedroom) when they have the best natural light.
Turn On Every Light
This is non-negotiable. Before shooting a single photo, walk through the entire property and turn on every light:
- Overhead fixtures
- Lamps (table and floor)
- Under-cabinet lighting
- Closet lights
- Bathroom vanity lights
- Garage lights
- Exterior porch lights (even during daytime, for exterior shots)
Every light source adds warmth and eliminates shadows. The mix of natural and artificial light creates the layered, inviting atmosphere that makes listing photos appealing.
Open Every Blind and Curtain
Unless direct sunlight is creating harsh, blinding glare, open all window coverings. You want maximum natural light entering the room. If a particular window has harsh direct sun:
- Partially close sheer curtains to diffuse the light
- Shoot from an angle where the window is not directly in frame
- Accept the bright window and rely on HDR processing to balance the exposure
Avoid Flash
The iPhone's built-in flash produces harsh, unflattering light that creates hard shadows and hot spots. Turn off flash entirely. If a room is too dark even with all lights on:
- Wait for a time of day with better natural light
- Use a portable LED panel (available for $20-50) placed on a surface to add ambient fill light
- Rely on Night Mode if needed, though it can introduce motion blur
- Accept a slightly darker photo and brighten it in post-processing
Room-by-Room Shooting Guide
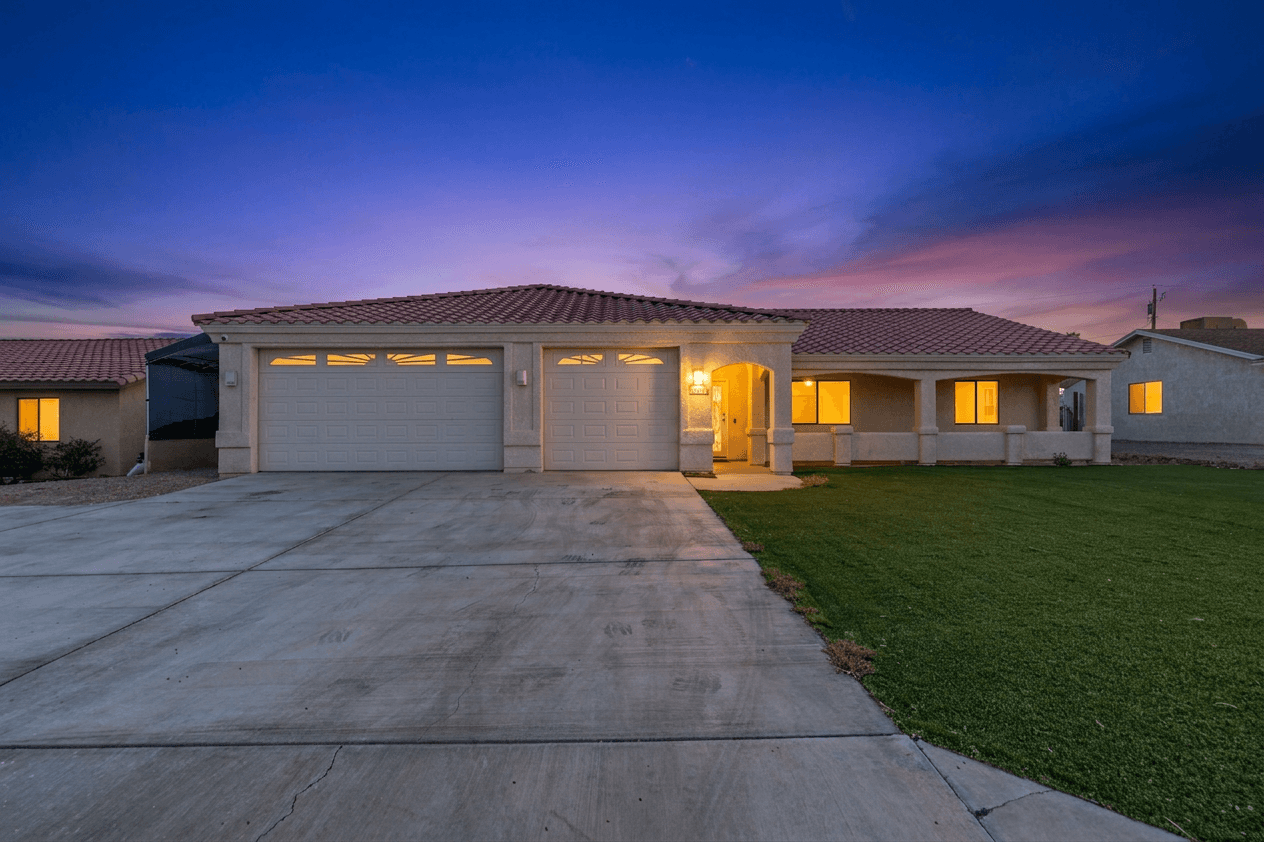
Exterior (Front)
The most important photo in the listing. It is the thumbnail on every portal.
- Shoot from across the street or at the end of the driveway for a straight-on or slight angle view
- Include the full house, yard, and some sky
- Use the 0.5x lens to capture the full scene
- Shoot at the time of day when the front is well-lit (check sun orientation)
- For the best results, consider having AI convert this shot to a twilight scene for maximum impact
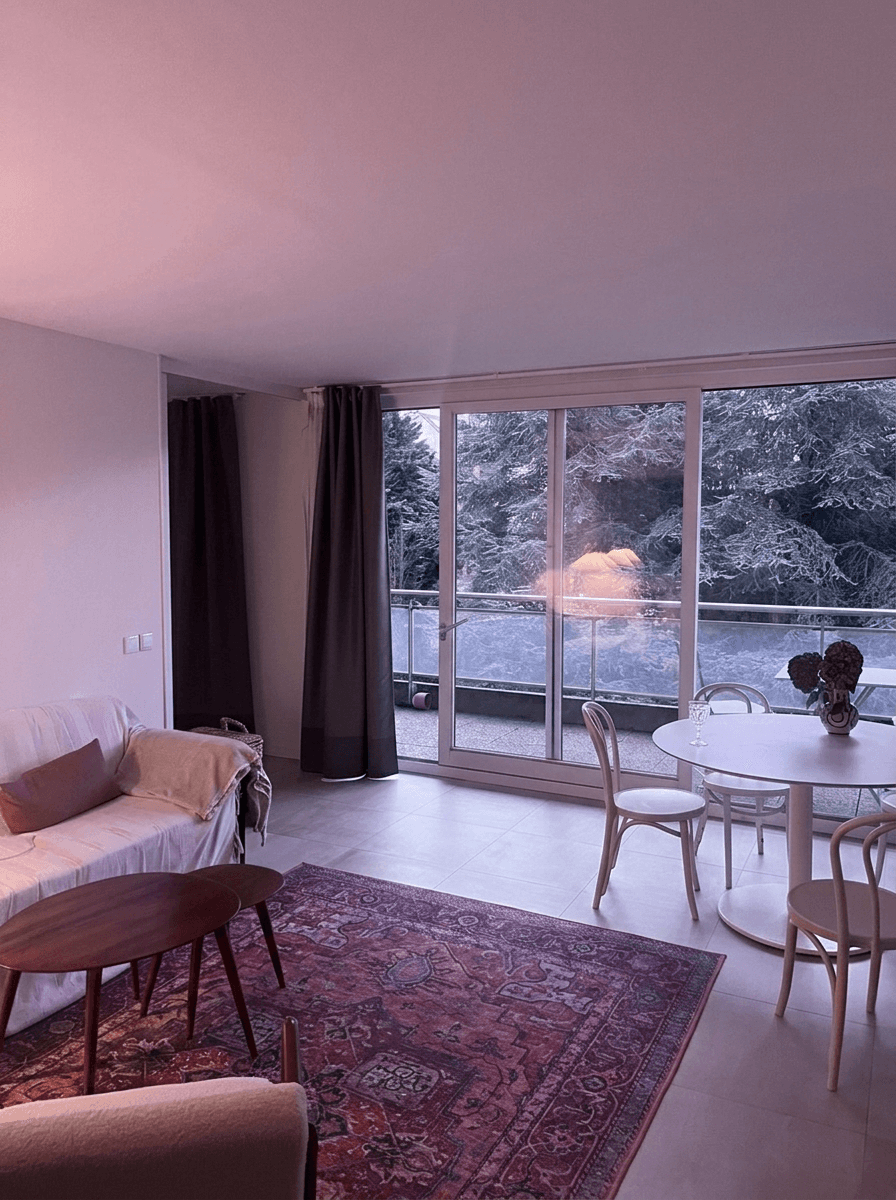
Living Room
Usually the second most important photo.
- Shoot from the main entrance to the room
- Include the primary seating area and any focal points (fireplace, built-ins, view windows)
- Show the connection to adjacent rooms if possible (creates a sense of flow)
- Use 0.5x to capture the full space
Kitchen
Often the most important room for buyers.
- Shoot from the doorway or opening showing the most counter space and cabinetry
- Include the island or breakfast bar if present
- Clear all countertop clutter before shooting
- Take a secondary shot from the opposite angle if the kitchen warrants it
- Use 1x for a detail shot of upgraded appliances or a beautiful backsplash
Bedrooms
- Shoot from the doorway looking in
- Include the window to show natural light
- Make the bed (this should not need saying, but it does)
- Remove excessive personal items from nightstands and dressers
Bathrooms
- Shoot from the doorway at an angle
- Angle to avoid toilet if possible (or minimize its prominence)
- Watch for mirror reflections of yourself
- Close the toilet lid
- Remove all personal items (toothbrushes, towels hung on hooks, bath products)
- Turn on vanity lights
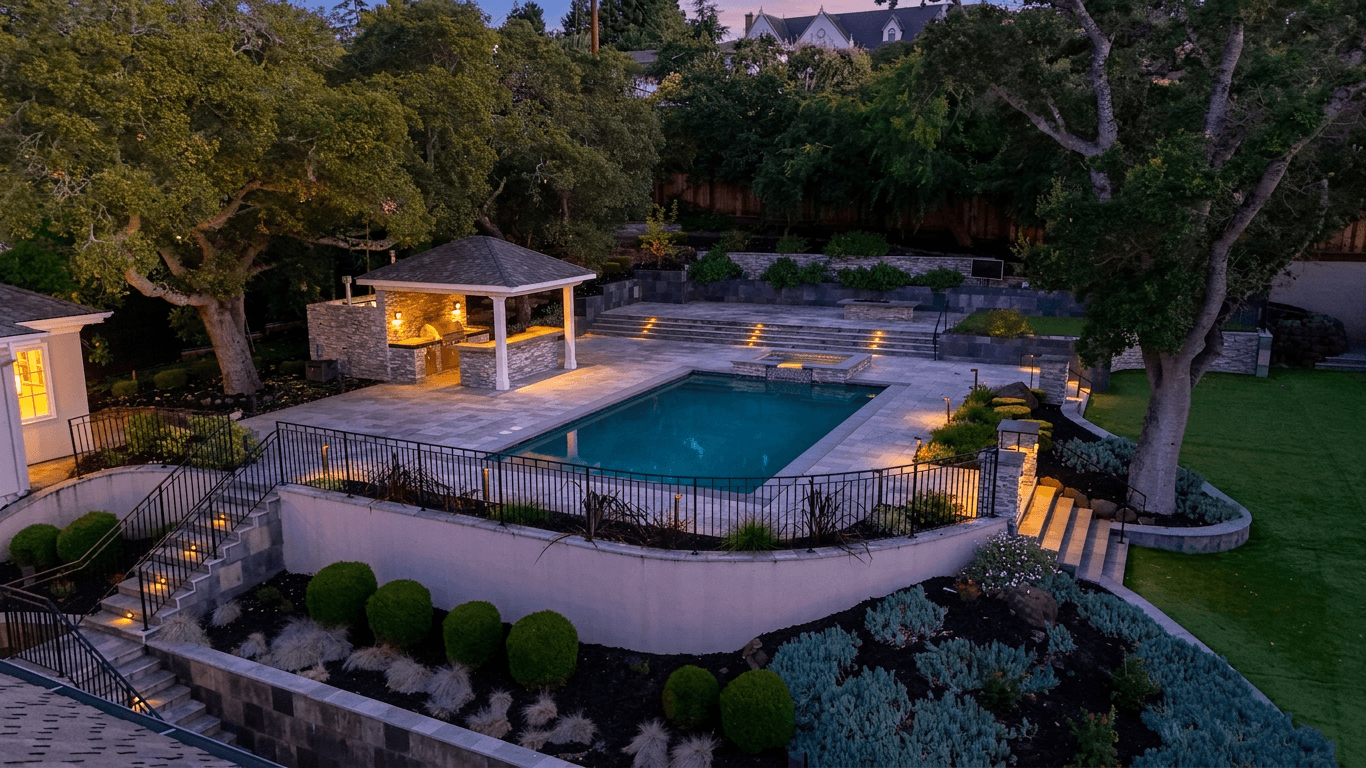
Backyard
- Shoot from the back door or patio looking outward
- Include the patio or deck surface in the foreground for grounding
- Capture the full yard depth
- If there is a pool, shoot from an angle that shows its full shape
- Sky replacement can dramatically improve backyard shots taken on overcast days
Post-Processing iPhone Photos
This is where iPhone photos go from "pretty good" to "professional quality." Raw iPhone photos, even with great composition and lighting, typically need several adjustments to match the polish of professional real estate photography.
What Needs Fixing
Common issues with iPhone real estate photos:
- Underexposure. Rooms often appear darker in photos than they look in person because the camera tries to preserve highlight detail in windows.
- Color casts. Mixed lighting (warm bulbs + cool daylight) creates uneven color across the room.
- Ultra-wide distortion. The 0.5x lens bows walls and stretches objects at the edges.
- Window blow-out. Even with Smart HDR, bright windows can appear as featureless white rectangles.
- Soft detail. Computational photography processing can soften fine details compared to a DSLR.
Manual Editing Options
If you want to edit on your phone:
- Snapseed (free) -- Google's photo editor with perspective correction and selective editing
- Lightroom Mobile (free with limits, $10/month for full) -- professional-grade editing with presets
- VSCO (free with limits) -- good presets and basic editing tools
These apps can handle brightness, color correction, and perspective fixes, but require time and skill to produce consistently good results across a full listing.
AI Post-Processing: The Game Changer
This is where the gap between iPhone and professional photography narrows dramatically. AI photo editing tools can automatically handle every common issue with iPhone real estate photos:
- Exposure correction. AI analyzes the scene and brightens dark areas while preserving window detail, producing HDR-like results from a single exposure.
- Color correction. AI identifies and neutralizes color casts, producing accurate white balance even in mixed lighting.
- Lens correction. AI straightens distorted walls and corrects the barrel distortion from ultra-wide shooting.
- Sky replacement. Overcast or blown-out skies are replaced with realistic blue skies.
- Overall enhancement. Contrast, sharpness, and clarity adjustments tuned specifically for real estate photography.
The key advantage of AI over manual editing is consistency and speed. You can process every photo in a listing through the same AI pipeline in minutes, and every image comes back with the same professional polish. There is no variation in quality from photo to photo, no room that looks dramatically different from the others because you spent less time editing it.
Twilight is built specifically for this workflow. Upload your iPhone photos, select a preset that matches the look you want, and the AI handles every technical correction automatically. The result is a set of listing photos that look consistent, professional, and polished -- from an iPhone.
Before-and-After: What AI Does for iPhone Photos
The improvement is particularly dramatic for iPhone photos because they tend to have more technical issues than DSLR shots. An iPhone photo that looks "okay" straight from the camera can look genuinely professional after AI processing. Check out our before and after gallery to see the kinds of transformations that are possible.
Equipment Worth Buying
You do not need much equipment beyond your iPhone, but a few inexpensive accessories make a noticeable difference.
Essential (Under $50 Total)
- Smartphone tripod with ball head ($15-30). Eliminates camera shake, ensures consistent height, and frees your hands to open doors, turn on lights, or move objects. Look for one that extends to at least 50 inches.
- Bluetooth remote shutter ($8-15). Lets you trigger the camera without touching the phone, eliminating the slight shake from tapping the screen.
- Microfiber lens cloth ($5). Fingerprints on the lens are the number one cause of soft, hazy iPhone photos. Clean the lens before every room.
Nice to Have (Under $150 Total)
- Portable LED light panel ($25-50). A small, battery-powered panel provides fill light in dark rooms. Set it on a surface pointing at the ceiling for bounced ambient fill.
- Smartphone gimbal ($50-100). If you are also shooting video walkthroughs, a gimbal provides smooth, stable movement.
- Wide-angle lens attachment ($20-40). If you have an older iPhone without an ultra-wide lens, a clip-on wide-angle adapter helps. Quality varies, though, and they are not necessary if your phone has the 0.5x option.
Not Worth It
- Clip-on flash units. They produce the same harsh light as the built-in flash. Use an LED panel for soft fill light instead.
- Expensive lens attachments. Clip-on lenses over $50 rarely provide enough improvement to justify the cost. Your phone's native lenses are well-optimized.
- Camera app subscriptions. For real estate specifically, the native Camera app with Smart HDR outperforms most paid camera apps.
Common iPhone Photography Mistakes
Avoid these errors that immediately mark photos as amateur:
Shooting in Portrait Orientation
Always shoot landscape (horizontal). MLS systems, real estate portals, and listing websites are all designed for landscape photos. Portrait photos get displayed with black bars on the sides, look out of place, and waste display space.
Tilting the Camera Up or Down
Hold the camera level. Tilting up to capture a high ceiling makes walls converge and creates an unnatural perspective. Tilting down to show flooring emphasizes the floor at the expense of the room. Keep it level and correct in post if needed.
Forgetting the Wide Shots
Every room needs at least one wide establishing shot. Detail shots of the backsplash or the shower fixture are nice supplements, but they do not replace the wide shot that shows the full room.
Including Too Much Ceiling
A common mistake with the ultra-wide lens: the camera captures an excessive amount of ceiling, making the photo feel like it is looking up. This wastes frame space and makes rooms look odd. Tilt very slightly down if needed, or crop the ceiling in post.
Shooting Cluttered Spaces
Spend five minutes decluttering before shooting each room. Put away dishes, clear counters, remove the laundry basket, close closet doors, and tuck away cords and cables. This five minutes of prep saves significant editing time later.
Inconsistent White Balance
If you are manually editing, apply the same white balance correction to all photos. Nothing looks more amateur than a listing where the kitchen appears warm orange and the bathroom appears cool blue. AI tools handle this automatically, which is one of their biggest advantages for multi-room consistency.
A Complete Shooting Workflow
Here is a practical, start-to-finish workflow for shooting a listing with your iPhone.
Before You Arrive (5 minutes)
- Check the sun position for the property's orientation (use a sun position app)
- Charge your phone fully
- Clear phone storage -- you will need space for 50-100 photos
- Pack your tripod, remote shutter, lens cloth, and LED panel
On Arrival (15 minutes prep)
- Walk the entire property without shooting
- Turn on every light
- Open all blinds and curtains
- Do a quick declutter pass -- clear counters, make beds, close toilet lids
- Note the best angles for each room
Shooting (30-45 minutes for a typical 3-bed home)
- Start with exteriors while the interior lights warm up
- Shoot front exterior from multiple angles -- straight on, 45-degree, and from each side
- Move inside: entry, living room, kitchen, dining room
- Primary bedroom and bathroom
- Secondary bedrooms and bathrooms
- Bonus rooms, office, laundry
- Garage (at least one shot)
- Backyard and patio from multiple angles
- Return to any room where the lighting has changed (sun movement)
After the Shoot (10-15 minutes)
- Review all photos on your phone
- Delete obvious duplicates and bad shots (blurry, bad angle)
- Select the best 20-30 photos
- Upload to your AI editing tool for processing
- Review the processed results, request any re-edits
Total time investment: roughly 60-75 minutes from arrival to having edited photos ready for upload. Compare that to the two to three day turnaround of hiring a photographer and waiting for edited deliverables.
The Quality Gap Is Narrowing
Five years ago, the difference between iPhone listing photos and professional photography was obvious and significant. Today, with modern iPhone cameras and AI post-processing, the gap has narrowed dramatically. For properties below a certain price point, the difference is no longer worth the additional cost and scheduling complexity of hiring a professional.
The combination of iPhone hardware improvements and AI post-processing has created a sweet spot where agents can produce listing photos that meet and often exceed MLS requirements, look professional on listing portals, and cost next to nothing beyond the time investment.
That said, know your limits. If a property deserves professional photography -- luxury homes, architecturally significant properties, or listings where you are competing with professionally photographed comparables -- hire the professional. Your iPhone is a tool, not a universal replacement. If you are an agent looking for a zero-jargon walkthrough of AI editing, our agent's guide to AI photo editing covers the essentials in plain language.
Related Articles
Color Correction for Real Estate Photos: Fix Mixed Lighting, Yellow Casts, and More
Learn how to fix color casts, white balance issues, and mixed lighting in real estate photos. Covers Kelvin temperature basics, common lighting problems, and AI-powered color correction workflows.
Real Estate Photo Composition Rules That Make Every Room Look Better
Master the essential composition techniques for real estate photography, including the two-wall rule, one-point perspective, leading lines, and proper shooting height to make every room look spacious and inviting.
Sky Replacement for Real Estate Photos: When and How to Use It
Learn when and how to use sky replacement in real estate photos. Covers buyer psychology, manual techniques, AI-powered tools, ethical guidelines, and best practices for stunning exterior shots.